
The holiday table that has to carry a year of expectation. The turkey that everyone says they want but nobody actually finishes. The side dishes that get made out of habit rather than love. The dessert that gets bought at the last minute because nobody has the energy left. Holiday cooking is the highest-stakes cooking of the year, and most of it is built on tradition rather than taste. There is a version of the holiday meal that is both soulful and achievable, and it looks a lot like the East Tennessee table Dolly Parton grew up around.
The problem with most holiday menus is that they are designed for a magazine spread, not a real kitchen. Twelve dishes, four ovens, and a timeline that assumes you have a team of prep cooks. The recipes that claim to be make-ahead are often not. The ones that claim to be classic are often hiding boxed mixes and canned shortcuts. And the turkey, more often than not, ends up dry because it was the last thing anyone actually thought about. The advice looks good on a blog but falls apart on the day itself when the oven is full and the guests are early.
These five recipes are built as a complete holiday menu that actually works. One is a show-stopping main dish that is not a turkey. Two are the essential sides that belong on every Southern holiday table. One is the unique side that surprises people. One is the make-ahead dessert that finishes the meal with something worth remembering. They are inspired by the Appalachian and Tennessee cooking traditions that shaped Dolly Parton’s family table, and they reflect the kind of holiday cooking that is generous, unfussy, and rooted in the idea that the people at the table matter more than the perfection of the plate.
1. Chicken and Dumplings as the Holiday Centerpiece
Chicken and dumplings on a holiday table is a statement. It says this meal is about comfort rather than convention, and it says the cook knows what people actually want to eat. This version is rich, creamy, and deeply savory, with tender shredded chicken and dumplings that are soft on the inside and just barely crisp at the edges. It is a labor of love, but the labor is mostly waiting, and the payoff is the kind of main dish that people remember longer than any turkey.
Here is the part I would not skip. The broth has to be at a gentle simmer, not a rolling boil, when the dumplings go in. A hard boil knocks the dumplings around, breaks them apart, and turns the broth cloudy and thin. Keep the heat low and let them cook slowly. They will puff up and float, and that is when you know they are done.
One thing most recipe cards leave out is that the dumpling dough should be handled as little as possible. Overworked dough turns tough and gummy, and no amount of broth can fix that. Stir it together until it just comes together, then stop. The dough will look shaggy and slightly uneven. That is exactly right.
Prep: 20 minutes Cook: 55 minutes Total: 75 minutes Serves: 8 Difficulty: Medium
Ingredients
- 3 pounds bone-in, skin-on chicken thighs
- 2 tablespoons butter
- 1 large onion, diced
- 4 celery stalks, diced
- 4 carrots, peeled and sliced
- 4 cloves garlic, minced
- 8 cups chicken broth
- 1 ½ cups whole milk
- 3 tablespoons all-purpose flour
- 1 ½ teaspoons salt
- 1 teaspoon black pepper
- 1 ½ teaspoons dried thyme
- For the dumplings: 2 ½ cups all-purpose flour, 1 tablespoon baking powder, 1 ½ teaspoons salt, 1 ¼ cups whole milk, 4 tablespoons melted butter
Instructions
Melt the butter in a large Dutch oven over medium-high heat. Season the chicken thighs with salt and pepper and place them skin-side down in the pot. Cook for 5 to 6 minutes per side until the skin is deeply golden and the chicken is browned. Remove the chicken to a plate. It will not be cooked through yet, and that is fine. It finishes in the broth.
Add the onion, celery, and carrots to the pot and cook for 6 to 7 minutes until they start to soften and the onion turns translucent. Add the garlic and cook for 30 seconds until fragrant. Sprinkle the flour over the vegetables and stir for 1 minute to coat everything and cook out the raw flour taste. Slowly pour in the chicken broth, stirring constantly to prevent lumps. Add the milk, salt, pepper, and thyme. Return the chicken to the pot, cover, and simmer gently for 25 minutes.
While the chicken simmers, make the dumpling dough. Whisk the flour, baking powder, and salt together in a medium bowl. Add the milk and melted butter and stir just until the dough comes together. It should be soft and slightly sticky, not smooth and elastic. Do not overmix.
Remove the chicken from the pot and shred it, discarding the bones and skin. Return the shredded chicken to the pot. Using two spoons, drop the dumpling dough into the simmering broth in roughly 2-tablespoon portions. Do not stir. Cover the pot and simmer gently for 15 to 18 minutes without lifting the lid. The dumplings are done when they have puffed up and a toothpick inserted into the center comes out clean. Serve hot.
Tips & Things That Go Wrong
The dumplings will fall apart if the broth is boiling. Keep the heat at a gentle simmer. If the broth looks too thin after the dumplings go in, remove the lid for the last 5 minutes to let some liquid evaporate. If it looks too thick, add a splash more broth. Do not stir the dumplings once they are in the pot. Stirring breaks them apart and turns the whole dish into a cloudy mess. The chicken can dry out if it simmers too long. Pull it at 25 minutes and shred it while it is still tender.
Substitutions
Use chicken breasts instead of thighs, but reduce the simmering time to 15 minutes so they do not dry out. Use frozen mixed vegetables in place of the fresh onion, celery, and carrots if you are short on time. Frozen peas added in the last 5 minutes are a nice addition. For a richer broth, add ½ cup of heavy cream with the milk.
Storage & Reheating
This keeps in the refrigerator for 3 days. The dumplings soften and absorb more of the broth overnight, so reheat gently on the stovetop with a splash of broth or milk to loosen it up. The microwave works in a pinch but makes the dumplings dense. Freezing is not recommended, as the dumplings break down on thawing.
Approximate Nutrition Per Serving: 560 calories, 36g protein, 44g carbs, 26g fat, 4g fiber
Keep the broth at a gentle simmer, not a boil, when you add the dumplings. A hard boil breaks them apart and turns the broth cloudy and thin.
2. Holiday Mashed Potatoes
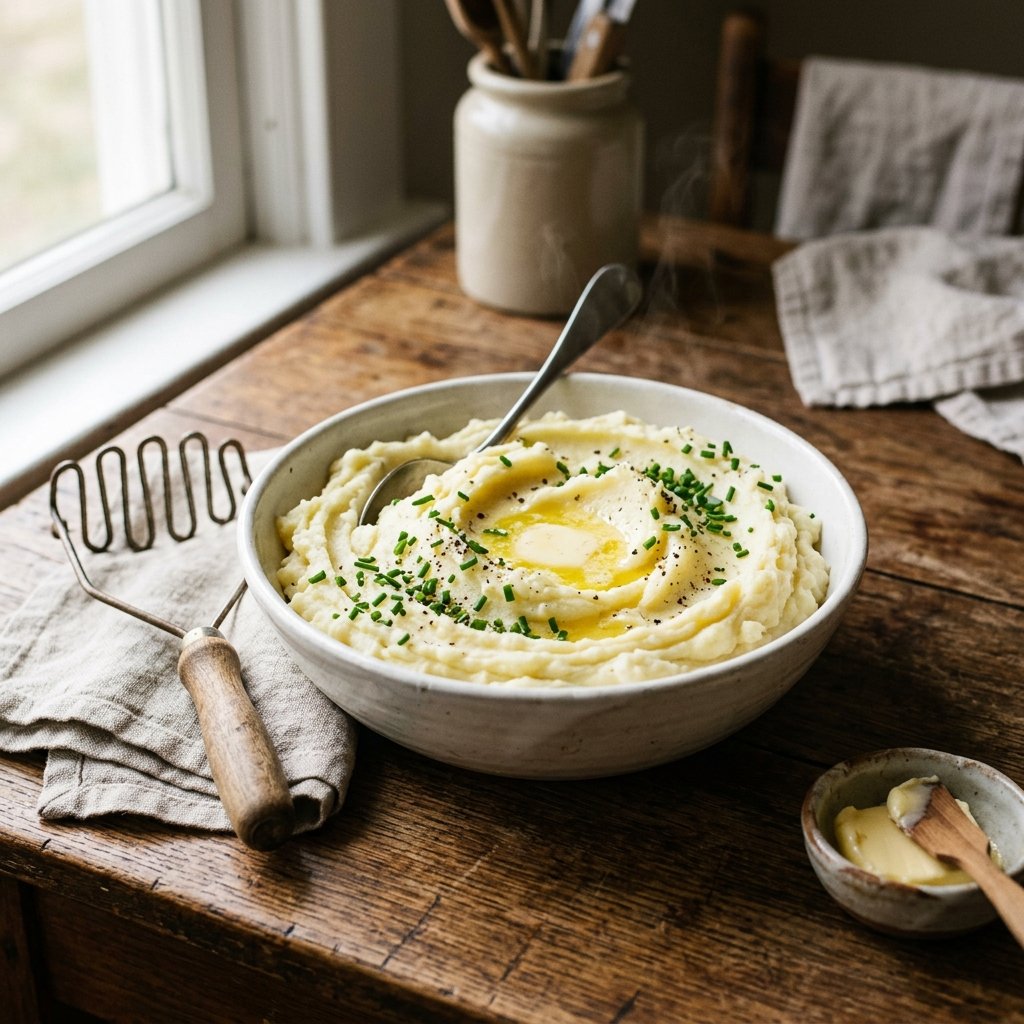
Mashed potatoes are the one side dish that everyone claims to know how to make and almost no one makes well. They come out gluey, watery, or bland. The fix is simple and it does not involve a ricer or a food mill. It is about the kind of potato, the order of the ingredients, and a light hand with the mashing.
Here is the part I would not skip. Use Yukon Gold potatoes, not Russets. Russets are for baking and frying. Yukon Golds have a buttery, creamy texture that makes mashed potatoes taste like mashed potatoes. Peel them, cut them into even chunks, and boil them in heavily salted water until a knife slides in with no resistance.
One thing most recipe cards leave out is that the butter and milk should be warm before they go into the potatoes. Cold butter and cold milk cool the potatoes down and make them seize up. Warm them in a small saucepan or in the microwave before adding them. The result is a smoother, richer mash that holds its shape on the plate.
Prep: 15 minutes Cook: 25 minutes Total: 40 minutes Serves: 10 Difficulty: Easy
Ingredients
- 4 pounds Yukon Gold potatoes, peeled and cut into 1-inch chunks
- 1 tablespoon salt, for the boiling water
- ¾ cup unsalted butter, plus more for serving
- 1 ½ cups whole milk, warmed
- ½ cup sour cream
- 1 ½ teaspoons salt
- ½ teaspoon black pepper
- Chopped chives for garnish
Instructions
Place the potato chunks in a large pot and cover with cold water by 2 inches. Add the tablespoon of salt. Bring to a boil over high heat, then reduce to a simmer and cook for 20 to 25 minutes until a knife slides into the potatoes with no resistance.
Drain the potatoes and return them to the pot. Place the pot over low heat for 1 minute to dry the potatoes slightly. This removes excess moisture and makes the mash fluffier. Add the butter and let it melt into the hot potatoes.
Mash the potatoes with a potato masher or a fork until they are mostly smooth. Add the warm milk, sour cream, salt, and pepper. Stir gently with a wooden spoon until just combined. Do not overwork the potatoes or they will become gluey. Taste and adjust the seasoning. Serve warm with extra butter and chives.
Tips & Things That Go Wrong
The potatoes can become gluey if they are overmashed or if they are processed in a blender or food processor. Use a hand masher or a ricer and stop when the potatoes are mostly smooth. The potatoes can be watery if they are not drained properly. Let them sit in the colander for a minute before returning them to the pot. Warm the milk and butter before adding them. Cold dairy makes the potatoes seize. These can be made a day ahead and reheated gently with a splash of milk.
Substitutions
Use Russet potatoes if you prefer a lighter, fluffier mash. Add ½ cup of cream cheese for an even richer version. For a dairy-free version, use plant milk, dairy-free butter, and dairy-free sour cream. Add roasted garlic or horseradish for a different flavor.
Storage & Reheating
This keeps in the refrigerator for 3 days. Reheat in a saucepan over low heat with a splash of milk, stirring gently. The microwave works in a pinch. Do not freeze; the texture changes on thawing.
Approximate Nutrition Per Serving: 300 calories, 5g protein, 34g carbs, 16g fat, 3g fiber
Warm the butter and milk before adding them to the potatoes. Cold dairy makes the potatoes seize up and turns the mash gluey.
3. Sweet Potato Casserole
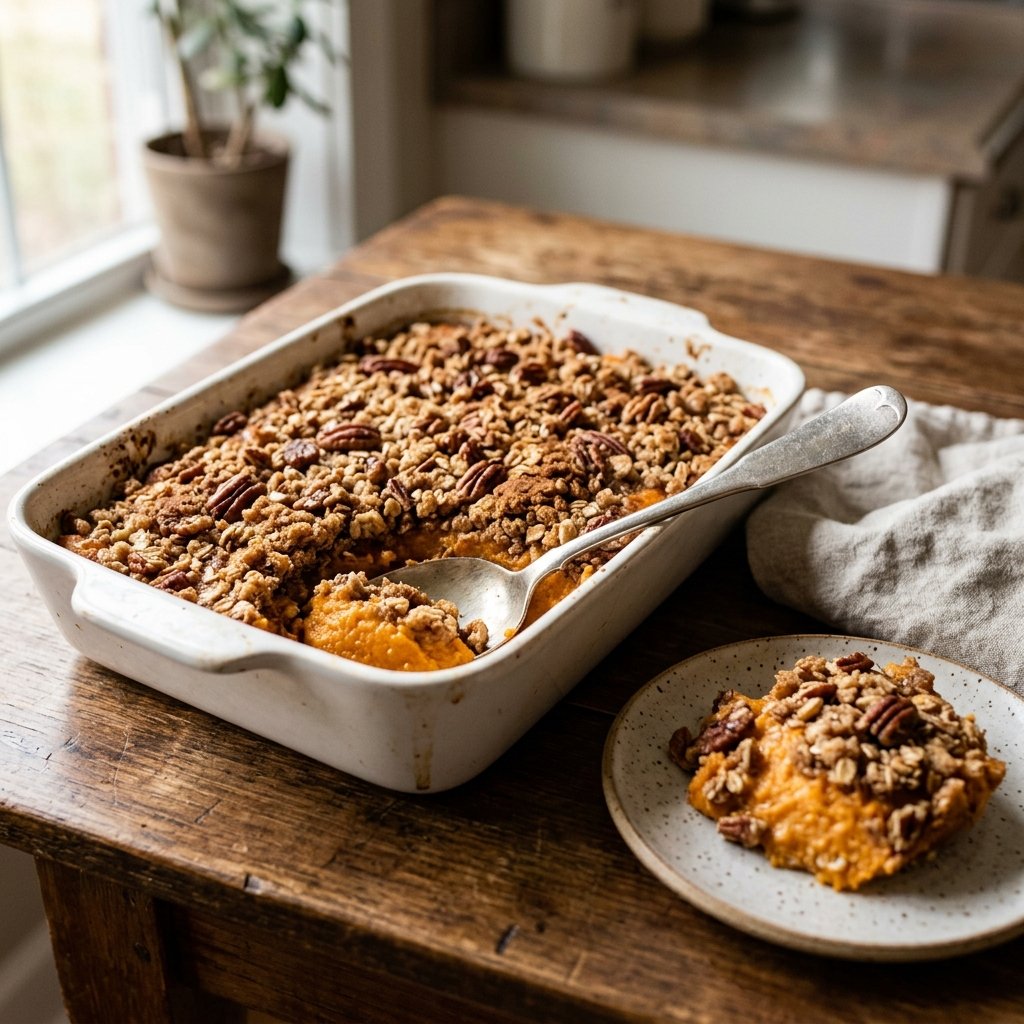
Sweet potato casserole is the dish that turns a holiday table into a celebration. The filling is smooth and creamy with a warm spice flavor, and the topping is a buttery, brown-sugar streusel with toasted pecans. It is sweet enough to feel like dessert but savory enough to sit beside the main dish without a conflict.
The trick is roasting the sweet potatoes instead of boiling them. Roasting concentrates the natural sugars and gives the filling a deeper, richer flavor. Boiling works in a pinch, but the filling will be thinner and less sweet. If you have the time, roast them. The difference is worth the extra 30 minutes.
One thing most recipe cards leave out is that the topping should be added in the last 15 minutes of baking, not at the beginning. If it goes in too early, the streusel burns before the filling is hot. Add it at the end and broil for the last 2 minutes to get the pecans toasted.
Prep: 20 minutes Cook: 40 minutes Total: 60 minutes Serves: 10 Difficulty: Easy
Ingredients
For the filling:
- 4 large sweet potatoes (about 3 pounds), roasted and peeled
- ½ cup unsalted butter, melted
- ½ cup granulated sugar
- ½ cup whole milk
- 2 large eggs
- 1 teaspoon vanilla extract
- 1 teaspoon cinnamon
- ½ teaspoon ground nutmeg
- ½ teaspoon salt
For the topping:
- 1 cup packed brown sugar
- ½ cup all-purpose flour
- ½ cup unsalted butter, cold and cubed
- 1 cup chopped pecans
- ½ teaspoon cinnamon
Instructions
Preheat the oven to 375°F. Roast the sweet potatoes for 45 to 50 minutes until they are soft and caramelized at the edges. Let them cool slightly, then peel and mash them in a large bowl.
Add the melted butter, sugar, milk, eggs, vanilla, cinnamon, nutmeg, and salt to the mashed sweet potatoes. Mix until smooth and well combined. Pour the filling into a greased 9×13-inch baking dish. Bake for 25 minutes.
While the filling bakes, make the topping. In a medium bowl, combine the brown sugar, flour, and cinnamon. Cut in the cold butter with a pastry blender or your fingers until the mixture resembles coarse crumbs. Stir in the chopped pecans.
Remove the casserole from the oven and sprinkle the topping evenly over the top. Return to the oven and bake for 15 more minutes until the topping is golden brown. Broil for the last 1 to 2 minutes to toast the pecans, watching closely. Let rest for 10 minutes before serving.
Tips & Things That Go Wrong
The filling can be too thin if the sweet potatoes are boiled instead of roasted. Roasting removes excess water and concentrates the flavor. The topping can burn if it is added too early. Add it in the last 15 minutes of baking. The topping can be too dry if the butter is not cold enough. Use cold butter and work quickly. The casserole can be made ahead and refrigerated before baking; add 10 minutes to the baking time if it goes in cold.
Substitutions
Use canned sweet potato puree in place of roasted sweet potatoes. Use walnuts or pecans, or a mix. For a dairy-free version, use plant milk and dairy-free butter. For a gluten-free version, use a gluten-free flour blend in the topping.
Storage & Reheating
This keeps in the refrigerator for 5 days. Reheat individual portions in the microwave or the whole dish in the oven at 350°F for 20 minutes. The topping softens after refrigeration but the flavor is still good. The casserole freezes well for up to 2 months; thaw overnight in the refrigerator and reheat in the oven.
Approximate Nutrition Per Serving: 420 calories, 5g protein, 54g carbs, 22g fat, 4g fiber
Add the streusel topping in the last 15 minutes of baking, not at the beginning. If it goes in too early, it burns before the filling is hot.
4. Southern Corn Pudding
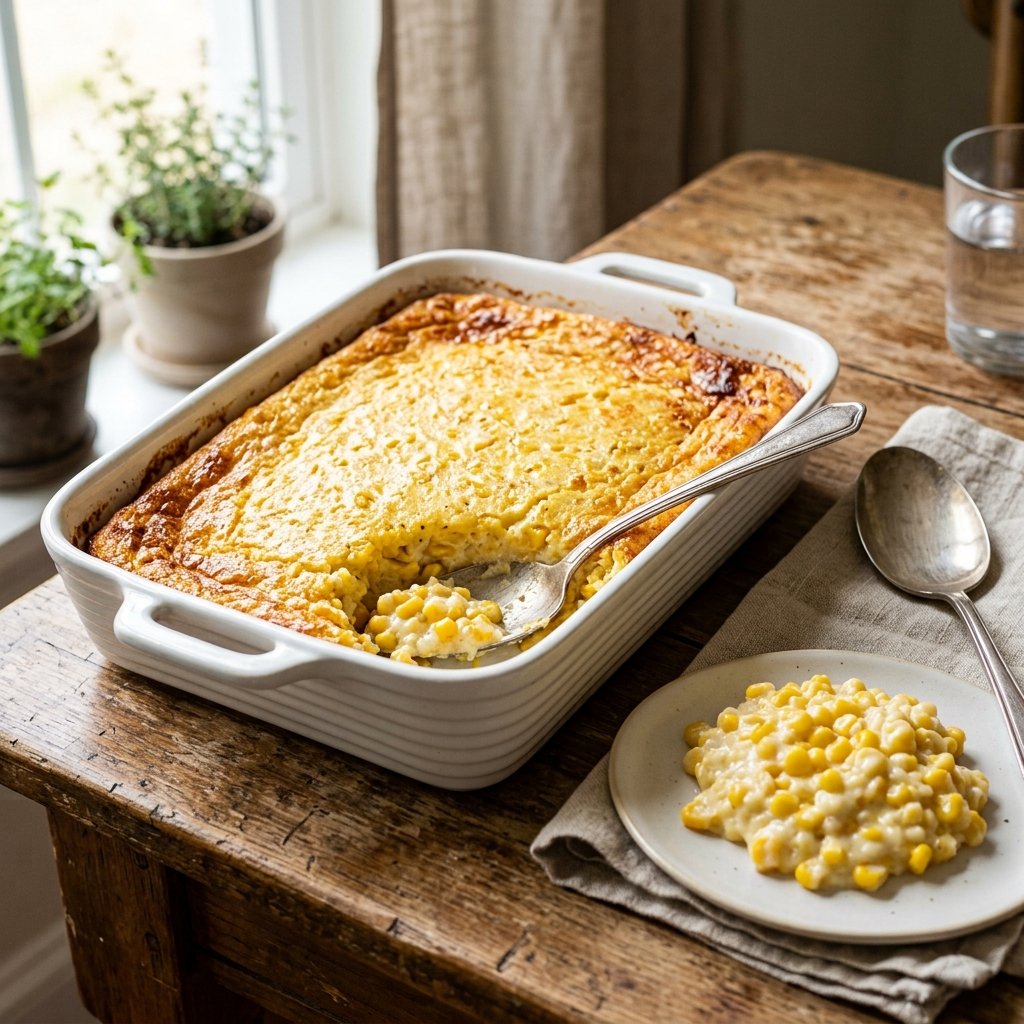
Corn pudding is the side dish that shows up at every Southern holiday table and disappears before the main dish gets carved. It is soft, custardy, and slightly sweet from the corn, with a golden crust on top that gives it just enough texture. It is the kind of dish that people who have never had it cannot quite identify, but they always ask for the recipe.
The version that actually works in a real kitchen is the one that uses frozen corn and a simple cornbread base. Fresh corn is wonderful in the summer, but frozen corn is sweeter and more consistent, and it holds up better in the custard. The cornbread base gives the pudding structure without turning it into a casserole.
This is where the texture changes. The pudding should be soft and slightly jiggly in the center, not firm and sliceable. If it is fully set when you pull it out of the oven, it is overcooked. The residual heat will finish the cooking as it rests on the counter.
Prep: 10 minutes Cook: 45 minutes Total: 55 minutes Serves: 10 Difficulty: Easy
Ingredients
- 1 bag frozen corn kernels (16 ounces), thawed
- 1 cup cornbread mix
- ½ cup unsalted butter, melted
- 1 cup whole milk
- 4 large eggs
- ½ cup granulated sugar
- 1 teaspoon salt
- ½ teaspoon freshly grated nutmeg
Instructions
Preheat the oven to 350°F and grease a 9×9-inch baking dish. In a large bowl, whisk together the cornbread mix, melted butter, milk, eggs, sugar, salt, and nutmeg until smooth. Fold in the thawed corn kernels.
Pour the mixture into the prepared baking dish and smooth the top with a spatula. Bake for 40 to 45 minutes until the top is golden brown and the center is set but still slightly jiggly. The pudding should puff slightly and have a soft, custardy texture.
Let the pudding rest for 10 minutes before serving. It will deflate slightly as it cools, which is normal.
Tips & Things That Go Wrong
The pudding can be too soft if the corn is not drained properly. If using frozen corn, thaw it completely and drain any excess liquid. The pudding can be dry if it is overbaked. Pull it out when the center is still slightly jiggly. The top can brown too fast if the oven is too hot. Tent it loosely with foil if the top is getting dark. The sugar can be reduced to ⅓ cup if you prefer a less sweet pudding.
Substitutions
Use fresh corn cut off the cob in the summer. Use a homemade cornbread mix if you prefer. For a dairy-free version, use plant milk and dairy-free butter. For a gluten-free version, use a gluten-free cornbread mix.
Storage & Reheating
This keeps in the refrigerator for 4 days. Reheat individual portions in the microwave for 30 seconds or in the oven at 350°F for 10 minutes. The pudding is best fresh but holds up well. Do not freeze; the custard becomes watery on thawing.
Approximate Nutrition Per Serving: 320 calories, 7g protein, 38g carbs, 16g fat, 2g fiber
Pull the pudding out when the center is still slightly jiggly. It finishes setting as it rests. If you wait until it looks fully done, it will be dry and rubbery.
5. Mama’s Banana Pudding
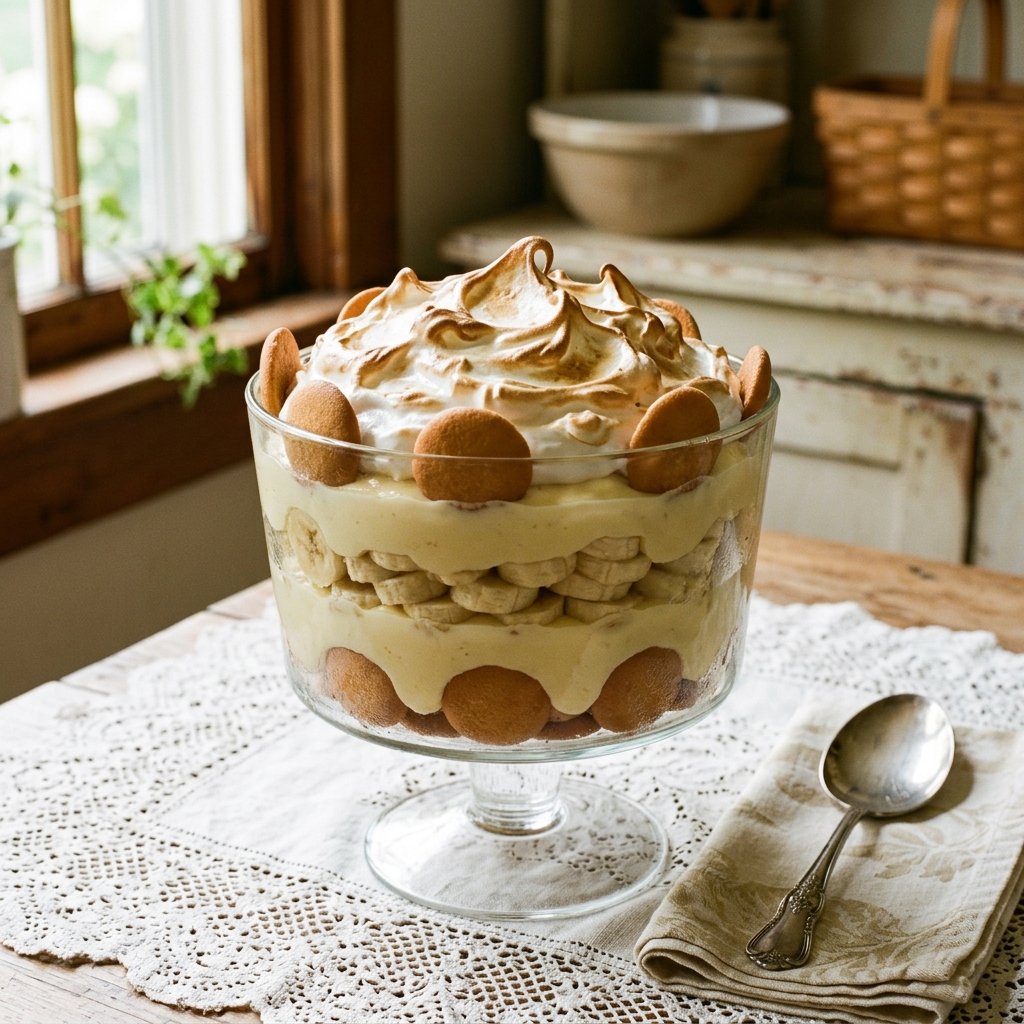
This is the banana pudding that shows up at every Southern holiday table, church supper, and family reunion. The boxed pudding mix version is fine in a pinch, but it is not the same thing. The real version starts with a homemade custard cooked on the stovetop, layered with vanilla wafers and fresh bananas, and topped with a meringue that gets browned under the broiler. It is a labor of love, but it is the kind of dessert that people remember for years.
The trick is patience with the custard. If you turn the heat up too high or walk away, the eggs will scramble and you will be starting over. Cook it low and slow, stirring constantly with a whisk, and wait for it to thicken enough to coat the back of a spoon. That moment is the whole recipe.
One thing most recipe cards leave out is that the bananas should be sliced just before layering. Sliced bananas sitting out for even twenty minutes begin to brown and turn mushy, and they give the pudding a slightly fermented flavor. Slice them fresh, layer them, and get the pudding into the refrigerator quickly.
Prep: 20 minutes Cook: 20 minutes Total: 40 minutes plus chilling Serves: 12 Difficulty: Medium
Ingredients
- 2 ½ cups whole milk
- ⅔ cup granulated sugar
- ⅓ cup cornstarch
- ¼ teaspoon salt
- 5 large egg yolks
- 3 tablespoons unsalted butter
- 2 teaspoons vanilla extract
- 1 box vanilla wafer cookies (about 12 ounces)
- 6 to 7 ripe bananas, sliced
- For the meringue: 5 large egg whites, ⅔ cup granulated sugar, ¼ teaspoon cream of tartar
Instructions
In a medium saucepan, whisk together the milk, sugar, cornstarch, and salt. Cook over medium heat, whisking constantly, until the mixture thickens enough to coat the back of a spoon, about 8 to 10 minutes. It should be thick and glossy but still pourable.
In a small bowl, whisk the egg yolks. Slowly pour about ½ cup of the hot milk mixture into the yolks, whisking constantly, to temper them. Pour the tempered yolks back into the saucepan and cook for 2 more minutes, whisking constantly, until the custard is thick and smooth. Remove from heat and stir in the butter and vanilla. Let the custard cool for 10 minutes, stirring occasionally to prevent a skin from forming.
In a 9×13-inch baking dish or a large trifle dish, layer half of the vanilla wafers, then half of the sliced bananas, then half of the custard. Repeat with the remaining wafers, bananas, and custard.
To make the meringue, beat the egg whites and cream of tartar in a clean bowl until soft peaks form. Gradually add the sugar and beat until stiff, glossy peaks form. Spread the meringue over the top of the pudding, sealing the edges all the way to the dish. Broil for 1 to 2 minutes until the peaks are golden brown, watching closely. Refrigerate for at least 4 hours before serving.
Tips & Things That Go Wrong
The custard can scramble if the heat is too high. Keep it on medium and whisk constantly. The meringue can weep if the pudding is not fully cooled before topping. Let the pudding cool completely before adding the meringue. The bananas can brown if the pudding sits too long. It is best eaten within 2 days. The meringue can burn under the broiler in seconds. Stay by the oven the whole time.
Substitutions
Use homemade whipped cream instead of meringue if you prefer. Add 2 cups of sweetened whipped cream on top of the chilled pudding instead. Use gluten-free vanilla wafers for a gluten-free version. Use 1 teaspoon of banana extract along with the vanilla for a stronger banana flavor.
Storage & Reheating
Store covered in the refrigerator for up to 3 days. The wafers soften over time, which is traditional and expected. Serve cold. Do not freeze.
Approximate Nutrition Per Serving: 420 calories, 7g protein, 64g carbs, 16g fat, 2g fiber
Cook the custard low and slow and never walk away. The moment it thickens enough to coat the back of a spoon is the whole recipe.
Frequently Asked Questions About a Southern Holiday Menu
Can I make this entire menu ahead of time?
Most of it, yes. The mashed potatoes can be made a day ahead and reheated with a splash of milk. The sweet potato casserole and the corn pudding can be assembled a day in advance and baked before serving. The banana pudding needs at least 4 hours to chill and is best made the day before. The chicken and dumplings are best made the same day, but they hold for a few days in the refrigerator and reheat gently on the stovetop.
Are these recipes connected to Dolly Parton personally?
They are inspired by the Appalachian and Tennessee cooking traditions Dolly Parton grew up in and has talked about throughout her career. They are not verified family recipes, and I am not claiming they came straight from her kitchen. They are the kind of old-fashioned, generous holiday food that defines that tradition, and they reflect the kind of table she has described as central to her family life.
What if I want to serve a turkey instead of chicken and dumplings?
The sides in this menu work beautifully with a roast turkey. The mashed potatoes, sweet potato casserole, and corn pudding are all classic turkey accompaniments. If you go that route, save the chicken and dumplings for a smaller gathering or a Sunday dinner later in the season. It makes an excellent New Year’s Day meal.
How do I keep everything warm at the same time?
Use your oven as a warming drawer at 200°F. Once a dish is cooked, cover it tightly with foil and slide it into the oven. The chicken and dumplings can stay on the stovetop on the lowest heat with the lid on, but stir it occasionally so the dumplings do not stick. The banana pudding stays in the refrigerator until dessert. Plan your cooking so the dishes that need the oven most come out last.
What is the one dish I should not skip?
The banana pudding. It is the dish that finishes the meal and the one people will talk about the next day. It is also the only recipe on this list that can be made entirely the day before, which makes it the easiest to get right on a busy holiday. Make it first, put it in the refrigerator, and forget about it until dessert.
Putting a Southern Holiday Menu on Your Table
The practical decision you have to make is not which recipe to try first. It is what kind of holiday you want to have. If you want a traditional turkey dinner, keep the sides and the banana pudding and add a roasted bird. If you want something soulful and different, build the whole meal around the chicken and dumplings. Either way, the sides are the backbone of the menu, and the dessert is the thing people remember.
If I had to point you to one recipe to start with, it would be the banana pudding. It is the most forgiving of the five, it can be made the day before, and it is the one dish that will have people asking for the recipe before they finish their first spoonful. From there, add the mashed potatoes and the sweet potato casserole, and you have a holiday table that feels both generous and manageable.
Holiday cooking does not have to be a performance. It can be a long, slow afternoon in the kitchen with the people you love nearby and the smell of something good in the oven. These recipes are built for that kind of holiday. They are not fancy, and they are not complicated. They are the kind of food that shows up at the table year after year because it works.