
The dinner show that people drive across the country to see. The soup that everyone talks about on the way home. The biscuits that get compared to the ones at the seafood chain, and honestly, the comparison undersells them. There is a specific kind of magic to the Dixie Stampede experience, and most of it lives on the plate rather than the stage. The food is simple, generous, and served with the kind of confidence that comes from knowing it works.
The problem with copycat recipes is that most of them are guesses dressed up as secrets. Someone ate the dish once, wrote down what they thought was in it, and published a version that tastes nothing like the original. The soup comes out thin. The chicken comes out greasy. The biscuits come out dense and flat. What makes a copycat recipe actually work is understanding the technique behind the flavor, not just listing plausible ingredients.
These six recipes are built as a complete dinner-and-a-show menu you can make at home. One is the creamy vegetable soup that starts the meal. One is the buttery biscuit that comes with it. One is the fried chicken that anchors the plate. One is the skillet cornbread that sits alongside. One is the sweet fried apples that cut through the richness. One is the banana pudding that finishes everything. They are not official recipes, and I am not claiming they came out of the Dollywood kitchen. They are my best home-kitchen recreations of the flavors people remember, and they work.
1. Copycat Creamy Vegetable Soup
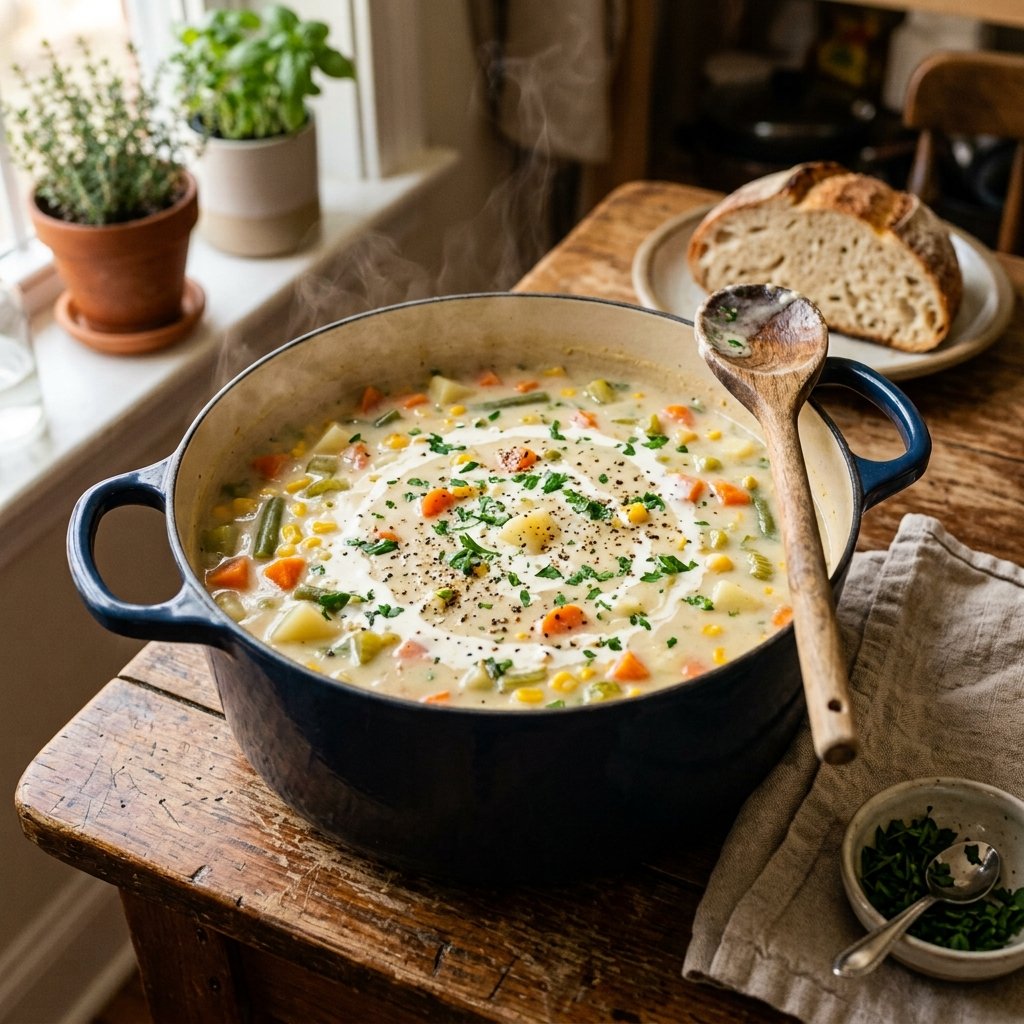
This is the soup that starts the whole experience, and it is the one people try to recreate first. It is creamy without being heavy, thick without being gluey, and it tastes like it simmered for hours. It did not. The secret is a combination of a roux for body, a little cream cheese for silkiness, and frozen vegetables that hold their shape better than fresh ones do in a long simmer.
Here is the part I would not skip. The roux has to cook for a full two minutes before the liquid goes in. If you dump the broth in too early, the soup tastes like raw flour and the texture stays grainy no matter how long it simmers. Cook the butter and flour together until it smells nutty and turns pale gold. That is the moment.
One thing most copycat recipes leave out is that the vegetables should be added in stages. The potatoes and carrots need the most time. The corn and green beans need very little. If you throw everything in at once, the green beans turn to mush before the potatoes are tender. Add them in order and the texture holds.
Prep: 15 minutes Cook: 30 minutes Total: 45 minutes Serves: 8 Difficulty: Easy
Ingredients
- 6 tablespoons unsalted butter
- ½ cup all-purpose flour
- 1 large onion, finely diced
- 3 cloves garlic, minced
- 8 cups chicken or vegetable broth
- 2 large potatoes, peeled and diced small
- 3 carrots, peeled and diced small
- 2 cups frozen corn
- 2 cups frozen cut green beans
- 1 cup heavy cream
- 4 ounces cream cheese, cubed and softened
- 1 ½ teaspoons salt
- 1 teaspoon black pepper
- ½ teaspoon dried thyme
- Pinch of nutmeg
Instructions
Melt the butter in a large Dutch oven over medium heat. Add the onion and cook for 5 to 6 minutes until soft and translucent. Add the garlic and cook for 30 seconds until fragrant. Sprinkle the flour over the butter and onions and whisk constantly for a full 2 minutes. The mixture should smell nutty and turn a pale gold color. Do not rush this step.
Slowly pour in the broth in a steady stream, whisking constantly to prevent lumps. Bring to a simmer. Add the potatoes and carrots and cook for 10 minutes until they start to soften. Add the corn and green beans and cook for 8 more minutes until all the vegetables are tender.
Reduce the heat to low. Add the cream cheese in cubes and whisk until it melts completely into the soup. Stir in the heavy cream, salt, pepper, thyme, and nutmeg. Taste and adjust the seasoning. Simmer gently for 3 to 4 minutes, but do not let it boil hard once the cream is in. Serve hot with biscuits on the side.
Tips & Things That Go Wrong
The soup can turn grainy if the roux is undercooked or the broth is added too fast. Cook the flour for the full 2 minutes and add the liquid slowly. The soup can be too thick if it simmers too long after the cream goes in. If it thickens more than you like, whisk in a splash of broth. The cream cheese can leave small lumps if it is cold. Let it sit at room temperature for 20 minutes before adding. Do not let the soup boil hard after the cream is in, or it can separate.
Substitutions
Use a bag of frozen mixed vegetables instead of the separate corn and green beans for a faster version. Use half-and-half instead of heavy cream for a lighter soup, but it will be thinner. For a dairy-free version, use coconut cream and a dairy-free cream cheese substitute. For a slow cooker version, cook the roux and onions on the stovetop first, then transfer everything to the slow cooker and cook on low for 4 hours, adding the cream and cream cheese in the last 30 minutes.
Storage & Reheating
This keeps in the refrigerator for 4 days and freezes well for up to 3 months. The soup thickens significantly after refrigeration. Reheat on the stovetop over low heat with a splash of broth or milk, stirring occasionally. Do not microwave on high, as the cream can separate.
Approximate Nutrition Per Serving: 340 calories, 7g protein, 28g carbs, 22g fat, 4g fiber
Cook the flour and butter together for a full 2 minutes before adding any liquid. Undercooked roux is the number one reason a creamy soup tastes like raw flour.
2. Copycat Butter Biscuits
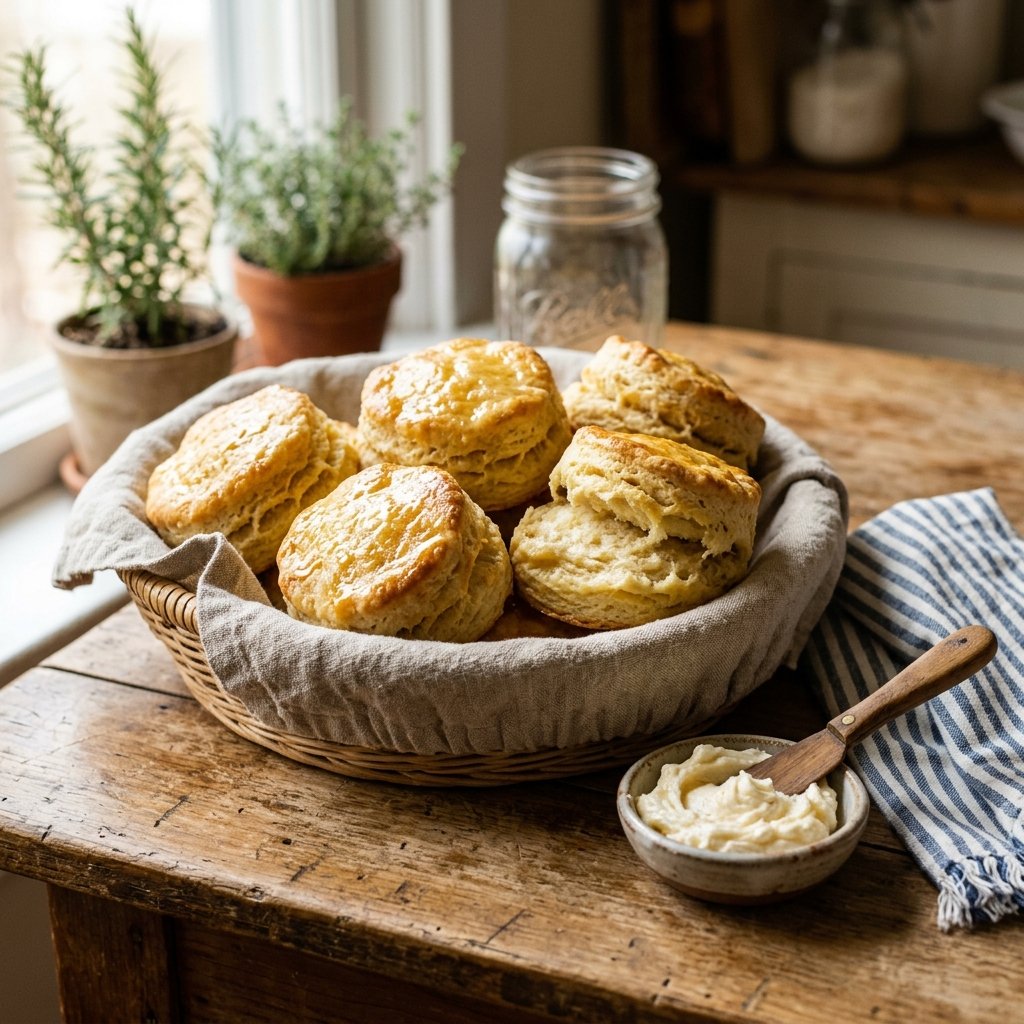
These are the biscuits that come out in a bucket and disappear before the soup is finished. They are tall, tender, and unbelievably buttery, with layers that peel apart when you pull them open. The trick is not the recipe so much as the technique. Cold fat, a light hand, and a hot oven do most of the work.
Here is the part I would not skip. The butter has to be frozen, not just cold. Grate it on a box grater straight from the freezer and toss it into the flour. Those little shreds of frozen butter create steam pockets in the oven, and steam pockets are what make layers. If you use room temperature butter, you get dense hockey pucks.
One thing most copycat recipes leave out is that the dough should not be kneaded. You fold it. Pat it out, fold it in thirds like a letter, pat it down, and repeat three times. That builds layers without developing gluten. Kneading makes biscuits tough. Folding makes them flaky.
Prep: 20 minutes Cook: 15 minutes Total: 35 minutes Serves: 8 (makes about 10 biscuits) Difficulty: Medium
Ingredients
- 2 ½ cups all-purpose flour, plus more for dusting
- 1 tablespoon baking powder
- 1 teaspoon salt
- 1 teaspoon granulated sugar
- 1 cup unsalted butter, frozen
- 1 ¼ cups cold whole buttermilk
- 3 tablespoons melted butter, for brushing
Instructions
Preheat the oven to 450°F and line a baking sheet with parchment paper. Whisk the flour, baking powder, salt, and sugar together in a large bowl. Grate the frozen butter on the large holes of a box grater directly into the flour. Toss gently with your fingers until the butter shreds are coated and evenly distributed. The mixture should look like coarse crumbs with visible butter flakes.
Pour the cold buttermilk into the flour mixture and stir with a fork until the dough just starts to come together. It will look shaggy and slightly wet. Turn the dough out onto a floured surface and pat it into a rough rectangle about ½ inch thick. Fold the dough in thirds like a letter, pat it out again, and repeat two more times. Do not knead.
Pat the dough to a final thickness of about 1 inch. Cut out biscuits with a 2 ½-inch round cutter, pressing straight down without twisting. Twisting seals the edges and stops the biscuits from rising. Place the biscuits close together on the baking sheet so they rise upward rather than outward. Brush the tops with melted butter. Bake for 12 to 15 minutes until tall and golden brown.
Tips & Things That Go Wrong
The biscuits can come out flat if the butter melts before the oven. Work quickly and keep everything cold. If the kitchen is warm, chill the dough for 15 minutes before cutting. The biscuits can be tough if the dough is overworked. Fold, do not knead. The biscuits can spread instead of rising if they are spaced too far apart. Place them touching on the pan. The butter can burn on the bottoms if the oven runs hot. Check them at 12 minutes.
Substitutions
Use a gluten-free all-purpose flour blend for a gluten-free version, but expect a slightly denser texture. Use whole milk with a tablespoon of lemon juice if you do not have buttermilk. For a savory version, add 1 cup of shredded cheddar and a teaspoon of garlic powder to the dry ingredients.
Storage & Reheating
These are best eaten the day they are made. Store leftovers in an airtight container at room temperature for 2 days. Reheat in a 350°F oven for 5 minutes. The microwave makes them rubbery. The unbaked cut biscuits can be frozen on a baking sheet, then transferred to a freezer bag and baked from frozen, adding 3 to 4 minutes to the baking time.
Approximate Nutrition Per Biscuit: 310 calories, 5g protein, 30g carbs, 20g fat, 1g fiber
Grate the butter straight from the freezer. Those frozen shreds create steam pockets in the oven, and steam pockets are what make flaky layers.
3. Copycat Buttermilk Fried Chicken
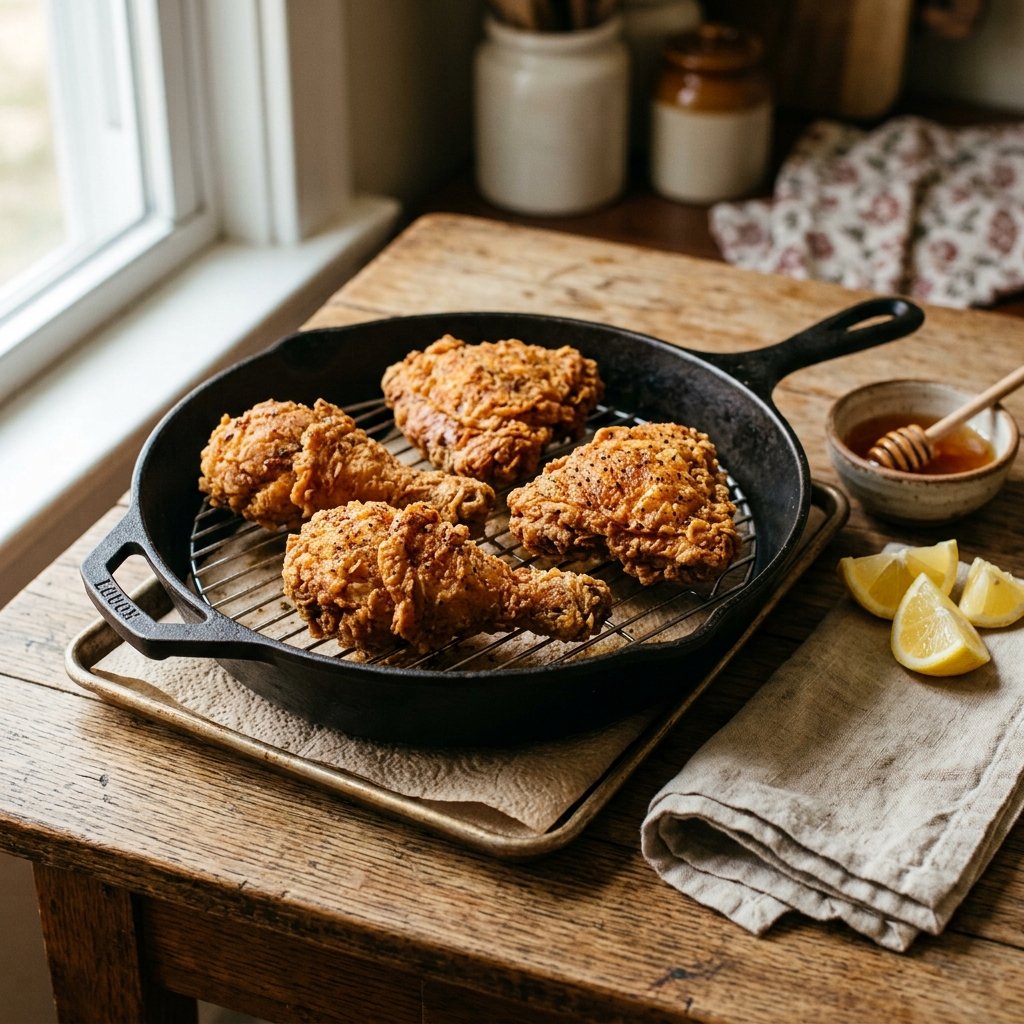
This is the centerpiece of the plate, and it is the recipe that scares people the most. Frying chicken at home has a reputation for being messy, dangerous, and inconsistent. It is messy. The other two problems are solvable. A cast-iron skillet, a thermometer, and a little patience will get you chicken that is shatteringly crisp outside and juicy all the way through.
The buttermilk brine is not optional. It tenderizes the meat and gives the flour something to cling to. Two hours is the minimum. Overnight is better. The acid in the buttermilk breaks down the surface proteins just enough that the coating sticks and the chicken stays moist through the fry.
This is where the texture changes. The coating should be uneven and craggy, not smooth. Those rough edges are what give you the crunch. When you dredge the chicken, press the flour on hard and let it sit for a few minutes before frying. That rest time lets the coating hydrate slightly, which means it will not slide off in the oil.
Prep: 20 minutes + 2 hours brine Cook: 25 minutes Total: 2 hours 45 minutes Serves: 6 Difficulty: Medium to advanced
Ingredients
- 3 pounds bone-in, skin-on chicken pieces
- 3 cups whole buttermilk
- 2 tablespoons hot sauce
- 3 cups all-purpose flour
- 2 tablespoons cornstarch
- 2 tablespoons salt
- 2 tablespoons black pepper
- 2 teaspoons smoked paprika
- 2 teaspoons garlic powder
- 1 teaspoon onion powder
- 1 teaspoon dried thyme
- ½ teaspoon cayenne pepper
- 6 cups peanut or vegetable oil, for frying
Instructions
In a large bowl or zip-top bag, combine the buttermilk and hot sauce. Add the chicken pieces and turn to coat. Cover and refrigerate for at least 2 hours, or overnight for the best results. Let the chicken sit at room temperature for 20 minutes before frying so it cooks evenly.
In a large shallow dish, whisk together the flour, cornstarch, salt, pepper, paprika, garlic powder, onion powder, thyme, and cayenne. Set a wire rack over a baking sheet. Working with one piece at a time, lift the chicken from the buttermilk, letting the excess drip off, and press it firmly into the flour mixture, coating it heavily on all sides. Place the coated pieces on the wire rack and let them rest for 10 minutes. The coating will look slightly wet in places, which is exactly what you want.
Heat the oil in a large cast-iron skillet or Dutch oven to 350°F. Use a thermometer. Add the chicken pieces in batches, skin-side down, without crowding the pan. Fry for 12 to 15 minutes, turning every 4 to 5 minutes, until the coating is deep golden brown and the internal temperature reaches 165°F. Dark meat may take a few minutes longer than white meat. Drain on a wire rack, not paper towels, so the bottom stays crisp.
Tips & Things That Go Wrong
The coating can fall off if the chicken is too wet when it hits the flour. Let the excess buttermilk drip off, but do not pat the chicken dry. The oil temperature will drop when the chicken goes in. Adjust the heat to keep it between 325°F and 350°F. If the oil is too hot, the coating burns before the chicken cooks through. If it is too cool, the coating turns greasy. Fry in small batches and let the oil come back to temperature between batches. Do not cover the chicken while it rests, or the coating will steam and go soft.
Substitutions
Use a gluten-free flour blend for a gluten-free version, but add an extra tablespoon of cornstarch. Use boneless thighs for a faster cook, reducing the frying time to 6 to 8 minutes. For an oven-fried version, bake on a wire rack at 425°F for 35 to 40 minutes, turning once, though the coating will be less craggy.
Storage & Reheating
This keeps in the refrigerator for 3 days. The coating loses its crunch after refrigeration. Reheat in a 375°F oven on a wire rack for 12 to 15 minutes to bring back some of the crispness. The microwave makes the coating soft and is not recommended. Leftovers are excellent cold or chopped into a salad.
Approximate Nutrition Per Serving: 620 calories, 42g protein, 38g carbs, 32g fat, 2g fiber
Let the coated chicken rest for 10 minutes before it hits the oil. That rest hydrates the flour just enough that the coating sticks instead of sliding off.
4. Dolly’s Skillet Cornbread
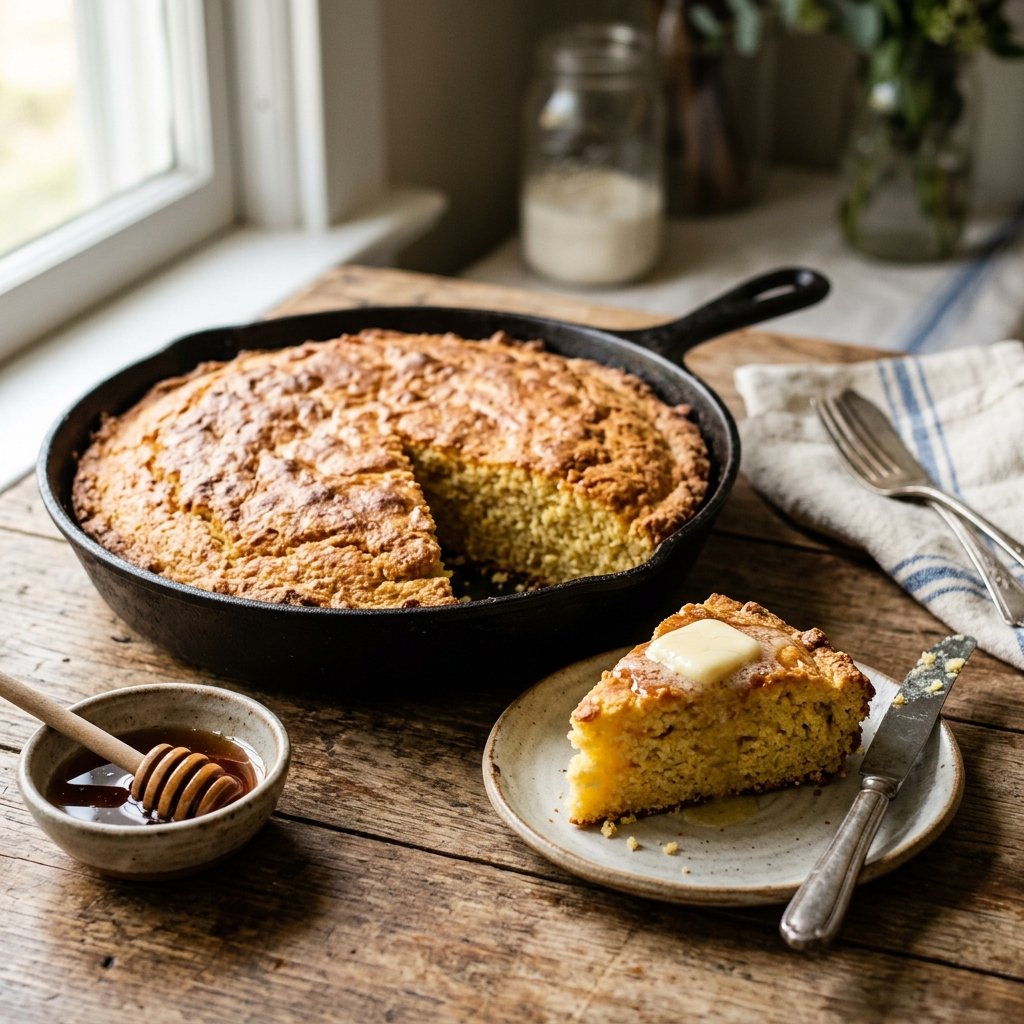
This is the cornbread that belongs beside the soup and the fried chicken. It is savory, not sweet, with a crust so crisp you can hear it when you cut into it. It uses three core ingredients and comes together in about five minutes of hands-on time. It is the kind of recipe that rewards a hot skillet and a coarse grind of cornmeal.
Here is the part I would not skip. The skillet has to be hot before the batter goes in. Put the skillet in the oven while it preheats with a tablespoon of bacon drippings or butter in the bottom. When the fat is shimmering and just starting to smoke, pour in the batter. It should sizzle at the edges. That sizzle is what gives you the crust.
One thing most recipe cards leave out is that the cornmeal matters. Coarse stone-ground cornmeal gives the bread its texture and its slightly nutty flavor. Fine cornmeal or a cornbread mix makes something closer to cake. If you can find coarse stone-ground cornmeal at the store, use it. The difference is noticeable.
Prep: 5 minutes Cook: 25 minutes Total: 30 minutes Serves: 8 Difficulty: Very easy
Ingredients
- 2 cups coarse stone-ground cornmeal
- 1 teaspoon baking soda
- 1 teaspoon salt
- 2 cups whole buttermilk
- 2 large eggs
- 3 tablespoons bacon drippings or melted butter, divided
Instructions
Preheat the oven to 425°F. Place a 10-inch cast-iron skillet in the oven with 1 tablespoon of the bacon drippings or butter and let it heat for 10 minutes.
In a large bowl, whisk together the cornmeal, baking soda, and salt. In a separate bowl, whisk the buttermilk and eggs together. Pour the wet ingredients into the dry and stir until just combined. Stir in the remaining 2 tablespoons of bacon drippings or melted butter. The batter should be thin and pourable, like pancake batter. Do not overmix.
Carefully remove the hot skillet from the oven and pour the batter into the skillet. It should sizzle. Return the skillet to the oven and bake for 22 to 25 minutes until the top is golden brown and a toothpick inserted into the center comes out clean. Let it cool for 5 minutes before slicing into wedges.
Tips & Things That Go Wrong
The cornbread can stick if the skillet is not well seasoned. Use a well-seasoned cast-iron skillet and do not skimp on the fat. The cornbread can be dry if overbaked. Check it at 22 minutes. If you do not have bacon drippings, use melted butter or vegetable oil. The flavor will be different but still good. Do not add sugar if you want traditional Southern cornbread. If you must, add no more than 1 tablespoon.
Substitutions
Use a gluten-free cornmeal if needed. Use a mix of buttermilk and whole milk if you are short on buttermilk. For a vegetarian version, use melted butter or vegetable oil instead of bacon drippings. For a dairy-free version, use plant milk with a tablespoon of lemon juice and dairy-free butter.
Storage & Reheating
This keeps in an airtight container at room temperature for 2 days or in the refrigerator for up to 5 days. Reheat individual wedges in a toaster oven or in a skillet with a little butter. The microwave makes it rubbery. Leftover cornbread is excellent crumbled into a bowl with buttermilk or used as a base for dressing.
Approximate Nutrition Per Wedge: 220 calories, 6g protein, 30g carbs, 8g fat, 2g fiber
Get the skillet hot before the batter goes in. When the fat is shimmering and the batter sizzles at the edges, you know the crust will be crisp.
5. Southern Fried Apples
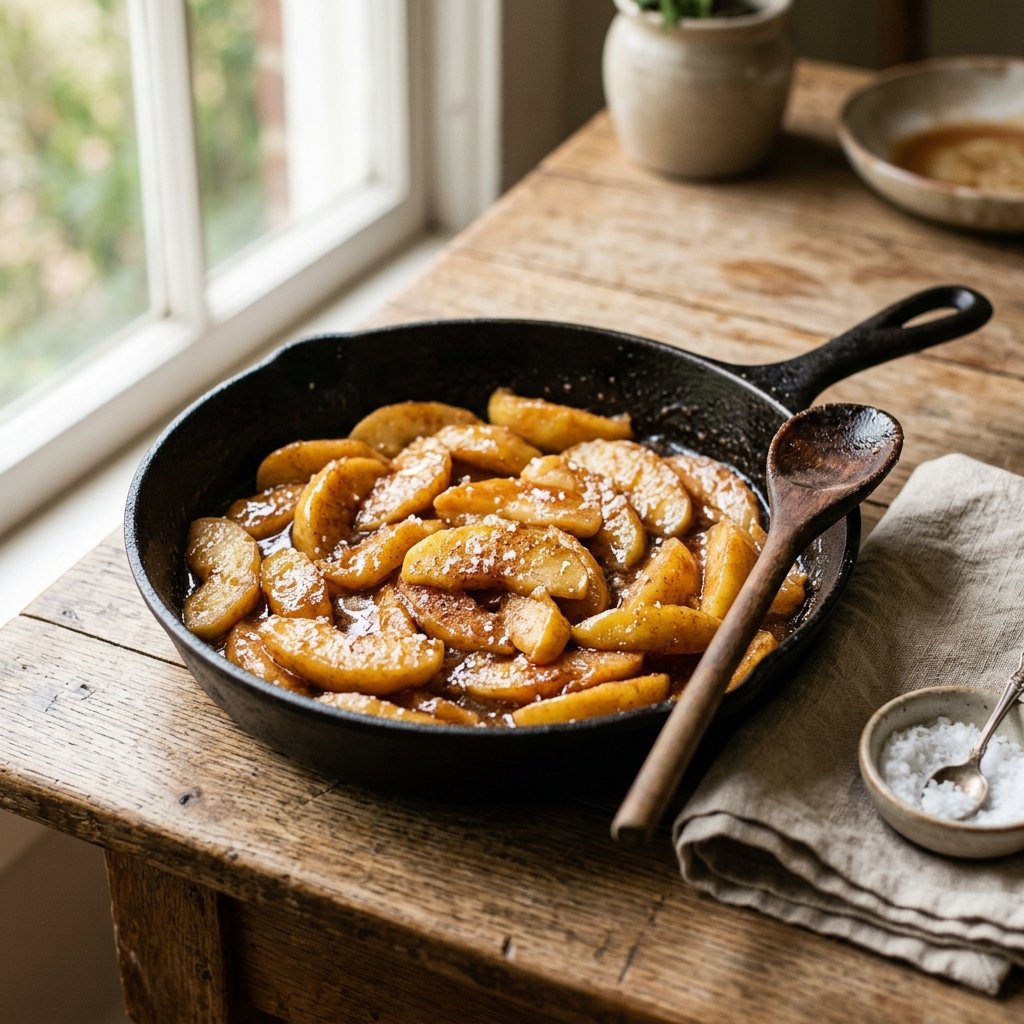
Fried apples are the side dish that cuts through the richness of everything else on the plate. They are soft, buttery, and slightly sweet, with a touch of cinnamon and just enough salt to keep them from being cloying. They come together in about 15 minutes and they are almost impossible to mess up.
The trick is the apple variety. Granny Smith holds its shape and provides the tartness that makes the dish work. Honeycrisp or Fuji will be sweeter and softer. A mix of both is the best of both worlds. Peel them or leave the skin on, depending on your preference. Leaving the skin on adds a little texture and color.
One thing most recipe cards leave out is that the apples should be cooked in butter, not oil. Butter gives the glaze its richness and its glossy sheen. The butter should be foaming but not browning when the apples go in. If it browns, turn the heat down. Brown butter has a nutty flavor that competes with the cinnamon.
Prep: 10 minutes Cook: 15 minutes Total: 25 minutes Serves: 6 Difficulty: Very easy
Ingredients
- 6 medium Granny Smith apples, peeled, cored, and sliced ½ inch thick
- ½ cup unsalted butter
- ½ cup packed brown sugar
- 1 teaspoon cinnamon
- ¼ teaspoon ground nutmeg
- ¼ teaspoon salt
- 1 tablespoon fresh lemon juice
- 1 teaspoon cornstarch mixed with 1 tablespoon water (optional)
Instructions
Melt the butter in a large skillet over medium heat. Add the sliced apples and cook for 5 to 6 minutes, stirring occasionally, until they start to soften at the edges. Add the brown sugar, cinnamon, nutmeg, salt, and lemon juice. Stir to coat the apples evenly.
Cook for 6 to 8 minutes more, stirring gently, until the apples are tender and the sauce has thickened and turned glossy. If the sauce looks thin, stir in the cornstarch slurry and cook for 1 minute until it thickens. If the apples release a lot of liquid, simmer uncovered for a few extra minutes. Serve warm as a side dish or over biscuits, pancakes, or vanilla ice cream.
Tips & Things That Go Wrong
The apples can turn to mush if they are overcooked. Keep the heat at medium and check them at 10 minutes. The sauce can be too thin if the apples are very juicy. The cornstarch slurry will fix it. The sauce can be too sweet if you use sweet apples instead of Granny Smith. Reduce the brown sugar to ⅓ cup if your apples are sweet. The butter can burn if the heat is too high. If it starts to brown, pull the pan off the heat for a minute.
Substitutions
Use a mix of Granny Smith and Honeycrisp for a balance of tart and sweet. Use maple syrup instead of brown sugar for a different flavor. For a dairy-free version, use coconut oil or a dairy-free butter substitute. Add a splash of bourbon or apple cider in the last minute for a deeper flavor.
Storage & Reheating
This keeps in the refrigerator for 5 days. Reheat in a skillet over low heat or in the microwave for 30 seconds. The apples soften further on reheating, so they are best eaten within a day or two. Do not freeze; the texture changes on thawing.
Approximate Nutrition Per Serving: 240 calories, 1g protein, 32g carbs, 13g fat, 3g fiber
Use Granny Smith apples. They hold their shape and provide the tartness that keeps the dish from being too sweet.
6. Mama’s Banana Pudding
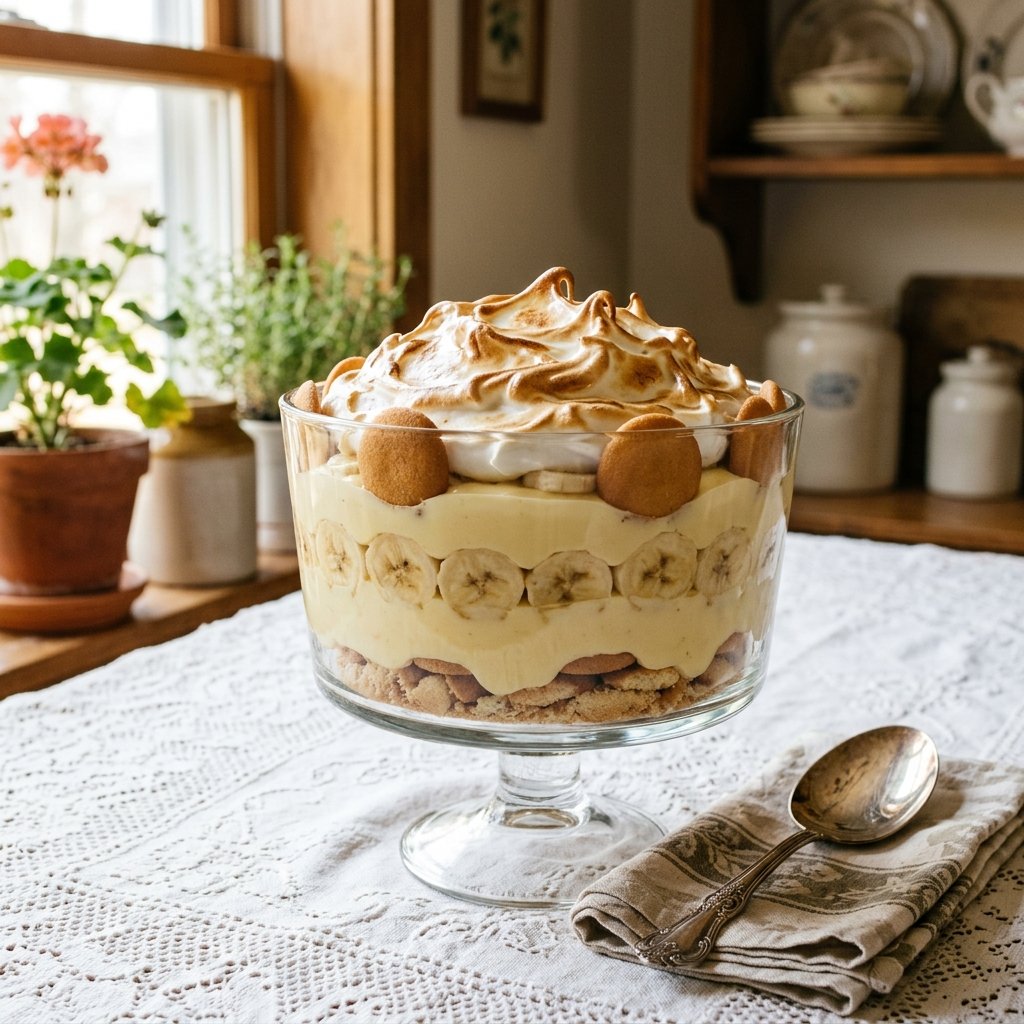
This is the dessert that finishes the show. The boxed pudding version is fine in a pinch, but it is not the same thing. The real version starts with a homemade custard cooked on the stovetop, layered with vanilla wafers and fresh bananas, and topped with a meringue that gets browned under the broiler. It is a labor of love, but it is the kind of dessert people remember for years.
The trick is patience with the custard. If you turn the heat up too high or walk away, the eggs will scramble and you will be starting over. Cook it low and slow, stirring constantly with a whisk, and wait for it to thicken enough to coat the back of a spoon. That moment is the whole recipe.
One thing most recipe cards leave out is that the bananas should be sliced just before layering. Sliced bananas sitting out for even twenty minutes begin to brown and turn mushy, and they give the pudding a slightly fermented flavor. Slice them fresh, layer them, and get the pudding into the refrigerator quickly.
Prep: 20 minutes Cook: 20 minutes Total: 40 minutes plus chilling Serves: 12 Difficulty: Medium
Ingredients
- 2 ½ cups whole milk
- ⅔ cup granulated sugar
- ⅓ cup cornstarch
- ¼ teaspoon salt
- 5 large egg yolks
- 3 tablespoons unsalted butter
- 2 teaspoons vanilla extract
- 1 box vanilla wafer cookies (about 12 ounces)
- 6 to 7 ripe bananas, sliced
- For the meringue: 5 large egg whites, ⅔ cup granulated sugar, ¼ teaspoon cream of tartar
Instructions
In a medium saucepan, whisk together the milk, sugar, cornstarch, and salt. Cook over medium heat, whisking constantly, until the mixture thickens enough to coat the back of a spoon, about 8 to 10 minutes. It should be thick and glossy but still pourable.
In a small bowl, whisk the egg yolks. Slowly pour about ½ cup of the hot milk mixture into the yolks, whisking constantly, to temper them. Pour the tempered yolks back into the saucepan and cook for 2 more minutes, whisking constantly, until the custard is thick and smooth. Remove from heat and stir in the butter and vanilla. Let the custard cool for 10 minutes, stirring occasionally to prevent a skin from forming.
In a 9×13-inch baking dish or a large trifle dish, layer half of the vanilla wafers, then half of the sliced bananas, then half of the custard. Repeat with the remaining wafers, bananas, and custard.
To make the meringue, beat the egg whites and cream of tartar in a clean bowl until soft peaks form. Gradually add the sugar and beat until stiff, glossy peaks form. Spread the meringue over the top of the pudding, sealing the edges all the way to the dish. Broil for 1 to 2 minutes until the peaks are golden brown, watching closely. Refrigerate for at least 4 hours before serving.
Tips & Things That Go Wrong
The custard can scramble if the heat is too high. Keep it on medium and whisk constantly. The meringue can weep if the pudding is not fully cooled before topping. Let the pudding cool completely before adding the meringue. The bananas can brown if the pudding sits too long. It is best eaten within 2 days. The meringue can burn under the broiler in seconds. Stay by the oven the whole time.
Substitutions
Use homemade whipped cream instead of meringue if you prefer. Add 2 cups of sweetened whipped cream on top of the chilled pudding instead. Use gluten-free vanilla wafers for a gluten-free version. Use 1 teaspoon of banana extract along with the vanilla for a stronger banana flavor.
Storage & Reheating
Store covered in the refrigerator for up to 3 days. The wafers soften over time, which is traditional and expected. Serve cold. Do not freeze.
Approximate Nutrition Per Serving: 420 calories, 7g protein, 64g carbs, 16g fat, 2g fiber
Cook the custard low and slow and never walk away. The moment it thickens enough to coat the back of a spoon is the whole recipe.
Frequently Asked Questions About the Dixie Stampede Menu
Are these the actual recipes from the dinner show?
No. These are home-kitchen recreations inspired by the flavors people remember from the show. I am not claiming they came out of the Dollywood kitchen, and the official recipes have never been published. What I can tell you is that these versions taste like the experience, and they work in a normal kitchen with normal equipment.
Can I make the whole menu in one afternoon?
Yes, but plan the order. Start with the banana pudding because it needs at least 4 hours to chill. Then make the soup, which holds well on the stovetop. Make the biscuit dough and chill it. Fry the chicken last so it is hot when it hits the table. The cornbread and the fried apples take 30 minutes each and can be made while the chicken rests. Give yourself three hours from start to finish.
What if I do not want to deep fry the chicken?
You can oven-fry it on a wire rack at 425°F for 35 to 40 minutes, turning once. The coating will be less craggy and less shatteringly crisp, but it will still be good. You can also use an air fryer at 400°F for 20 to 25 minutes, flipping halfway. Neither method will match the skillet, but both are solid alternatives.
Can I make the soup in a slow cooker?
Yes. Cook the roux, onion, and garlic on the stovetop first, then transfer everything except the cream and cream cheese to the slow cooker. Cook on low for 4 hours, then stir in the cream and cream cheese in the last 30 minutes. The texture is slightly softer than the stovetop version, but the flavor is the same.
What is the best way to reheat the fried chicken without losing the crunch?
Reheat it in a 375°F oven on a wire rack for 12 to 15 minutes. The wire rack keeps the bottom from steaming, and the dry heat re-crisps the coating. The microwave will make it soft and greasy. If you have an air fryer, 375°F for 6 to 8 minutes works even better.
Can I make this menu ahead of time for a party?
Yes. The soup can be made 3 days ahead and reheated. The biscuit dough can be cut and frozen, then baked from frozen. The chicken is best fried the same day, but you can fry it earlier and re-crisp it in the oven. The cornbread and fried apples are best fresh but hold for a day. The banana pudding must be made at least 4 hours ahead and is best made the day before.
Bringing the Dinner Show Home
The practical decision you have to make is not whether you can pull this off. It is how much of the menu you want to take on. The soup and the biscuits alone make a memorable dinner. Add the fried chicken and you have a full Southern spread. Add the cornbread, the fried apples, and the banana pudding and you have the whole show. Pick the version that fits your evening and your energy level.
If I had to point you to one recipe to start with, it would be the creamy vegetable soup. It is the most forgiving of the six, it freezes beautifully, and it is the dish people ask about first when they talk about the show. Make a pot on a Sunday, eat it all week, and then work your way up to the fried chicken on a weekend when you have the time and the patience.
Dinner and a show does not have to mean a ticket and a drive. With a hot skillet, a cold bowl of biscuit dough, and a trifle dish in the refrigerator, you can bring the whole experience to your own table. The show is whatever happens around it.