
The after-school snack graze, the toddler who refuses anything that requires a fork, the baby-led weaning practice that turns mealtime into a floor show—finger foods exist because children have their own logic about eating. They want to touch it, inspect it, and sometimes throw it before deciding it is worth consuming. Sitting a child down with a plate of food that requires utensils often ends with the food on the floor and the parent’s patience wearing thin. The real problem is not that kids are picky; it is that the food itself does not match their developmental stage or their mood.
Most finger food recipes you find online are either too complicated for a Tuesday afternoon or so processed that they barely qualify as food. Packages of puffed snacks and cheese crackers dominate the shelf, but they do not provide the protein and vegetables kids actually need. The typical advice is to serve the same few things—fruit slices, cheese cubes, crackers—until everyone is bored. That approach works until it does not, and then you are back to square one with a hungry, frustrated child and an empty plate.
These recipes are built around the reality of feeding small humans. They are designed to be picked up with fingers, eaten without fuss, and packed with enough nutrition to justify the effort. Each one solves a specific problem: the batch-cookable snack, the no-cook emergency option, the hidden vegetable, the protein-packed bite. They are not restaurant food scaled down. They are food that actually works when you are standing in the kitchen at 4:00 PM wondering what to serve.
1. Oven-Baked Sweet Potato Fries with Parmesan
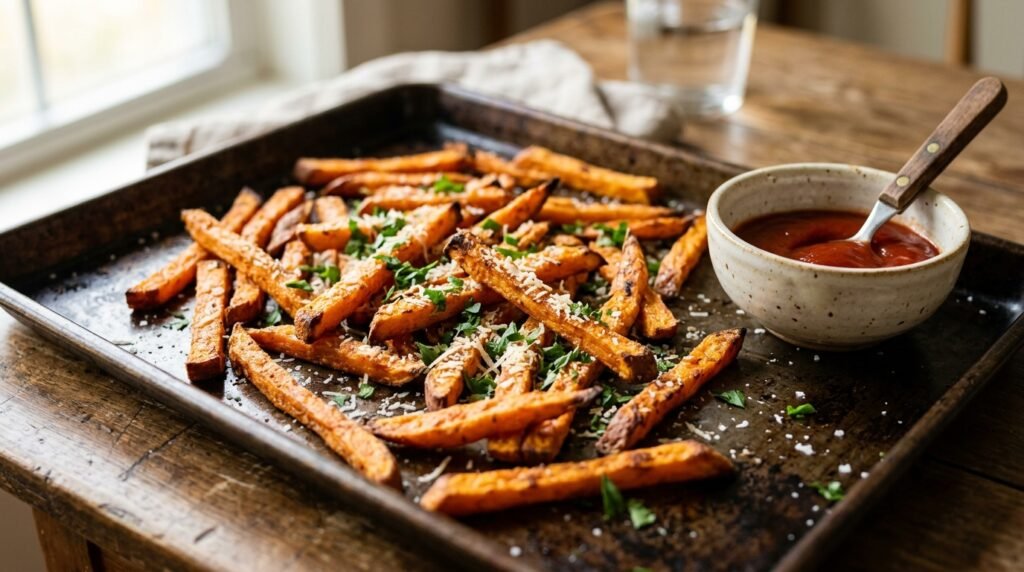
These sweet potato fries solve the problem of the snack that looks like a treat but actually contains vegetables. The natural sweetness of the potato appeals to kids, and the Parmesan adds a savory note that makes them taste more like a side dish from a restaurant than a health food. I have served these to groups of children at birthday parties and watched them disappear faster than the chips.
The trick is cutting them evenly so they cook at the same rate. Thin fries get crispy, thick fries stay soft in the center. I aim for about a quarter-inch thickness, which gives a nice contrast between the exterior and interior. These are best fresh from the oven, though they hold up reasonably well in a lunchbox for a few hours.
Prep: 10 minutes Cook: 20 minutes Total: 30 minutes Serves: 4 Difficulty: Easy
Ingredients:
- 2 large sweet potatoes (about 1.5 pounds total)
- 2 tablespoons olive oil
- 1/4 cup grated Parmesan cheese
- 1/2 teaspoon garlic powder
- 1/2 teaspoon paprika
- 1/2 teaspoon salt
Instructions:
- Preheat the oven to 425°F. Line a baking sheet with parchment paper.
- Peel the sweet potatoes and cut them into fry-shaped sticks about 1/4 inch thick. Try to keep them roughly the same size so they cook evenly.
- In a large bowl, toss the fries with olive oil, garlic powder, paprika, and salt. Use your hands to make sure every fry is coated.
- Spread the fries in a single layer on the prepared baking sheet. Leave space between them—crowding will steam them instead of creating crisp edges.
- Bake for 15 minutes, then flip the fries with a spatula. Sprinkle the Parmesan over the top and bake for another 5 minutes, until golden and crisp at the edges.
- Let them cool for a few minutes before serving—they firm up as they cool.
Cooking Tips & Mistakes to Avoid
Sweet potatoes have more moisture than regular potatoes, which means they can steam instead of crisp if you overcrowd the pan. I use two baking sheets if I am making a large batch. The space between fries matters more than you think—crowded fries become soft and floppy. If you are short on time, you can skip the flip, but the fries that are touching the pan will be less crisp on the bottom.
The Parmesan goes on toward the end so it does not burn. It will melt into a golden layer that adds flavor without turning into a blackened crust. If your child does not like Parmesan, you can leave it off entirely—the sweet potatoes are flavorful enough on their own, just with a little less savory depth.
Substitutions:
- Regular potatoes instead of sweet potatoes—cook time stays about the same.
- Nutritional yeast instead of Parmesan for a dairy-free version.
- Chili powder instead of paprika for a bit of heat (use sparingly for kids).
Storage & Reheating:
These are best fresh, but they keep in the refrigerator for up to two days. Reheat them in a toaster oven or regular oven at 400°F for 5 minutes to bring back some crispness. Microwaving will make them soggy, so I avoid that route unless I am desperate.
Approximate Nutrition Per Serving: 210 calories, 4g protein, 28g carbohydrates, 10g fat, 4g fiber
Do not crowd the pan. Sweet potatoes steam when they are packed together, and steamed fries are never as good as the ones with golden, crisp edges. Use two pans if you need to.
2. Mini Pizza Bites
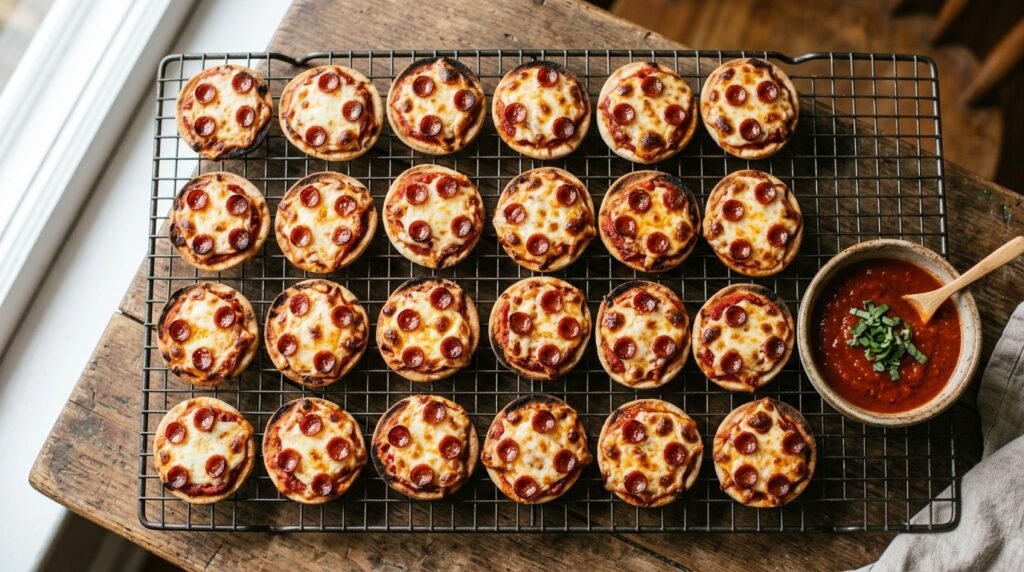
Pizza is the universal food of childhood, and these mini pizza bites capture the flavor without requiring a full pizza crust. They are small enough for tiny hands to manage, and the ingredients are flexible enough to accommodate whatever toppings your child prefers. I have made these with pita, English muffins, and even bagel halves—all work, though pita gives you the best crunch-to-softness ratio.
The real advantage here is speed. These come together in about fifteen minutes from start to finish, which makes them perfect for after-school snacks or quick lunches. They are also a good way to use up leftover sauce and cheese from a weekend pizza night. The pepperoni is optional—my kids eat these with just cheese and sauce.
Prep: 5 minutes Cook: 10 minutes Total: 15 minutes Serves: 4 Difficulty: Very Easy
Ingredients:
- 4 mini pita rounds or 2 English muffins, split
- 1/2 cup pizza sauce or marinara
- 1 cup shredded mozzarella cheese
- Optional toppings: mini pepperoni slices, diced bell peppers, sliced olives, crumbled cooked sausage
Instructions:
- Preheat the oven to 400°F. Line a baking sheet with parchment paper.
- Place the pita rounds or English muffin halves on the baking sheet.
- Spread a thin layer of pizza sauce on each piece, leaving a small border around the edge.
- Sprinkle mozzarella cheese over the sauce, then add your toppings of choice.
- Bake for 8 to 10 minutes, until the cheese is melted and bubbly and the edges are starting to crisp.
- Let cool for a few minutes before serving—the cheese is extremely hot right out of the oven.
Cooking Tips & Mistakes to Avoid
The sauce can make the pita soggy if you use too much. I spread a thin layer and leave the edges bare—that gives the bite a crisp rim that holds everything together. If you are using English muffins, you can use a bit more sauce because the surface is less porous. Either way, go light at first; you can always add more.
These are at their best fresh from the oven, but they hold up surprisingly well in a lunchbox. The cheese sets as it cools, and the pita stays crisp enough for a few hours. I would not make these a day ahead unless you are planning to reheat them, because the texture changes after refrigeration.
Substitutions:
- Gluten-free pita or bagels for a gluten-free version.
- Dairy-free cheese for a dairy-free version (check the melt quality first).
- BBQ sauce instead of pizza sauce for a different flavor profile.
Storage & Reheating:
Refrigerate leftovers for up to three days. Reheat in a toaster oven or regular oven at 375°F for 5 minutes to restore the crispness. A microwave will turn them soft, so I only use that if I am in a hurry and texture is not a priority.
Approximate Nutrition Per Serving (2 mini pita bites): 190 calories, 9g protein, 18g carbohydrates, 9g fat
Spread the sauce thinly and leave a border around the edge. Too much sauce seeps into the pita and makes the whole thing soft instead of crispy.
3. No-Bake Peanut Butter Energy Bites
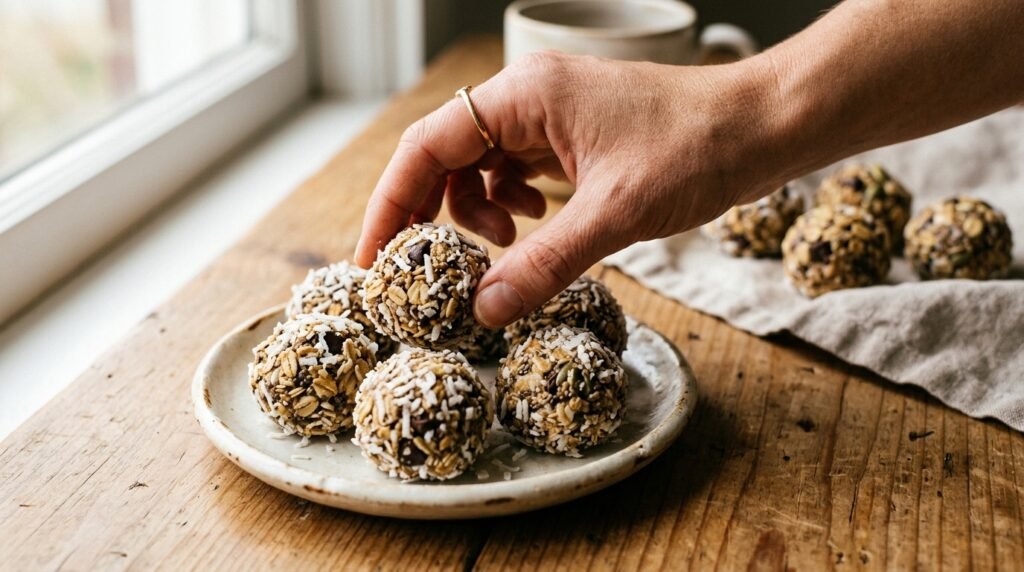
These energy bites are my secret weapon for the afternoon slump. They are sweet enough to feel like a treat, but they contain oats, peanut butter, and a little honey—enough to keep a child going until dinner. The texture is soft and slightly chewy, which works well for toddlers, and the bite-sized shape makes them manageable for kids of any age.
The best part is that they require no baking, no heat, and almost no cleanup. You mix everything in one bowl, roll them into balls, and refrigerate. They keep for over a week, which means you can make a double batch on Sunday and have snacks for the entire week. I have even hidden a few in my own lunch bag when I needed a quick pick-me-up.
Prep: 10 minutes Cook: 0 minutes Total: 10 minutes Serves: 6 (makes about 18 bites) Difficulty: Very Easy
Ingredients:
- 1 cup rolled oats (old-fashioned, not instant)
- 1/2 cup peanut butter (smooth or crunchy)
- 1/3 cup honey
- 1/2 cup ground flaxseed or chia seeds (optional, for extra nutrition)
- 1/4 cup mini chocolate chips (optional)
- 1 teaspoon vanilla extract
Instructions:
- In a large bowl, combine the oats, peanut butter, honey, vanilla, and any mix-ins you are using. Stir until everything is well combined and the mixture holds together when pressed.
- Chill the mixture in the refrigerator for 15 minutes if it is too sticky to handle—this makes rolling easier.
- Roll the mixture into 1-inch balls using your hands. The mixture should be slightly sticky but firm enough to hold its shape.
- Place the bites in a single layer in an airtight container, separating layers with parchment paper.
- Refrigerate for at least 30 minutes before serving to set the texture.
Cooking Tips & Mistakes to Avoid
The consistency of the mixture depends on the peanut butter you use. Natural peanut butter with separated oil can make the mixture runny. I recommend using a commercial peanut butter that is already blended for consistent results. If the mixture is too wet, add a tablespoon of oats at a time until it firms up. If it is too dry, add a teaspoon of honey or a splash of milk.
Chilling the mixture before rolling is the step I would not skip. Warm peanut butter and honey make for a sticky mess that frustrates everyone. Fifteen minutes in the refrigerator makes the mixture manageable and keeps the bites from spreading out on the pan. If you are making these with young children, this is an excellent recipe to involve them in—the rolling is fun and low-stakes.
Substitutions:
- Almond butter or sunflower seed butter instead of peanut butter.
- Maple syrup instead of honey.
- Dried fruit like raisins or chopped dates instead of chocolate chips.
Storage & Reheating:
These keep in an airtight container in the refrigerator for up to two weeks. They are also freezer-friendly—freeze them on a baking sheet, then transfer to a freezer bag for up to three months. They defrost in about 10 minutes at room temperature. No reheating required.
Approximate Nutrition Per Bite: 100 calories, 3g protein, 12g carbohydrates, 5g fat, 2g fiber
Chill the mixture for 15 minutes before rolling. Warm peanut butter and honey are too sticky to handle, and you will end up with messy hands and misshapen bites. The refrigerator is your friend here.
4. Crispy Baked Chicken Nuggets
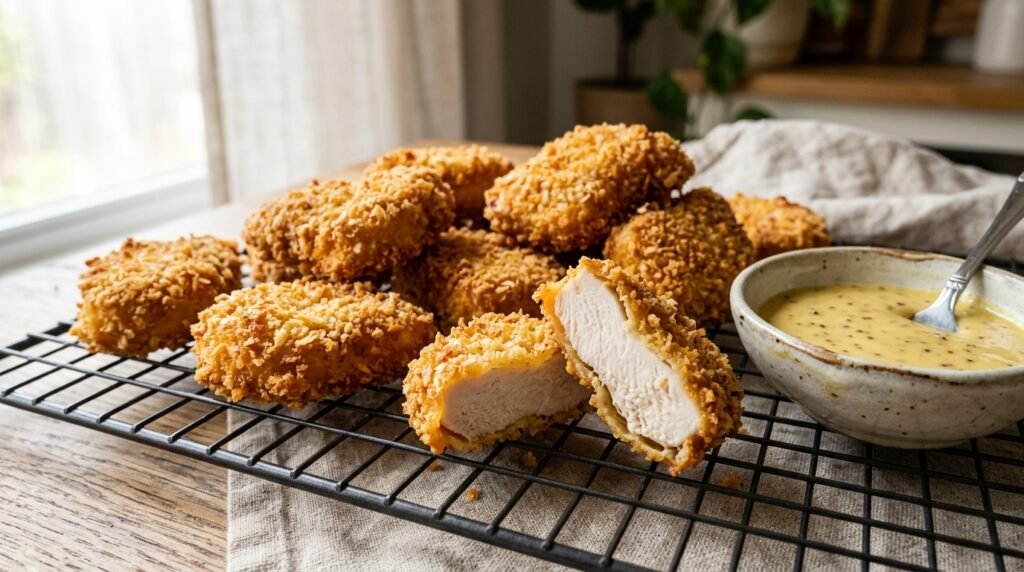
Homemade chicken nuggets are one of those recipes that sounds like more work than it actually is. These nuggets are simple enough for a weeknight but impressive enough to make you wonder why you ever bought the frozen version. The coating gets crispy in the oven, and the chicken stays juicy inside because you use small pieces that cook quickly.
The biggest advantage of making your own nuggets is knowing exactly what is in them—just chicken, a simple coating, and spices. No fillers, no preservatives, no mystery ingredients. I make a large batch of these on a Sunday, freeze them, and pull out a few whenever I need a quick protein option for lunch or dinner. They reheat beautifully in a toaster oven.
Prep: 15 minutes Cook: 15 minutes Total: 30 minutes Serves: 4 Difficulty: Medium (requires a few bowls for dipping)
Ingredients:
- 1 pound chicken breast, cut into 1.5-inch chunks
- 1/2 cup all-purpose flour
- 2 large eggs, beaten
- 1 cup breadcrumbs (panko works best for crispness)
- 1/2 cup grated Parmesan cheese
- 1 teaspoon garlic powder
- 1 teaspoon paprika
- 1/2 teaspoon salt
- Olive oil spray or cooking spray
Instructions:
- Preheat the oven to 425°F. Line a baking sheet with parchment paper and place a wire rack on top if you have one—this helps air circulate and keeps the nuggets crisp.
- Set up a dredging station: one bowl with flour, one bowl with beaten eggs, and one bowl with breadcrumbs, Parmesan, garlic powder, paprika, and salt mixed together.
- Dip each chicken piece first in flour, shaking off excess, then in the egg, letting the excess drip off, and finally in the breadcrumb mixture, pressing gently so the crumbs stick.
- Place the coated chicken pieces on the prepared baking sheet. Spray the tops lightly with cooking spray to help them brown.
- Bake for 12 to 15 minutes, flipping halfway, until the coating is golden-brown and the chicken is cooked through (internal temperature of 165°F).
- Let cool for a few minutes before serving.
Cooking Tips & Mistakes to Avoid
The coating is the most important part of this recipe. Panko breadcrumbs give you the best crisp texture because they are larger and flakier than regular breadcrumbs. If you only have regular breadcrumbs, they will work, but the result will be less crunchy. The Parmesan adds flavor and helps the coating brown.
Do not overcrowd the baking sheet—the nuggets need space to allow the hot air to circulate. If they are touching, they will steam instead of crisp. I use a wire rack on the baking sheet for even better air circulation, but it is not required. The nuggets will still be good without it.
Substitutions:
- Ground turkey or chicken instead of breast pieces—just form into small patties.
- Gluten-free breadcrumbs for a gluten-free version.
- Crushed cornflakes instead of breadcrumbs for extra crunch.
Storage & Reheating:
Refrigerate cooked nuggets for up to four days. They are best reheated in a toaster oven or regular oven at 400°F for 5 to 7 minutes. Microwaving will make the coating soft. For longer storage, freeze the nuggets on a baking sheet, then transfer to a freezer bag. Reheat from frozen at 425°F for 12 to 15 minutes.
Approximate Nutrition Per Serving (4 nuggets): 280 calories, 28g protein, 16g carbohydrates, 12g fat
Use panko breadcrumbs for the crispest coating. Regular breadcrumbs work, but panko gives you that light, crunchy texture that makes homemade nuggets better than store-bought.
5. Veggie Fritters with Zucchini and Carrot
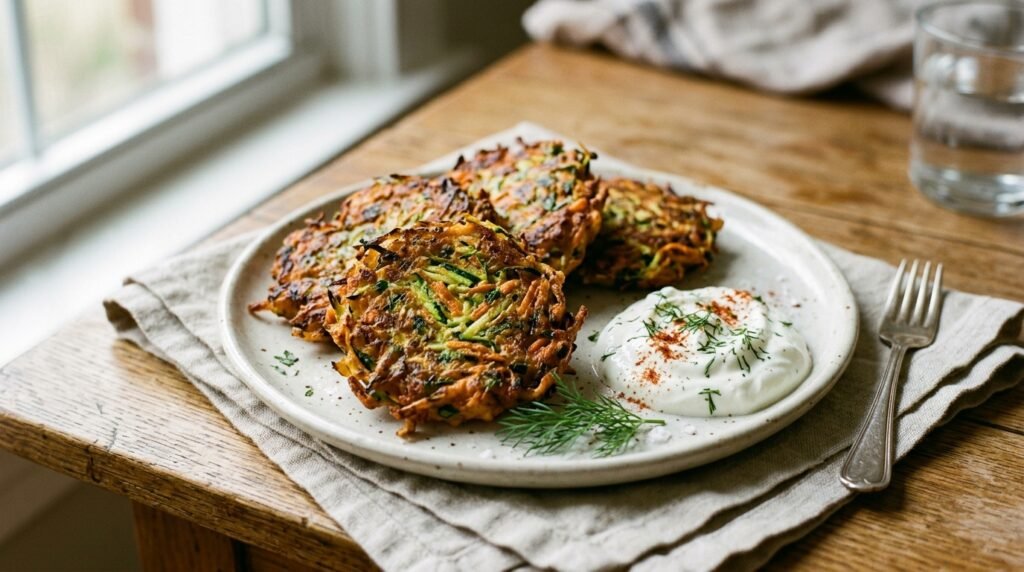
Veggie fritters are the solution to the vegetable problem. They look like little pancakes, they taste savory and satisfying, and they contain a substantial amount of grated vegetables without announcing it loudly. The eggs and flour hold everything together, and the cheese adds richness that kids recognize and trust. I have served these to children who “do not like vegetables” and watched them eat three without asking what was inside.
The texture is what makes them work—crisp on the outside, tender on the inside. The zucchini releases moisture as it cooks, which means the fritters are never dry. They are also forgiving enough to accept whatever vegetables you have in the refrigerator. Zucchini and carrot are my favorites because they are mild and shred easily.
Prep: 15 minutes Cook: 12 minutes Total: 27 minutes Serves: 4 (makes about 12 fritters) Difficulty: Easy
Ingredients:
- 2 medium zucchini, grated (about 2 cups)
- 1 large carrot, grated (about 1 cup)
- 1/2 cup all-purpose flour
- 2 large eggs, beaten
- 1/2 cup grated Parmesan cheese
- 1/4 cup chopped fresh chives or green onion (optional)
- 1/2 teaspoon garlic powder
- Salt and pepper to taste
- Olive oil or butter for frying
Instructions:
- Place the grated zucchini in a clean kitchen towel and squeeze out as much liquid as possible. This is the most important step—wet zucchini makes soggy fritters.
- In a large bowl, combine the squeezed zucchini, grated carrot, flour, eggs, Parmesan, chives, garlic powder, salt, and pepper. Mix until everything is well combined.
- Heat a large skillet over medium heat and add enough oil to coat the bottom, about 1 to 2 tablespoons.
- Drop heaping tablespoons of the mixture into the hot pan and flatten slightly with the back of a spoon. Cook for 2 to 3 minutes per side, until golden-brown and crisp at the edges.
- Transfer the cooked fritters to a paper-towel-lined plate to absorb excess oil. Serve warm or at room temperature.
Cooking Tips & Mistakes to Avoid
Squeezing the zucchini is non-negotiable. Zucchini is mostly water, and if you do not remove it, the fritters will fall apart in the pan and turn into a pale, soggy mess. I use a clean kitchen towel and twist it tightly to wring out as much liquid as possible. You will be surprised how much comes out.
If the mixture seems too wet after adding the flour, add a tablespoon more. The batter should be thick enough to hold together when you drop it into the pan. If it is runny, the fritters will spread out and become thin and fragile. A thicker batter gives you a more substantial fritter with a better texture.
Substitutions:
- Yellow squash instead of zucchini.
- Any shredded vegetable—broccoli stems, sweet potato, or parsnip.
- Gluten-free flour for a gluten-free version (use a blend, not a single gluten-free flour).
Storage & Reheating:
Fritters keep in the refrigerator for up to three days. Reheat them in a skillet with a splash of oil to bring back the crispness, or in a toaster oven at 375°F for 5 minutes. Microwaving makes them soft, so I avoid it unless I am short on time. They are also freezer-friendly—freeze on a baking sheet, then transfer to a bag for up to three months.
Approximate Nutrition Per Serving (3 fritters): 180 calories, 9g protein, 14g carbohydrates, 10g fat, 2g fiber
Squeeze the grated zucchini thoroughly before mixing. A kitchen towel works best—twist it tight to wring out as much water as possible. Wet zucchini leads to soggy fritters that fall apart in the pan.
6. Cheese Quesadilla Dippers
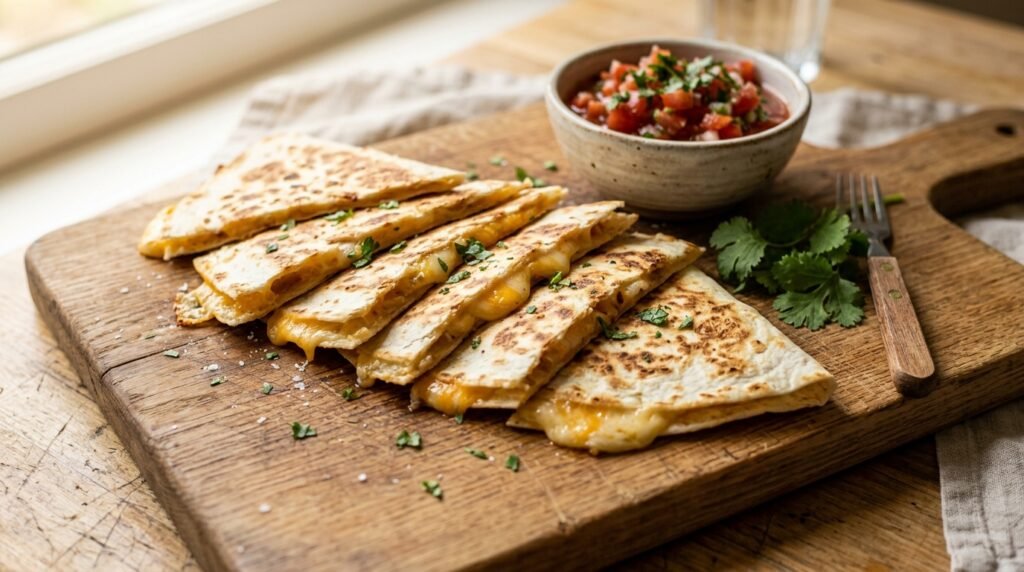
Quesadillas are the original finger food—simple, fast, and endlessly adaptable. These are cut into dipper-sized strips that children can grab and dunk into salsa, sour cream, or guacamole. The cheese melts into a gooey center, the tortilla gets lightly crisped in the pan, and the whole thing comes together in about as long as it takes to preheat the skillet.
What makes this version a little more useful is the cut and the dipping sauce. A full quesadilla can be unwieldy for a small child, but strips are manageable and fun. The dip adds a layer of flavor and moisture that keeps the quesadilla from feeling dry. I have served these at lunch, dinner, and snack time, and they are always a hit. They also work well in a lunchbox, holding up at room temperature for a few hours.
Prep: 5 minutes Cook: 8 minutes Total: 13 minutes Serves: 4 Difficulty: Very Easy
Ingredients:
- 4 large flour tortillas
- 2 cups shredded cheddar or Monterey Jack cheese
- Olive oil or butter for the pan
- Optional add-ins: black beans, cooked chicken, corn, or sliced bell peppers
- For dipping: salsa, sour cream, Greek yogurt, or guacamole
Instructions:
- Heat a large skillet or griddle over medium heat and add a thin layer of oil or a pat of butter.
- Place one tortilla in the skillet. Sprinkle half of the cheese evenly over the entire surface, leaving a small border. Add any other fillings you are using.
- Top with the second tortilla and press down lightly with a spatula. Cook for 2 to 3 minutes, until the bottom is golden-brown and lightly crisp.
- Flip carefully and cook for another 2 to 3 minutes, until the second side is browned and the cheese is fully melted.
- Remove from the pan and let cool for 2 minutes before slicing into strips or wedges.
- Serve with the dipping sauce of your choice.
Cooking Tips & Mistakes to Avoid
The heat of the pan matters. Too high and the tortilla will burn before the cheese melts. Too low and the tortilla will become tough and dry. Medium heat gives you enough time to melt the cheese while the tortilla develops a golden color. I use a cast-iron skillet for the best browning, but any heavy-bottomed pan works.
Do not overfill the quesadilla. A thick layer of cheese and fillings makes flipping difficult and can result in cheese spilling out. A moderate amount of cheese—about 1/2 cup per tortilla—spreads evenly and melts into a cohesive layer. If you are adding beans or chicken, keep it to a thin layer as well.
Substitutions:
- Corn tortillas for a gluten-free version (though they are smaller and more delicate).
- Any cheese that melts well—pepper jack, provolone, or a Mexican blend.
- Hummus or ranch dressing as a dipping alternative.
Storage & Reheating:
Refrigerate leftover quesadilla strips for up to three days. Reheat in a skillet to bring back the crispness, or in a toaster oven at 375°F for 5 minutes. Microwave works but makes the tortilla soft and chewy. These are best fresh but hold up reasonably well in a lunchbox for a few hours.
Approximate Nutrition Per Serving (1/2 quesadilla with dip): 310 calories, 14g protein, 26g carbohydrates, 16g fat
Cook at medium heat. Too hot and the tortilla burns before the cheese melts. Too low and you get a dry, tough quesadilla. Medium heat gives you a golden, crisp exterior with a perfectly melted center.
Frequently Asked Questions
What are the best finger foods for picky eaters?
Start with foods that look familiar but have a nutritional upgrade. The veggie fritters and chicken nuggets are good entry points because they resemble foods kids already trust. The cheese quesadilla dippers are also a safe bet—cheese and tortilla are rarely rejected. The key is to introduce new textures and flavors slowly, pairing them with a familiar dip or sauce.
Can I make these finger foods in advance?
Yes. The energy bites, chicken nuggets, and veggie fritters all freeze well and can be made in large batches. The sweet potato fries are best fresh but can be reheated. The pizza bites and quesadilla dippers are best made fresh or kept for a day in the refrigerator. I usually make the freezer-friendly items on a Sunday and the fresh items throughout the week.
What is the best way to store finger foods for school lunches?
Use airtight containers with separate sections to keep different foods from touching. For crispy items like nuggets and fries, pack them with a small paper towel to absorb moisture. If the lunchbox will not be refrigerated, use an ice pack for items containing dairy or meat. Most of these finger foods are fine at room temperature for a few hours.
Can I make these recipes gluten-free?
Most of these recipes have a gluten-free option. Use gluten-free breadcrumbs for the nuggets, gluten-free flour for the fritters, and corn tortillas for the quesadilla dippers. The energy bites are naturally gluten-free if you use certified gluten-free oats. The sweet potato fries and pizza bites can be made gluten-free with the appropriate substitutions.
How can I add more vegetables to these finger foods?
The veggie fritters are already vegetable-forward, but you can also add finely chopped spinach to the pizza bites, grated zucchini to the energy bites, or pureed sweet potato to the chicken nugget coating. The quesadilla dippers accept most vegetables—bell peppers, corn, and black beans work well. The key is to chop vegetables finely so they blend in with the overall texture.
What dips work well with these finger foods?
Ketchup is always safe. For the sweet potato fries, I like a simple yogurt-based dip with a little garlic powder. The nuggets go well with honey mustard, BBQ sauce, or ranch. The veggie fritters work nicely with Greek yogurt or a light vinaigrette. The quesadilla dippers are best with salsa, sour cream, or guacamole. Having a dip available increases the chance that the food gets eaten, especially for children who like to dip everything.
Conclusion
These recipes do not require a special occasion or a gourmet kitchen. They are built for the reality of feeding children—the rush, the mess, the changing preferences, the days when a plate of nuggets is the only thing that will work. Some are batchable, some are fast, some are designed to hide vegetables, but all of them serve the same purpose: getting food onto small plates and into small hands without a fight.
If you are new to making homemade finger foods, start with the energy bites and the cheese quesadilla dippers. Both are forgiving, quick, and almost universally popular. Once you have those in rotation, add the chicken nuggets and veggie fritters—they take a little more time but are worth the effort for the protein and vegetables they deliver. The sweet potato fries and pizza bites are the crowd-pleasers that work for parties, after-school snacks, or any time you need something that feels like a treat but actually contains real food.
A kitchen where children are fed well does not need to be complicated. It just needs a few recipes that work, a little planning, and the willingness to serve something that looks like food instead of a snack from a package. These recipes are that start.