
The church cookbook that falls open to the same stained page every time. The handwritten recipe card in your grandmother’s cursive that calls for a “pinch” and a “slow oven.” The dessert that takes an afternoon but disappears in ten minutes. Vintage Southern desserts are a kind of cooking that most modern recipe cards have quietly abandoned, and something has been lost in the trade.
The problem with most old-fashioned dessert recipes online is that they have been modernized into something unrecognizable. Shortcuts replace patience. Boxed pudding mix replaces real custard. Cake mixes replace the slow creaming of butter and sugar that gives a vintage cake its crumb. The recipes that claim to be old-fashioned are often just modern desserts with a vintage font. The result never tastes like the thing you were trying to remember.
These five desserts are the real thing. They come from the Appalachian and Tennessee baking traditions that shaped Dolly Parton’s kitchen, the kind of desserts that show up at Sunday dinners, church potlucks, and family reunions across the South. Some are simple enough for a weeknight. One is a showpiece for a birthday. Every one of them has a reason to exist beyond being another dessert recipe. They are built with real technique, real pantry staples, and real Southern hospitality in mind.
1. Classic Buttermilk Pie
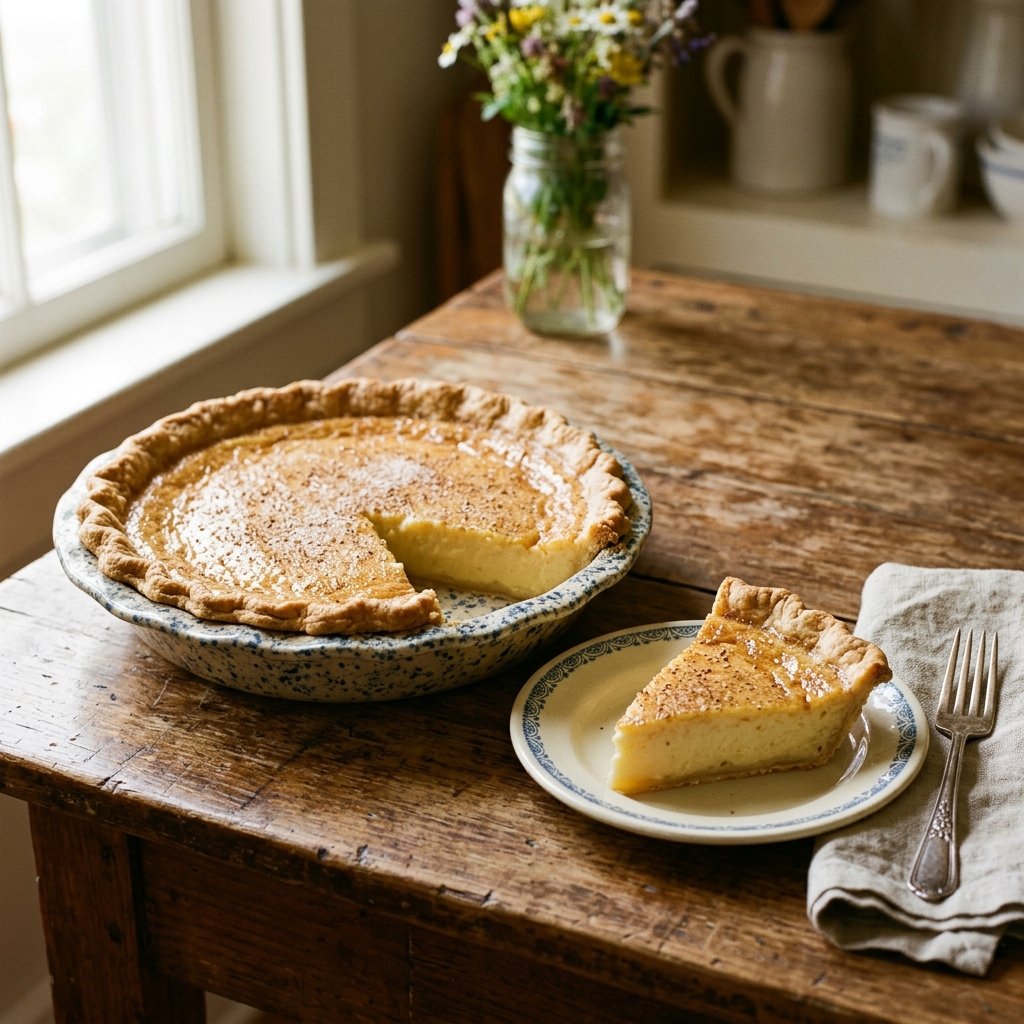
Buttermilk pie is the most underrated dessert in the Southern canon. It sounds strange if you have never had it, and it looks plain if you have never tasted it. But the first bite tells you everything. The custard is soft and tangy, the top gets a thin crackled layer as it cools, and the whole thing costs about three dollars to make. It is a pantry dessert, the kind of thing a Southern baker throws together when company shows up unannounced.
Here is the part I would not skip. The pie needs to be pulled out of the oven while the center still has a slight wobble. If you wait until it looks fully set, the custard will be overcooked and the texture turns to rubber. It finishes setting as it cools on the counter. This is the single most important thing to get right.
One thing most recipe cards leave out is that a watery buttermilk pie is almost always a temperature problem. If the eggs are added too quickly to the warm butter mixture, they scramble slightly and the custard separates. Temper the eggs by whisking a small amount of the warm mixture into them first, then pour the whole thing back into the bowl.
Prep: 10 minutes Cook: 45 minutes Total: 55 minutes plus cooling Serves: 8 Difficulty: Easy
Ingredients
- 1 unbaked 9-inch pie crust (store-bought is fine)
- ½ cup unsalted butter, melted and slightly cooled
- 1 ½ cups granulated sugar
- 3 large eggs, at room temperature
- 3 tablespoons all-purpose flour
- 1 cup whole buttermilk, at room temperature
- 1 teaspoon vanilla extract
- ¼ teaspoon salt
- ¼ teaspoon freshly grated nutmeg, plus more for dusting
Instructions
Preheat the oven to 350°F and place the unbaked pie crust in a 9-inch pie dish. If you are using a frozen crust, let it sit on the counter while you make the filling. Prick the bottom of the crust a few times with a fork so it does not bubble up.
In a large bowl, whisk together the melted butter and sugar until smooth. Add the eggs one at a time, whisking well after each addition. Add the flour, buttermilk, vanilla, salt, and nutmeg and whisk until the mixture is completely smooth. If the butter is still warm, add a spoonful of the mixture to the eggs first to temper them before combining everything.
Pour the filling into the prepared crust. Bake for 40 to 45 minutes until the edges are set and the center still has a slight wobble when you gently shake the pan. Do not bake it until the center is fully firm. Remove the pie from the oven and let it cool completely on a wire rack, at least 2 hours. The center will set as it cools. Dust with extra nutmeg before serving.
Tips & Things That Go Wrong
The custard can separate if the eggs are cold or the butter is too hot. Let both come to room temperature and temper the eggs slowly. The top can crack if the pie cools too quickly. Let it cool on the counter, not in the refrigerator. A few cracks are normal and traditional. If the crust browns too fast, tent the edges with foil strips.
Substitutions
Use a homemade all-butter pie crust for a richer version. If you do not have buttermilk, combine 1 cup of whole milk with 1 tablespoon of lemon juice and let it sit for 5 minutes. Do not substitute low-fat buttermilk; the custard needs the fat for the right texture.
Storage & Reheating
Store the pie in the refrigerator, covered, for up to 4 days. Serve it cold or at room temperature. It is best on the first day but holds up well. Do not freeze; the custard becomes watery on thawing.
Approximate Nutrition Per Slice: 380 calories, 5g protein, 48g carbs, 18g fat, 1g fiber
Pull the pie out while the center still wobbles. It sets as it cools. If you wait until it looks done in the oven, the custard will be overcooked and rubbery.
2. Southern Banana Pudding From Scratch
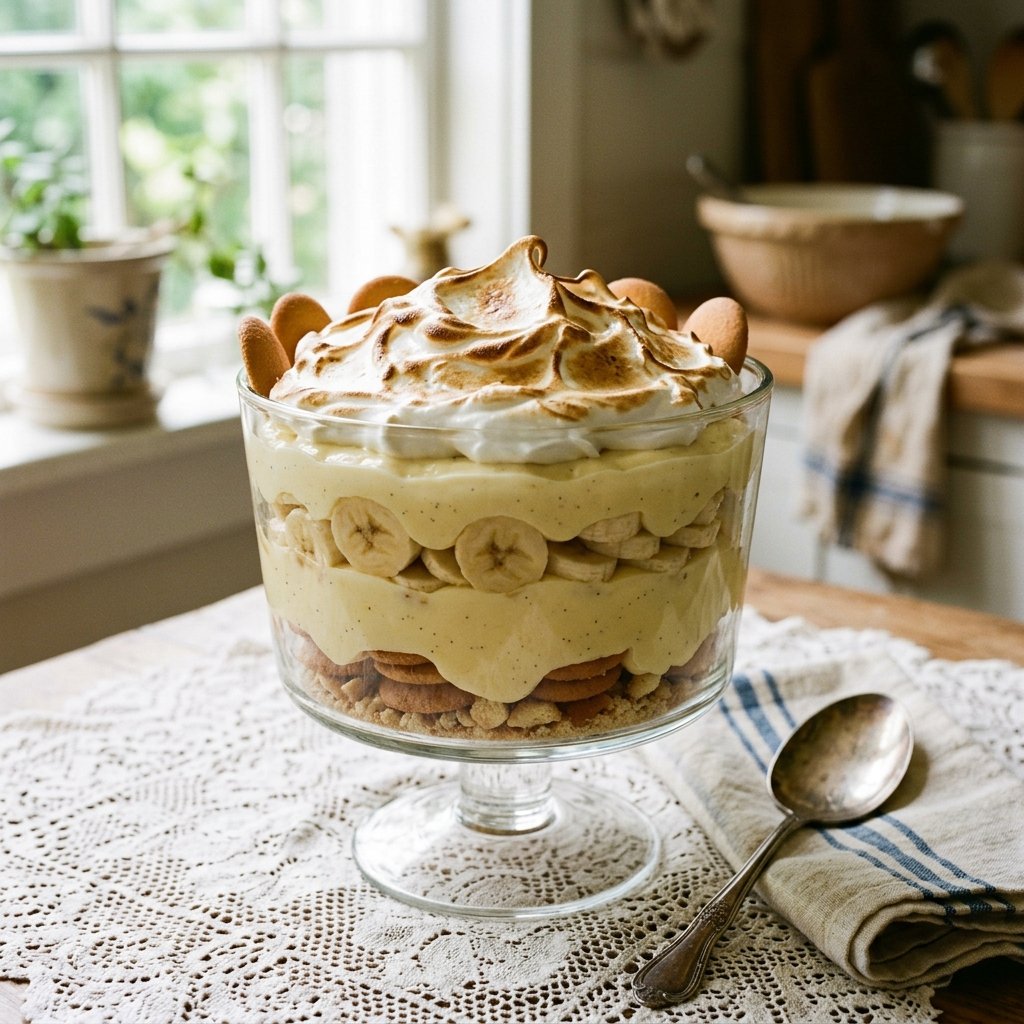
This is the banana pudding that shows up at every Southern family reunion, church supper, and Sunday dinner. The boxed pudding mix version is fine in a pinch, but it is not the same thing. The real version starts with a homemade custard cooked on the stovetop, layered with vanilla wafers and fresh bananas, and topped with a meringue that gets browned under the broiler. It is a labor of love, but it is the kind of dessert that people remember for years.
The trick is patience with the custard. If you turn the heat up too high or walk away, the eggs will scramble and you will be starting over. Cook it low and slow, stirring constantly with a whisk, and wait for it to thicken enough to coat the back of a spoon. That moment is the whole recipe.
One thing most recipe cards leave out is that the bananas should be sliced just before layering. Sliced bananas sitting out for even twenty minutes begin to brown and turn mushy, and they give the pudding a slightly fermented flavor. Slice them fresh, layer them, and get the pudding into the refrigerator quickly.
Prep: 20 minutes Cook: 20 minutes Total: 40 minutes plus chilling Serves: 10 Difficulty: Medium
Ingredients
- 2 cups whole milk
- ½ cup granulated sugar
- ¼ cup cornstarch
- ¼ teaspoon salt
- 4 large egg yolks
- 2 tablespoons unsalted butter
- 2 teaspoons vanilla extract
- 1 box vanilla wafer cookies (about 12 ounces)
- 5 to 6 ripe bananas, sliced
- For the meringue: 4 large egg whites, ½ cup granulated sugar, ¼ teaspoon cream of tartar
Instructions
In a medium saucepan, whisk together the milk, sugar, cornstarch, and salt. Cook over medium heat, whisking constantly, until the mixture thickens enough to coat the back of a spoon, about 8 to 10 minutes. It should be thick and glossy but still pourable.
In a small bowl, whisk the egg yolks. Slowly pour about ½ cup of the hot milk mixture into the yolks, whisking constantly, to temper them. Pour the tempered yolks back into the saucepan and cook for 2 more minutes, whisking constantly, until the custard is thick and smooth. Remove from heat and stir in the butter and vanilla. Let the custard cool for 10 minutes, stirring occasionally to prevent a skin from forming.
In a 9×13-inch baking dish or a large trifle dish, layer half of the vanilla wafers, then half of the sliced bananas, then half of the custard. Repeat with the remaining wafers, bananas, and custard.
To make the meringue, beat the egg whites and cream of tartar in a clean bowl until soft peaks form. Gradually add the sugar and beat until stiff, glossy peaks form. Spread the meringue over the top of the pudding, sealing the edges all the way to the dish. Broil for 1 to 2 minutes until the peaks are golden brown, watching closely. Refrigerate for at least 4 hours before serving.
Tips & Things That Go Wrong
The custard can scramble if the heat is too high. Keep it on medium and whisk constantly. The meringue can weep if the pudding is not fully cooled before topping. Let the pudding cool completely before adding the meringue. The bananas can brown if the pudding sits too long. It is best eaten within 2 days. The meringue can burn under the broiler in seconds. Stay by the oven the whole time.
Substitutions
Use homemade whipped cream instead of meringue if you prefer. Add 1 cup of sweetened whipped cream on top of the chilled pudding instead. Use gluten-free vanilla wafers for a gluten-free version. Use 1 teaspoon of banana extract along with the vanilla for a stronger banana flavor.
Storage & Reheating
Store covered in the refrigerator for up to 3 days. The wafers soften over time, which is traditional and expected. Serve cold. Do not freeze.
Approximate Nutrition Per Serving: 400 calories, 6g protein, 62g carbs, 15g fat, 2g fiber
Cook the custard low and slow and never walk away. The moment it thickens enough to coat the back of a spoon is the whole recipe.
3. Appalachian Jam Cake With Caramel Icing
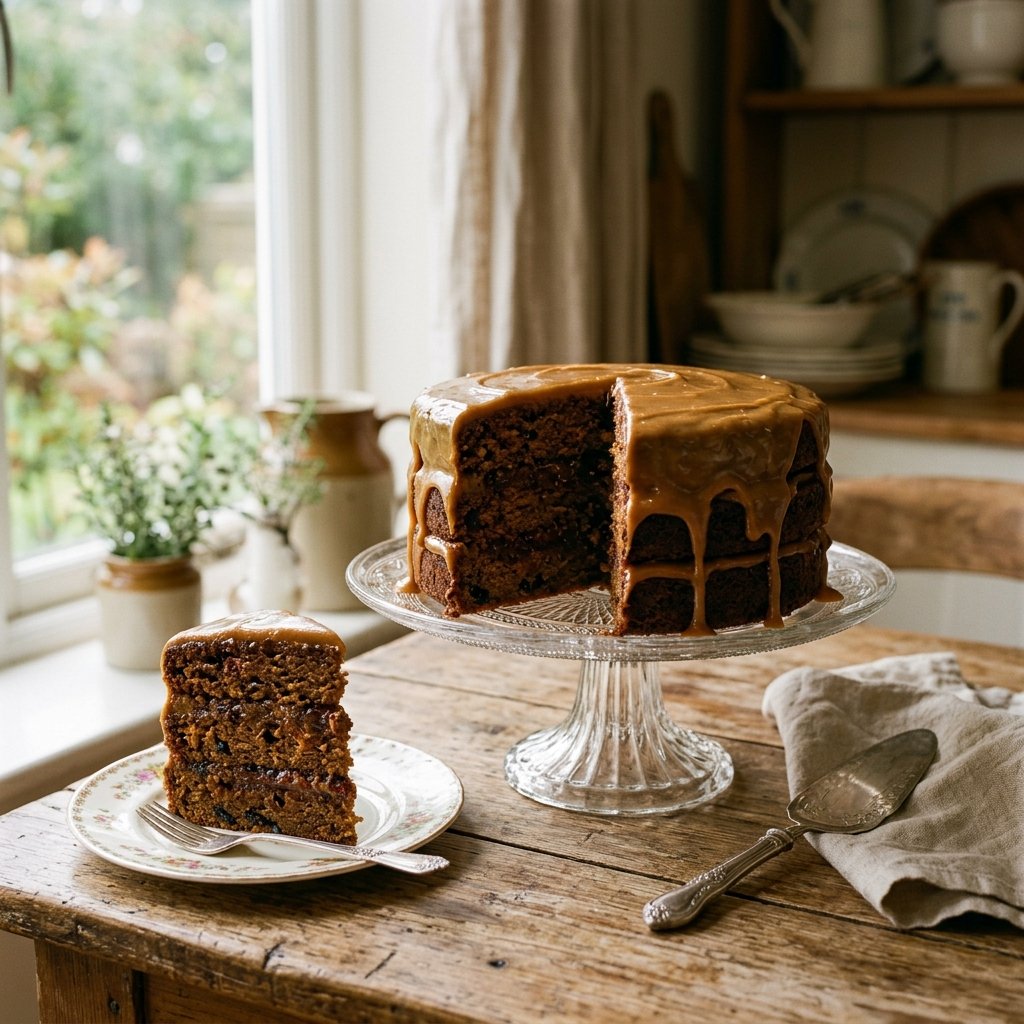
Jam cake is the cake that shows up at every Appalachian family gathering worth remembering. It is a spice cake made with fruit preserves and a little bit of buttermilk, layered together with caramel icing. The flavor is deep and old-fashioned, the kind of thing that tastes like it belongs to a hundred years ago. It is also the kind of cake that Dolly Parton herself has talked about loving, since it was the style of cake baked in her part of Tennessee.
Here is the part I would not skip. The caramel icing is not the easy kind you pour over cinnamon rolls. It is a cooked icing made with brown sugar and evaporated milk, and it needs to be beaten until it thickens enough to spread. If you stop beating too early, it runs off the cake. If you beat it too long, it sets up hard and turns crumbly. The sweet spot is somewhere in the middle, and you will know it when the icing starts to lose its shine and hold soft peaks.
One thing most recipe cards leave out is that this cake tastes better on the second day. The spice and the jam meld, the caramel softens into the layers, and the whole thing becomes richer. If you can, bake it the night before you plan to serve it.
Prep: 30 minutes Cook: 30 minutes Total: 60 minutes plus cooling Serves: 12 Difficulty: Medium to advanced
Ingredients
For the cake:
- 1 cup unsalted butter, softened
- 2 cups granulated sugar
- 4 large eggs, at room temperature
- 1 cup seedless blackberry or raspberry jam
- 3 cups all-purpose flour
- 1 teaspoon baking soda
- 1 teaspoon baking powder
- 1 teaspoon cinnamon
- ½ teaspoon ground cloves
- ½ teaspoon ground nutmeg
- ½ teaspoon salt
- 1 cup whole buttermilk
- 1 teaspoon vanilla extract
For the caramel icing:
- ½ cup unsalted butter
- 1 cup packed brown sugar
- ½ cup evaporated milk
- ¼ teaspoon salt
- 2 ½ cups powdered sugar, sifted
- 1 teaspoon vanilla extract
Instructions
Preheat the oven to 350°F. Grease three 9-inch round cake pans and line the bottoms with parchment paper.
In a large bowl, cream the butter and sugar together for 3 to 4 minutes until light and fluffy. Add the eggs one at a time, beating well after each addition. Beat in the jam until fully combined. In a separate bowl, whisk together the flour, baking soda, baking powder, cinnamon, cloves, nutmeg, and salt.
Add the dry ingredients to the wet ingredients in three additions, alternating with the buttermilk and vanilla. Beat until just combined. Divide the batter evenly between the three prepared pans. Bake for 28 to 32 minutes until a toothpick inserted into the center comes out clean. Let the cakes cool in the pans for 10 minutes, then turn them out onto a wire rack to cool completely.
To make the icing, melt the butter in a medium saucepan over medium heat. Add the brown sugar, evaporated milk, and salt. Bring to a boil and cook for 2 minutes, stirring constantly. Remove from heat and let it cool for 5 minutes. Whisk in the powdered sugar and vanilla until smooth. Beat the icing with a hand mixer for 3 to 5 minutes until it thickens and holds soft peaks. It will lose a little shine during beating. Spread the icing between the cake layers and over the top and sides. Work quickly; the icing sets fast.
Tips & Things That Go Wrong
The icing can set too hard if it is beaten too long or overcooked on the stove. Beat it only until it holds soft peaks, then spread it immediately. The cake can be dry if overbaked. Pull it at 28 minutes and check with a toothpick. The jam can cause the cake to brown too fast. Tent the pans loosely with foil if the tops are getting dark. The caramel icing can seize if the pan is too hot when the powdered sugar is added. Let the cooked mixture cool for a full 5 minutes before whisking in the sugar.
Substitutions
Use fig preserves or apple butter in place of the jam. Use a cream cheese frosting if you prefer, but the caramel icing is traditional and worth the effort. For a gluten-free version, use a 1-to-1 gluten-free flour blend.
Storage & Reheating
Store covered at room temperature for up to 3 days. The flavor improves on the second day. Refrigerate for up to 5 days, but bring to room temperature before serving so the icing softens. The cake layers freeze well for up to 2 months; wrap them tightly in plastic wrap and foil. Do not freeze the iced cake.
Approximate Nutrition Per Slice: 620 calories, 5g protein, 100g carbs, 22g fat, 1g fiber
Beat the caramel icing only until it holds soft peaks and loses a little shine. Beat it too long and it sets hard and crumbly.
4. Old-Fashioned Coconut Cake
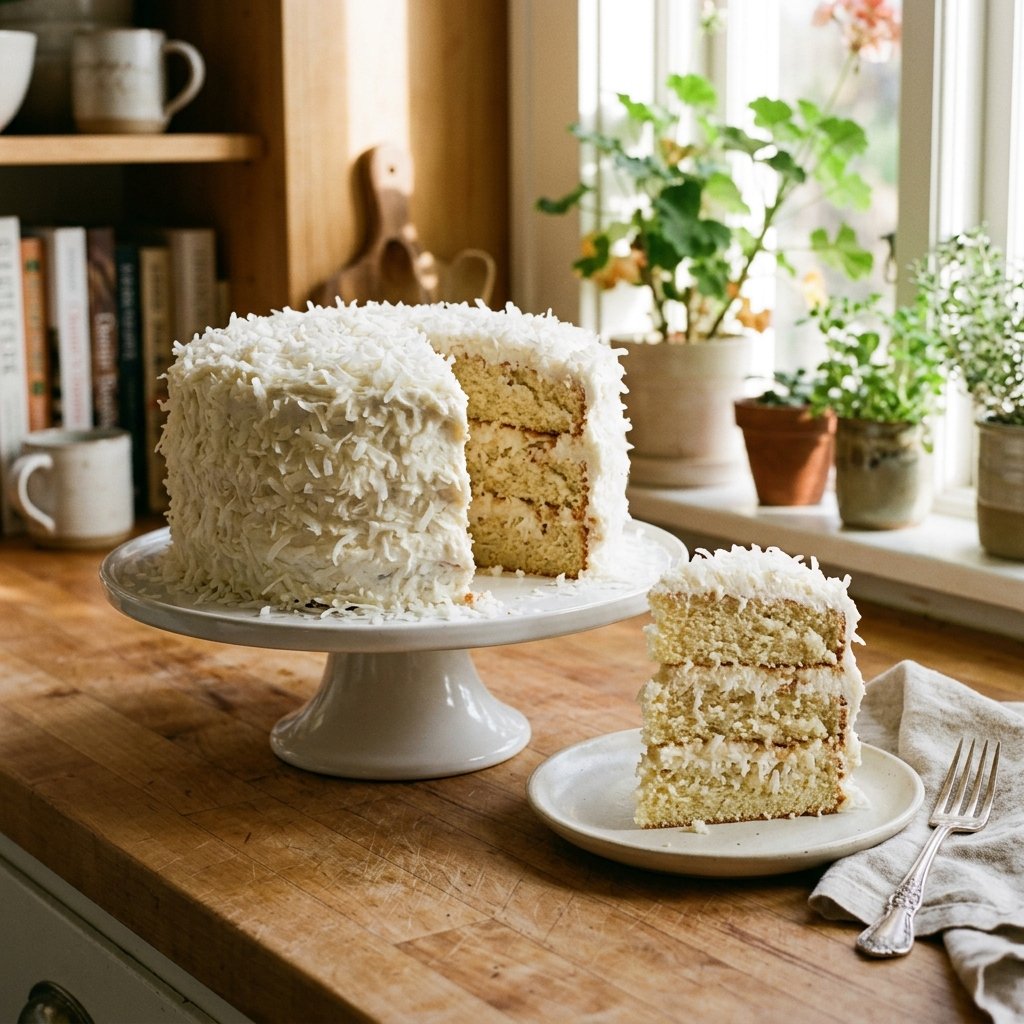
Coconut cake is the cake that shows up at Easter dinners, birthdays, and Sunday afternoon gatherings all across the South. It is a showpiece, the kind of cake that gets photographed before it gets eaten. The layers are light and tender, the frosting is soft and not too sweet, and the shredded coconut on the outside gives the whole thing a snowball look.
The trick is to use unsweetened shredded coconut, not the sweetened kind. Sweetened coconut is wet and heavy, and it makes the frosting soggy within an hour. Unsweetened coconut is drier and lighter, and it stays crisp on the outside of the cake for hours.
One thing most recipe cards leave out is that the frosting should be a seven-minute or Swiss meringue style, not a buttercream. The fluffy, marshmallow-like texture is what makes coconut cake taste like coconut cake. A heavy buttercream weighs down the cake and makes it feel more like a bakery cake than a home-baked one.
Prep: 30 minutes Cook: 30 minutes Total: 60 minutes plus cooling Serves: 12 Difficulty: Medium
Ingredients
For the cake:
- 1 cup unsalted butter, softened
- 2 cups granulated sugar
- 4 large eggs, at room temperature
- 1 teaspoon vanilla extract
- 1 teaspoon coconut extract
- 3 cups cake flour
- 1 tablespoon baking powder
- ½ teaspoon salt
- 1 cup whole milk
- 4 large egg whites, for the cake
For the frosting and assembly:
- 4 large egg whites
- 1 ½ cups granulated sugar
- ½ teaspoon cream of tartar
- ¼ teaspoon salt
- 1 teaspoon vanilla extract
- 2 cups unsweetened shredded coconut, for coating
Instructions
Preheat the oven to 350°F. Grease three 9-inch round cake pans and line the bottoms with parchment paper. In a large bowl, cream the butter and sugar for 3 to 4 minutes until light and fluffy. Add the eggs one at a time, beating well after each addition. Add the vanilla and coconut extracts.
In a separate bowl, whisk together the cake flour, baking powder, and salt. Add the dry ingredients to the wet ingredients in three additions, alternating with the milk. In a clean bowl, beat the 4 egg whites until stiff peaks form. Gently fold them into the batter in three additions, being careful not to deflate. Divide the batter evenly between the prepared pans.
Bake for 25 to 30 minutes until a toothpick inserted into the center comes out clean. Let the cakes cool in the pans for 10 minutes, then turn them out onto a wire rack to cool completely.
To make the frosting, combine the egg whites, sugar, cream of tartar, and salt in a heatproof bowl set over a pot of simmering water. Whisk constantly until the sugar is dissolved and the mixture is warm to the touch, about 3 to 4 minutes. Remove from heat and beat with a hand mixer on high for 6 to 8 minutes until stiff, glossy peaks form. Beat in the vanilla.
Place the first cake layer on a serving plate and spread a thick layer of frosting on top. Repeat with the second and third layers. Frost the top and sides of the cake with the remaining frosting. Press the unsweetened shredded coconut onto the top and sides of the cake, covering it completely. Let the cake set for at least 30 minutes before slicing.
Tips & Things That Go Wrong
The cake can be dry if the egg whites are overfolded or the cake is overbaked. Fold gently and check at 25 minutes. The frosting can weep if the sugar is not fully dissolved before beating. Whisk over the water bath until it is completely smooth and warm. The coconut can make the frosting soggy if sweetened coconut is used. Use unsweetened only. The frosting can be difficult to spread if it sets too fast. Work quickly and use a wet offset spatula if needed.
Substitutions
Use a cream cheese frosting if you prefer a tangier cake. Use all-purpose flour instead of cake flour, but the crumb will be slightly denser. Toast the shredded coconut in a 350°F oven for 5 minutes for a deeper flavor and a warmer color.
Storage & Reheating
Store the cake covered at room temperature for up to 2 days. Refrigerate for up to 5 days, but bring to room temperature before serving so the frosting softens. The cake layers freeze well for up to 2 months; wrap tightly and thaw at room temperature. Do not freeze the frosted cake.
Approximate Nutrition Per Slice: 560 calories, 8g protein, 78g carbs, 24g fat, 3g fiber
Use unsweetened shredded coconut, not the sweetened kind. Sweetened coconut is wet and heavy, and it makes the frosting soggy within an hour.
5. Old-Fashioned Peach Cobbler in a Skillet
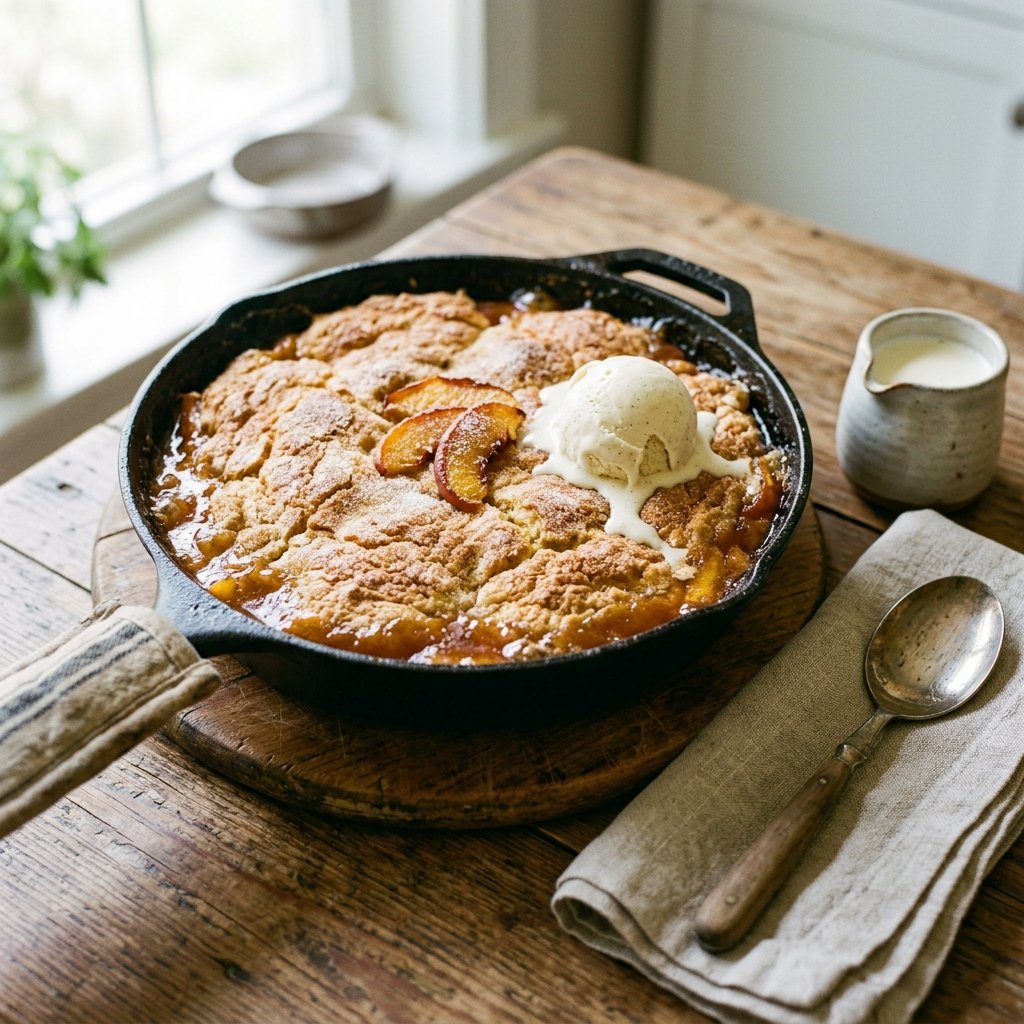
Peach cobbler is the dessert that tastes like summer in the South. The peaches soften into a sweet, syrupy filling, and the topping is a soft, buttery biscuit that soaks up the juices from the fruit. It is simple, rustic, and completely unpretentious. It is also the kind of dessert that you can make with frozen or canned peaches in the middle of winter without anyone complaining.
Here is the part I would not skip. The butter goes into the skillet first and gets melted in the oven while it preheats. When the batter is poured over the hot butter, it sizzles and starts to set immediately at the edges. That is what gives the cobbler its signature golden, slightly crisp crust. If you skip this step and pour the batter into a cold pan, the cobbler will bake but it will not have the same texture.
One thing most recipe cards leave out is that the peaches need a little sugar and a little time. Toss the sliced peaches with sugar and let them sit for 15 minutes. They release their juices and create a natural syrup that makes the cobbler taste richer. Do not skip this step. It is the difference between good cobbler and cobbler people talk about for years.
Prep: 15 minutes + 15 minutes macerating Cook: 45 minutes Total: 75 minutes Serves: 8 Difficulty: Easy
Ingredients
- 6 cups sliced fresh or frozen peaches (about 6 large peaches)
- 1 cup granulated sugar, divided
- 1 teaspoon cinnamon
- ¼ teaspoon ground nutmeg
- 1 tablespoon lemon juice
- ½ cup unsalted butter
- 1 cup all-purpose flour
- 1 ½ teaspoons baking powder
- ½ teaspoon salt
- 1 cup whole milk
- 1 teaspoon vanilla extract
- Coarse sugar for sprinkling
Instructions
In a large bowl, toss the sliced peaches with ½ cup of the sugar, the cinnamon, nutmeg, and lemon juice. Let them sit for 15 minutes to release their juices.
Preheat the oven to 375°F. Place the butter in a 10-inch cast-iron skillet and put the skillet in the oven while it preheats, so the butter melts completely and the skillet gets hot.
In a separate bowl, whisk together the flour, remaining ½ cup of sugar, baking powder, and salt. Add the milk and vanilla and stir until just combined. The batter should be thin, like pancake batter.
Carefully remove the hot skillet from the oven. Pour the batter into the melted butter. Do not stir. Spoon the peaches and their juices evenly over the batter. Do not stir. Sprinkle the top with coarse sugar. Bake for 40 to 45 minutes until the topping is golden brown and the juices are bubbling around the edges. Let it rest for 10 minutes before serving with vanilla ice cream or a drizzle of cream.
Tips & Things That Go Wrong
The cobbler can be soggy in the middle if the peaches are too juicy. If using frozen peaches, thaw and drain them first, then toss with sugar. The topping can sink into the fruit if the batter is stirred. Do not stir the batter with the peaches. The butter can burn if the skillet sits too long in the preheating oven. Put the butter in the skillet just as you turn on the oven, and pull it out as soon as it is melted and sizzling.
Substitutions
Use frozen or canned peaches when fresh peaches are not in season. Drain canned peaches well. Use nectarines, plums, or a mix of berries instead of peaches. For a gluten-free version, use a 1-to-1 gluten-free flour blend.
Storage & Reheating
Store covered in the refrigerator for up to 4 days. Reheat individual portions in the microwave for 30 seconds or in the oven at 350°F for 10 minutes. The topping softens after refrigeration but the flavor is still good. The cobbler freezes well for up to 2 months; thaw overnight in the refrigerator and reheat in the oven.
Approximate Nutrition Per Serving: 380 calories, 4g protein, 58g carbs, 16g fat, 2g fiber
Pour the batter into the sizzling melted butter in the hot skillet, then spoon the peaches on top without stirring. The hot butter is what gives the cobbler its crisp, golden crust.
Frequently Asked Questions About Vintage Southern Desserts
What makes a dessert “vintage” or “old-fashioned”?
Vintage desserts are the ones that predate boxed mixes and modern shortcuts. They rely on real butter, eggs, whole milk, and slow technique. They tend to be less sweet than modern desserts, and the flavors are often simpler and more direct. Buttermilk pie, jam cake, and homemade banana pudding all fall into this category.
Can I use modern shortcuts like boxed cake mix or pudding mix?
You can, but you will not get the same result. The texture and flavor of these desserts comes from real eggs, real butter, and real custard. A boxed pudding mix will taste like a boxed pudding mix. If you want the vintage experience, do it the slow way.
Are these recipes connected to Dolly Parton personally?
They are inspired by the Appalachian and Tennessee baking traditions that shaped her part of the world. These are the kinds of desserts that show up at family reunions, church suppers, and Sunday dinners across the South, and they reflect the kind of old-fashioned baking that Dolly has talked about loving throughout her career. The recipes themselves are traditional Southern versions, not verified family recipes.
Why do vintage desserts use so much butter and sugar?
Vintage Southern baking was built around the ingredients people had on hand: butter from the family cow, sugar from the pantry, eggs from the henhouse. The proportions reflect a time when desserts were a treat, not a daily habit, and when a slice of cake was a genuine celebration. You can cut back on the sugar by 25% in most of these recipes without ruining them, but do not cut back on the butter. The fat is what gives the crumb its texture.
Can I make these desserts ahead of time?
Yes. The banana pudding needs at least 4 hours to chill, and it is best on the second day. The jam cake and the coconut cake both benefit from being made a day ahead. The buttermilk pie can be made the morning of or the day before. The peach cobbler is best fresh but reheats well. These are desserts built for Sunday dinner, which means they were designed to be made ahead.
Bringing Vintage Southern Desserts Back to Your Table
The practical decision you have to make is how much time you want to spend in the kitchen. If you have 15 minutes and a half-empty pantry, the buttermilk pie is the place to start. If you have an afternoon and want something that will impress a crowd, the coconut cake or the jam cake is worth the effort. If you want something that feels like a Sunday dinner in July, the peach cobbler is the one.
If I had to point you to a single recipe to try first, it would be the buttermilk pie. It costs almost nothing, takes ten minutes to assemble, and tastes like something that took all day. It is the dessert that surprises people the most, and it is the one that will make you wonder why you did not start baking this way sooner.
Vintage Southern desserts are not a trend or a nostalgia trip. They are a way of cooking that has been quietly passed down for generations, and it still works. These recipes will not impress anyone on Instagram, but they will disappear off the plate before the coffee gets cold.