
The 5 p.m. question that never gets easier. What’s for dinner? The boxed pasta that fills a plate but not a person. The chicken breast that gets cooked the same tired way for the fourth time this week. There is a version of dinner that feels like a warm kitchen, a full table, and a meal that actually sticks to your ribs, and it does not require a culinary degree or a trip to a specialty store.
Southern cooking gets a reputation for being complicated, heavy, or somehow inaccessible to the home cook. That could not be further from the truth. The best Southern dinners are built on pantry staples, cheap cuts of meat, and patient cooking that rewards you with flavor. The problem is that most recipe cards either water the dishes down or turn them into a production. They skip the part where the gravy breaks, the dumplings turn gummy, or the beans need an extra hour. They tell you it is easy and then leave you wondering why your dinner did not turn out.
These six dinners are the real thing. They come from the kind of cooking that happens in kitchens across Tennessee and the wider South, where dinner is a verb, a gathering, and a reason to sit down together. Some of them take an afternoon. Some of them are done in 40 minutes. Every one of them has a reason to exist beyond being another recipe. They solve real problems for real cooks, and they taste like home.
1. Cast Iron Skillet Chicken and Dumplings
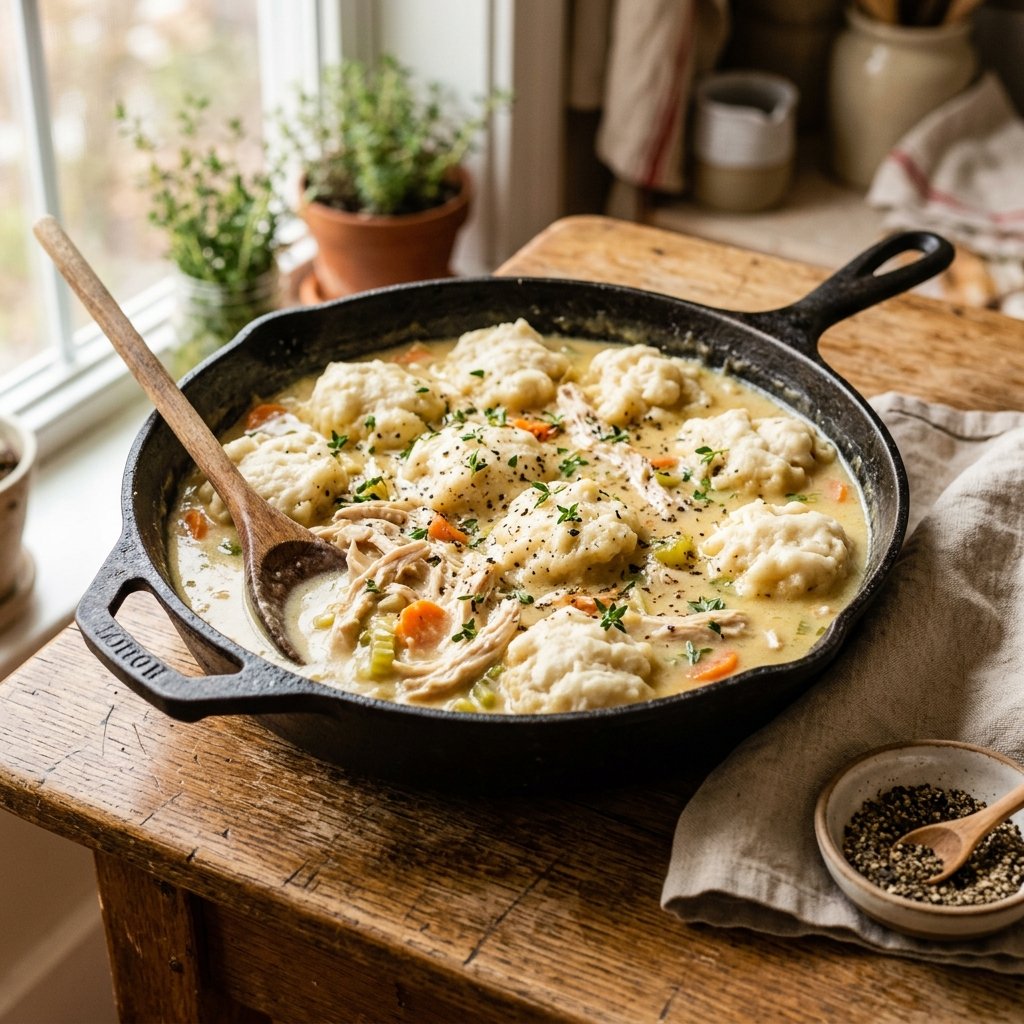
This is the dish that made me fall in love with Southern cooking. Chicken and dumplings is a Sunday dinner in a skillet, and the smell that fills the kitchen while it simmers is worth the time it takes. The dumplings are dropped, not rolled. They come out pillowy and soft, soaking up the broth without dissolving into it. The chicken shreds into the sauce and the whole thing comes together like a warm blanket on a plate.
Here is the part I would not skip. The broth has to be at a gentle simmer, not a rolling boil, when the dumplings go in. A hard boil will knock the dumplings around, break them apart, and turn the broth cloudy and thin. Keep the heat low and let them cook slowly. They will puff up and float, and that is when you know they are done.
One thing most recipe cards leave out is that the dumpling dough should be handled as little as possible. Overworked dough turns tough and gummy, and no amount of broth can fix that. Stir it together until it just comes together, then stop.
Prep: 15 minutes Cook: 45 minutes Total: 60 minutes Serves: 6 Difficulty: Medium
Ingredients
- 2 pounds bone-in, skin-on chicken thighs
- 2 tablespoons butter
- 1 large onion, diced
- 3 celery stalks, diced
- 3 carrots, peeled and sliced
- 3 cloves garlic, minced
- 6 cups chicken broth
- 1 cup whole milk
- 2 tablespoons all-purpose flour
- 1 teaspoon salt
- 1 teaspoon black pepper
- 1 teaspoon dried thyme
- For the dumplings: 2 cups all-purpose flour, 1 tablespoon baking powder, 1 teaspoon salt, 1 cup whole milk, 3 tablespoons melted butter
Instructions
Melt the butter in a large cast-iron skillet or Dutch oven over medium-high heat. Season the chicken thighs with salt and pepper and place them skin-side down in the pan. Cook for 5 to 6 minutes per side until the skin is deeply golden and the chicken is browned. Remove the chicken to a plate. It will not be cooked through yet, and that is fine. It finishes in the broth.
Add the onion, celery, and carrots to the pan and cook for 5 to 6 minutes until they start to soften and the onion turns translucent. Add the garlic and cook for 30 seconds until fragrant. Sprinkle the flour over the vegetables and stir for 1 minute to coat everything and cook out the raw flour taste. Slowly pour in the chicken broth, stirring constantly to prevent lumps. Add the milk, salt, pepper, and thyme. Return the chicken to the pan, cover, and simmer gently for 20 minutes.
While the chicken simmers, make the dumpling dough. Whisk the flour, baking powder, and salt together in a medium bowl. Add the milk and melted butter and stir just until the dough comes together. It should be soft and slightly sticky, not smooth and elastic. Do not overmix.
Remove the chicken from the skillet and shred it, discarding the bones and skin. Return the shredded chicken to the skillet. Using two spoons, drop the dumpling dough into the simmering broth in roughly 2-tablespoon portions. Do not stir. Cover the skillet and simmer gently for 12 to 15 minutes without lifting the lid. The dumplings are done when they have puffed up and a toothpick inserted into the center comes out clean. Serve hot.
Tips & Things That Go Wrong
The dumplings will fall apart if the broth is boiling. Keep the heat at a gentle simmer. If the broth looks too thin after the dumplings go in, remove the lid for the last 5 minutes to let some liquid evaporate. If it looks too thick, add a splash more broth. Do not stir the dumplings once they are in the pot. Stirring breaks them apart and turns the whole dish into a cloudy mess.
Substitutions
Use chicken breasts instead of thighs, but reduce the simmering time to 12 minutes so they do not dry out. Use frozen mixed vegetables in place of the fresh onion, celery, and carrots if you are short on time. Frozen peas added in the last 5 minutes are a nice addition.
Storage & Reheating
This keeps in the refrigerator for 3 days. The dumplings will soften and absorb more of the broth overnight, so reheat gently on the stovetop with a splash of broth or milk to loosen it up. The microwave works in a pinch but makes the dumplings a little dense. Freezing is not recommended, as the dumplings break down on thawing.
Approximate Nutrition Per Serving: 520 calories, 32g protein, 42g carbs, 24g fat, 4g fiber
Keep the broth at a gentle simmer, not a boil, when you add the dumplings. A hard boil breaks them apart and turns the broth cloudy and thin.
2. Slow Cooker Pinto Beans With Ham Hocks
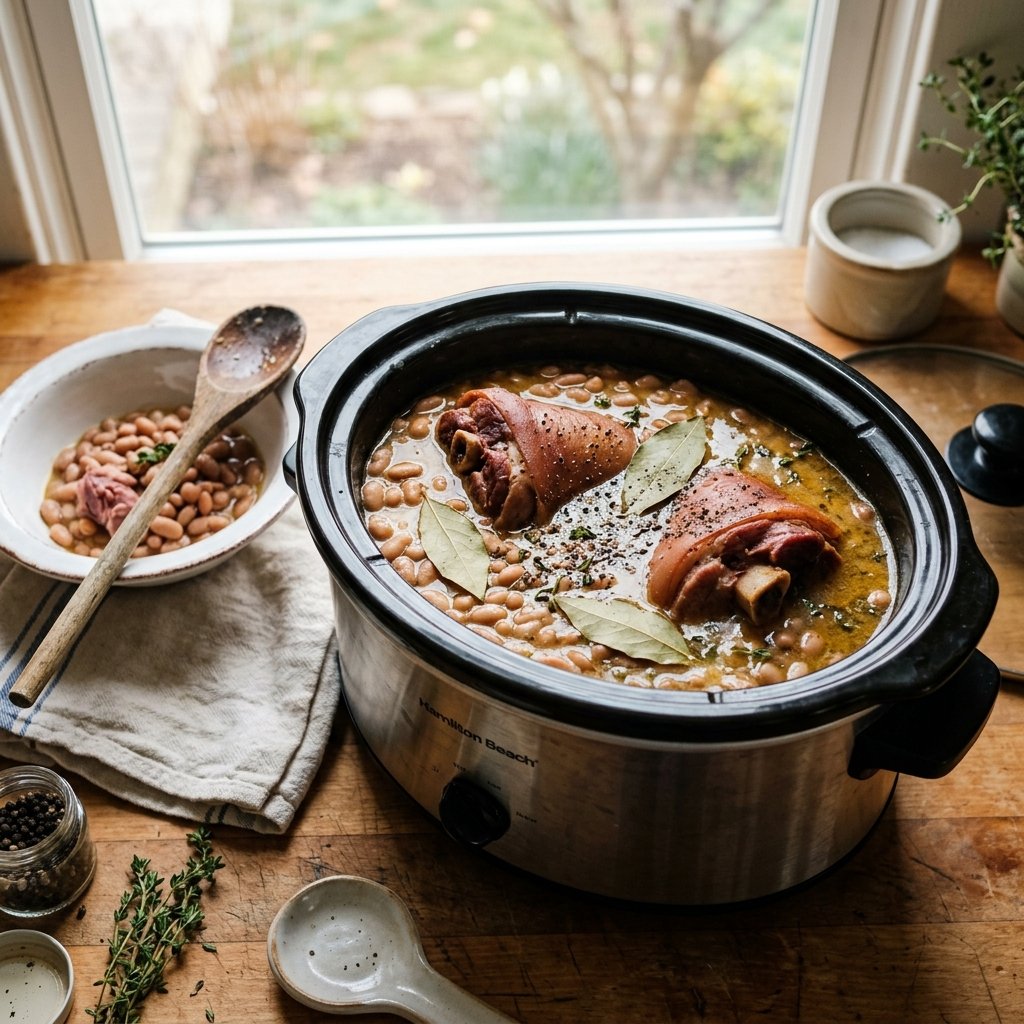
This is the kind of dinner that costs almost nothing and feeds a small army. A bag of dried pinto beans, a couple of ham hocks, and a handful of pantry spices turn into a pot of creamy, savory beans that you can eat over rice, with cornbread, or straight out of a bowl. It is the definition of stick-to-your-ribs cooking.
The version that actually works in a real kitchen is the one that does not rush. The beans need time to soften and absorb the smoky flavor from the ham hocks. I have tried the quick-soak method and the pressure cooker shortcut, and neither gives the same depth. The slow cooker is the move here. You load it in the morning and come home to dinner.
This is where the flavor changes. The ham hocks break down over the long cook, releasing gelatin and smoke into the broth. That is what gives the beans their silky body. Do not remove the ham hocks until the very end. Pull the meat off the bones, chop it, and stir it back into the beans.
Prep: 15 minutes + overnight soak Cook: 8 hours Total: 8 hours 15 minutes + soaking Serves: 8 Difficulty: Very easy
Ingredients
- 1 pound dried pinto beans
- 2 smoked ham hocks (about 1 pound total)
- 1 large onion, diced
- 4 cloves garlic, smashed
- 2 bay leaves
- 1 teaspoon dried oregano
- 1 teaspoon smoked paprika
- 1 teaspoon black pepper
- 6 cups water or unsalted chicken broth
- Salt to taste (added at the end)
Instructions
Sort through the dried beans and remove any small stones or shriveled beans. Rinse them in a colander under cold water. Place the beans in a large bowl, cover with at least 2 inches of cold water, and let them soak overnight. In the morning, drain and rinse them again.
Add the soaked beans, ham hocks, onion, garlic, bay leaves, oregano, smoked paprika, and black pepper to the slow cooker. Pour in the water or broth. The liquid should cover the beans by about 1 inch. Cover and cook on low for 8 hours.
After 8 hours, remove the ham hocks with tongs and set them on a cutting board to cool slightly. Pull the meat off the bones, chop it into bite-sized pieces, and stir it back into the beans. Discard the bones, skin, and bay leaves. Taste the beans and add salt as needed. Ham hocks are salty, so wait until the end to season. Serve over rice or with a wedge of cornbread.
Tips & Things That Go Wrong
The beans can turn out mushy if they cook too long. Check them at 7 hours if your slow cooker runs hot. The ham hocks can make the whole pot too salty if you add salt too early. Wait until the end to taste and season. If the beans are still firm after 8 hours, they are likely old. Older dried beans take longer to soften. Keep cooking in 30-minute increments until they are tender.
Substitutions
Use Great Northern beans or cannellini beans in place of pinto beans. If you cannot find ham hocks, use a smoked turkey leg or 6 slices of thick-cut bacon. For a vegetarian version, skip the meat and add 2 tablespoons of smoked paprika and 1 teaspoon of liquid smoke.
Storage & Reheating
These beans keep in the refrigerator for 5 days. The flavor gets better on day two. Reheat on the stovetop or in the microwave with a splash of water to loosen the broth. They freeze well for up to 3 months. Thaw overnight in the refrigerator and reheat gently.
Approximate Nutrition Per Serving: 280 calories, 18g protein, 34g carbs, 8g fat, 12g fiber
Wait until the very end to add salt. Ham hocks release a lot of salt into the broth, and seasoning early is the easiest way to ruin a pot of beans.
3. Smothered Pork Chops With Onion Gravy
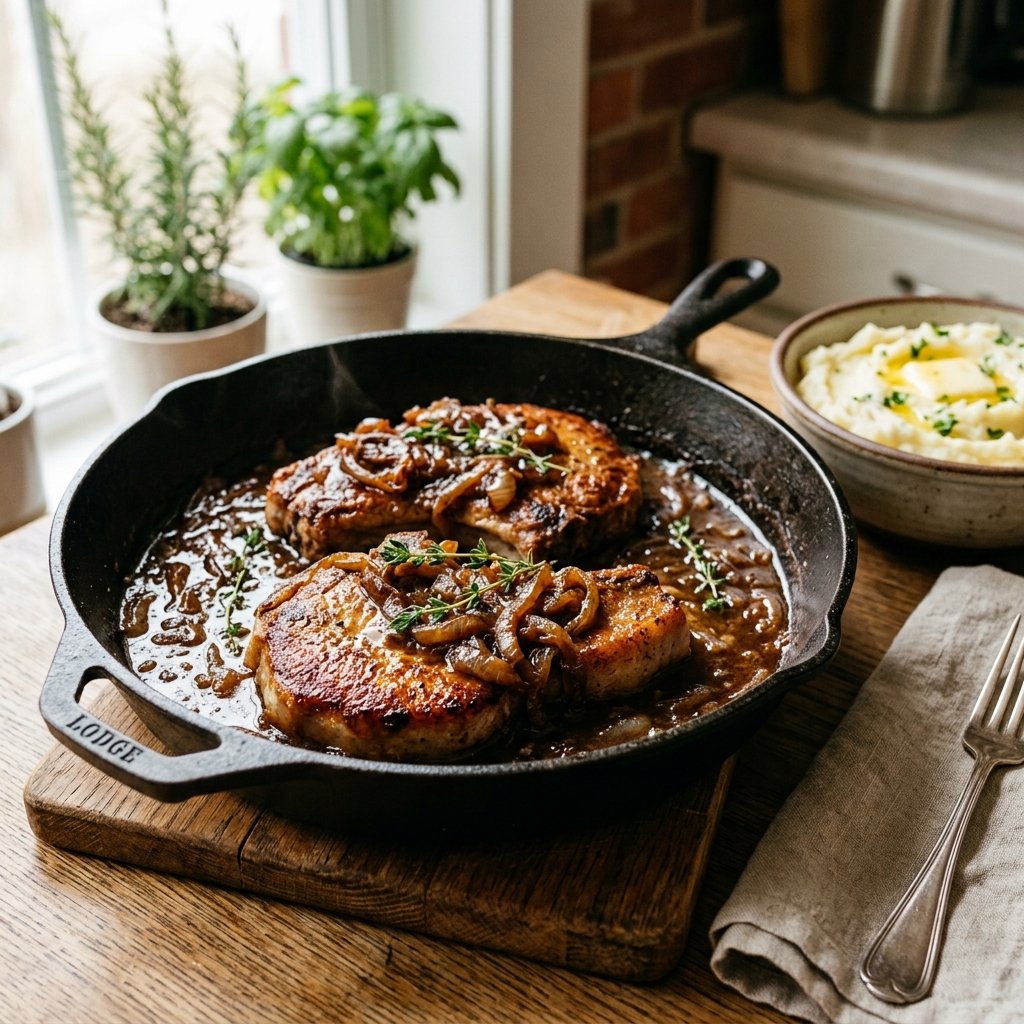
Smothered pork chops are the kind of dinner that makes a Tuesday feel like a Sunday. The pork chops are seared until deeply browned, then simmered in a rich onion gravy until they are fork-tender. The gravy is the star here. It is dark, savory, and full of slow-cooked onion flavor. Serve it over mashed potatoes or rice, and you have a meal that will not leave anyone hungry.
Here is the part I would not skip. The onions need real time. If you rush them, they stay sharp and crunchy, and the gravy never develops that deep sweetness. Give them 20 minutes over medium-low heat. Stir them often and let them get jammy and dark. That is where the flavor comes from.
One thing most recipe cards leave out is that pork chops dry out fast. The gravy helps, but the chop itself needs to be pulled at the right time. Use a meat thermometer and pull the chops at 140°F. They will carry over to 145°F while they rest. Anything beyond that and you are eating shoe leather in sauce.
Prep: 10 minutes Cook: 35 minutes Total: 45 minutes Serves: 4 Difficulty: Easy to medium
Ingredients
- 4 bone-in pork chops, about 1 inch thick
- 2 teaspoons salt
- 1 teaspoon black pepper
- 1 teaspoon garlic powder
- ½ cup all-purpose flour
- 3 tablespoons butter
- 2 large onions, thinly sliced
- 3 cloves garlic, minced
- 2 cups beef broth
- 1 cup whole milk
- 1 teaspoon dried thyme
- Fresh parsley for garnish
Instructions
Pat the pork chops dry with paper towels and season both sides with salt, pepper, and garlic powder. Place the flour in a shallow dish and dredge each chop, shaking off the excess. Reserve 2 tablespoons of the flour for the gravy.
Melt 2 tablespoons of butter in a large skillet over medium-high heat. Sear the pork chops for 3 to 4 minutes per side until deeply golden brown. They will not be cooked through yet. Remove them to a plate and set aside.
Reduce the heat to medium and add the remaining butter to the skillet. Add the onions and cook for 18 to 20 minutes, stirring often, until they are soft, jammy, and deep golden brown. Add the garlic and cook for 30 seconds. Sprinkle the reserved flour over the onions and stir for 1 minute. Slowly whisk in the beef broth, then the milk. Add the thyme. Bring to a simmer and cook for 3 to 4 minutes until the gravy thickens.
Return the pork chops and any resting juices to the skillet. Spoon the gravy over the top, cover, and simmer gently for 8 to 10 minutes until the chops are cooked through and reach 140°F on a meat thermometer. Garnish with parsley and serve over mashed potatoes or rice.
Tips & Things That Go Wrong
The gravy can turn lumpy if the flour is added too fast or the liquid is poured in all at once. Add the liquid in a slow, steady stream while whisking. The pork chops can dry out if they are overcooked. Pull them at 140°F and let them rest for a few minutes before serving. If the gravy is too thick, add a splash of broth. If it is too thin, simmer uncovered for a few extra minutes.
Substitutions
Use boneless pork chops if you prefer, but reduce the simmering time by 2 minutes. Use chicken broth instead of beef broth for a lighter gravy. Add a splash of heavy cream at the end for an even richer sauce.
Storage & Reheating
This keeps in the refrigerator for 3 days. Reheat gently on the stovetop with a splash of broth to loosen the gravy. The pork chops are best reheated gently so they do not toughen. Freeze the gravy separately for up to 2 months.
Approximate Nutrition Per Serving: 480 calories, 34g protein, 24g carbs, 26g fat, 2g fiber
Give the onions 20 full minutes. The deep, jammy caramelization is what makes the gravy worth eating, and there is no shortcut for it.
4. Skillet Cornbread Tamale Pie
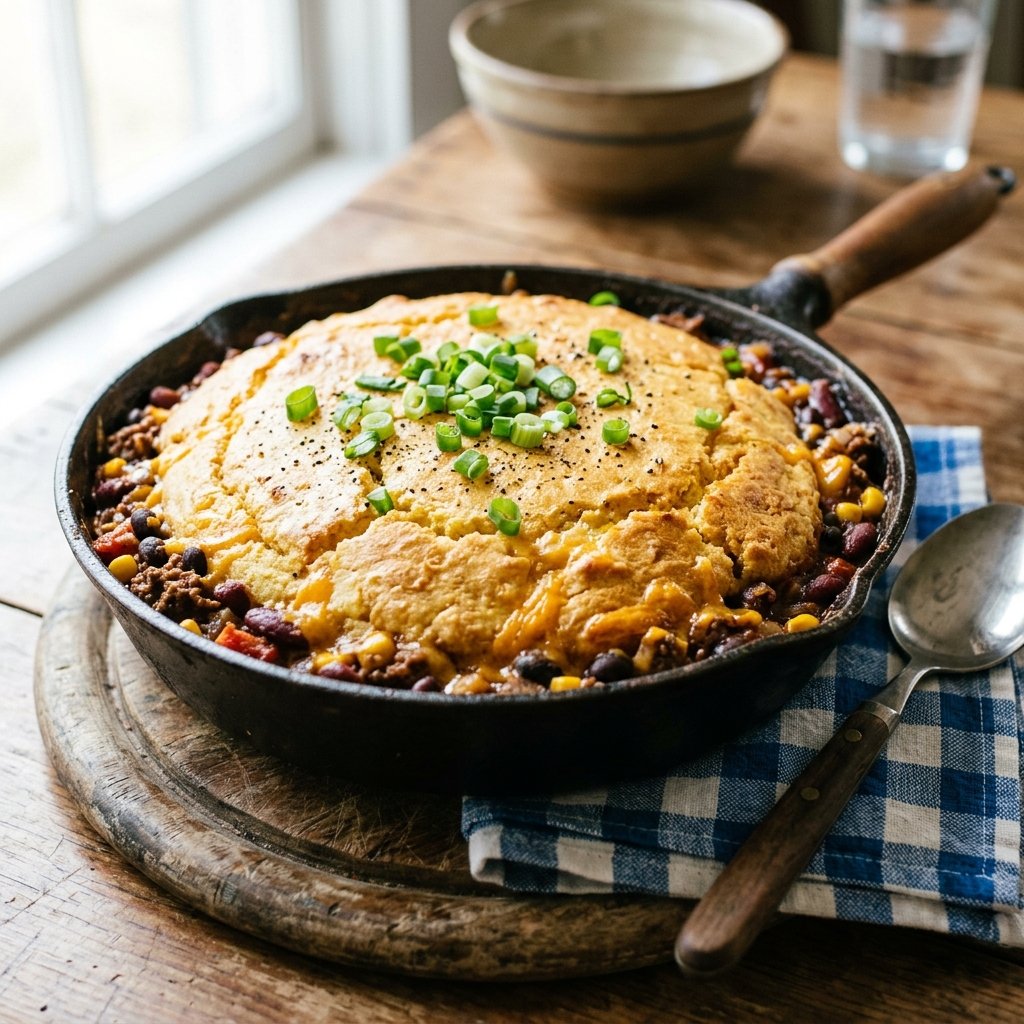
Tamale pie is one of those dishes that does not get enough credit. It is a hearty, savory filling of seasoned beef and beans, topped with a layer of cornbread and baked in a skillet until the cornbread is golden and the filling is bubbling at the edges. It is a one-pan dinner that comes together in about 40 minutes and feeds a family without breaking a sweat.
The trick is not making the filling too wet. A soupy filling will soak through the cornbread and turn the whole thing into mush. Cook the filling down until it is thick and saucy, almost like a chili. Let it cool for a few minutes before adding the cornbread batter on top.
This is where the texture changes. The cornbread should be soft and tender on the inside with a slightly crisp top. If it is dry, you baked it too long. If it is gummy, the filling was too wet. The sweet spot is a cornbread that soaks up the juices from the filling without falling apart.
Prep: 15 minutes Cook: 30 minutes Total: 45 minutes Serves: 6 Difficulty: Easy
Ingredients
- 1 ½ pounds ground beef
- 1 onion, diced
- 1 bell pepper, diced
- 3 cloves garlic, minced
- 2 tablespoons chili powder
- 1 tablespoon cumin
- 1 teaspoon smoked paprika
- 1 teaspoon salt
- 1 can diced tomatoes, drained
- 1 can black beans, drained and rinsed
- 1 cup shredded cheddar cheese
- For the cornbread: 1 cup cornmeal, 1 cup all-purpose flour, ¼ cup sugar, 1 tablespoon baking powder, 1 teaspoon salt, 1 cup whole milk, 2 large eggs, ¼ cup melted butter
Instructions
Preheat the oven to 400°F. Heat a 10-inch cast-iron skillet over medium-high heat. Add the ground beef and cook, breaking it up with a spoon, until browned and the liquid has evaporated, about 6 to 8 minutes. Add the onion and bell pepper and cook for 5 minutes until softened. Add the garlic, chili powder, cumin, paprika, and salt and cook for 1 minute until fragrant.
Add the drained tomatoes and black beans and simmer for 5 minutes until the filling is thick and saucy. Stir in the cheddar cheese until melted. Remove the skillet from the heat and let it cool for 5 minutes.
While the filling cools, whisk together the cornmeal, flour, sugar, baking powder, and salt in a large bowl. In a separate bowl, whisk the milk, eggs, and melted butter together. Pour the wet ingredients into the dry and stir just until combined. The batter should be thick but pourable.
Spoon the cornbread batter over the filling and spread it gently to the edges with a spatula. Do not stir it into the filling. Bake for 22 to 25 minutes until the cornbread is golden brown and a toothpick inserted into the center comes out clean. Let it rest for 5 minutes before serving.
Tips & Things That Go Wrong
The cornbread can sink into the filling if the filling is too wet. Cook the filling down until it is thick and saucy, and let it cool for 5 minutes before adding the batter. The cornbread can be dry if it is overbaked. Start checking at 22 minutes. Do not stir the batter into the filling. Spread it gently over the top and let it bake into a crust.
Substitutions
Use ground turkey or chicken instead of beef. Use pinto beans or kidney beans instead of black beans. For a spicier version, add a diced jalapeño with the onion and bell pepper. For a sweeter cornbread, increase the sugar to ⅓ cup.
Storage & Reheating
This keeps in the refrigerator for 3 days. Reheat individual portions in the microwave or in the oven at 350°F for 15 minutes. The cornbread softens after refrigeration. The filling freezes well for up to 2 months, but the cornbread topping is best fresh.
Approximate Nutrition Per Serving: 540 calories, 30g protein, 46g carbs, 26g fat, 7g fiber
Cook the filling down until it is thick and saucy, then let it cool for 5 minutes before adding the cornbread batter. A wet filling makes the cornbread sink and turn gummy.
5. Buttermilk Oven-Fried Chicken
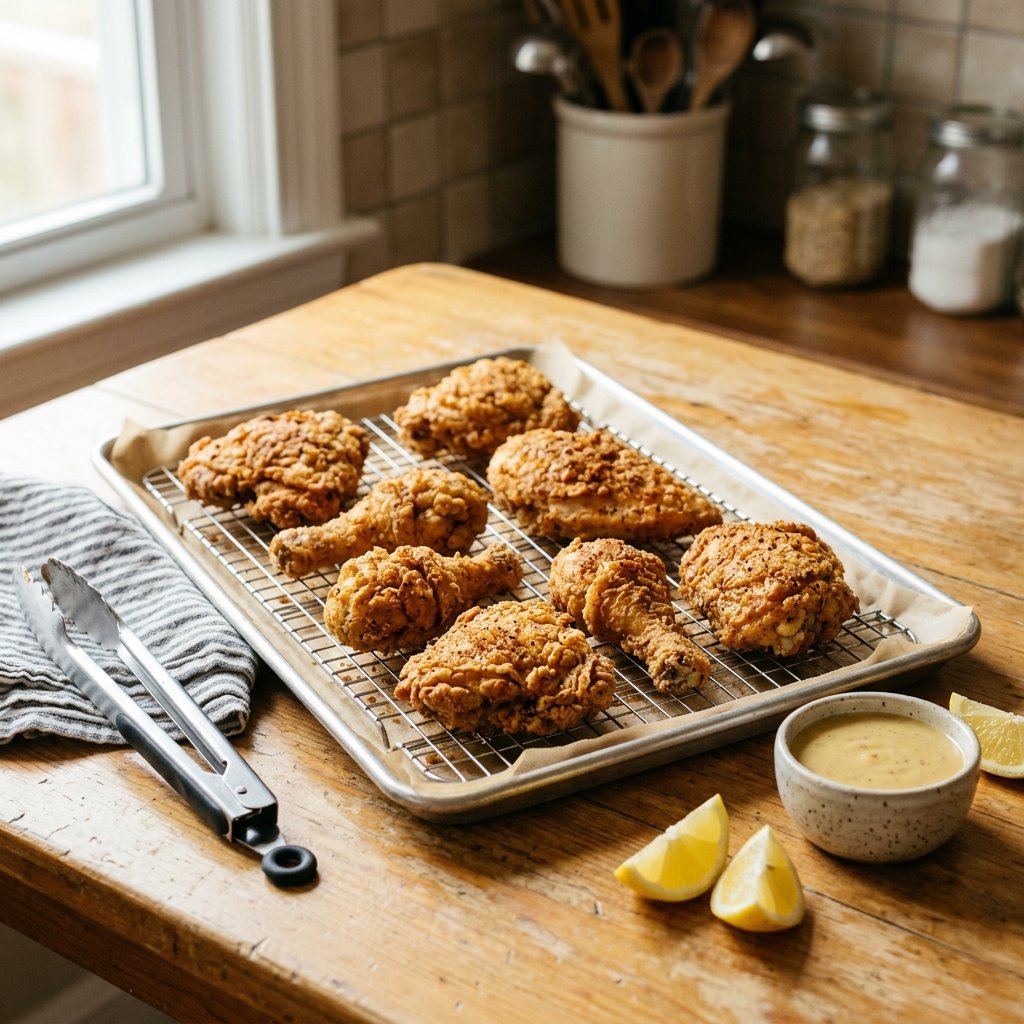
I love fried chicken, but I do not love standing over a pot of hot oil in the middle of summer. This oven-fried version gives you the same shatteringly crisp coating without the mess, the smell, or the danger of a vat of oil. The chicken is brined in buttermilk, coated in seasoned flour, and baked on a wire rack so the bottom crisps just like the top.
Here is the part I would not skip. The wire rack matters. If you bake the chicken directly on the sheet pan, the bottom will steam and the coating will stick and peel off. A wire rack lifts the chicken up and lets the hot air circulate around every side. It is the single biggest difference between soggy oven chicken and the real deal.
The buttermilk brine is also worth the time. Two hours is the minimum. Overnight is better. The acid in the buttermilk tenderizes the chicken and helps the coating stick. If you skip the brine, the coating will slide off in patches and the chicken will be less juicy. It is not a step to cut corners on.
Prep: 15 minutes + 2 hours brine Cook: 40 minutes Total: 2 hours 55 minutes Serves: 4 to 6 Difficulty: Easy
Ingredients
- 3 pounds bone-in, skin-on chicken pieces (thighs, drumsticks, breasts)
- 2 cups buttermilk
- 1 tablespoon hot sauce
- 2 cups all-purpose flour
- 2 teaspoons salt
- 2 teaspoons black pepper
- 2 teaspoons paprika
- 1 teaspoon garlic powder
- 1 teaspoon onion powder
- 1 teaspoon dried thyme
- ½ teaspoon cayenne pepper (optional)
- 3 tablespoons melted butter or olive oil spray
Instructions
In a large bowl or zip-top bag, combine the buttermilk and hot sauce. Add the chicken pieces and turn to coat. Cover and refrigerate for at least 2 hours, or overnight for the best results.
Preheat the oven to 400°F. Line a baking sheet with foil or parchment paper and set a wire rack on top. In a shallow dish, whisk together the flour, salt, pepper, paprika, garlic powder, onion powder, thyme, and cayenne if using.
Working with one piece at a time, remove the chicken from the buttermilk and let the excess drip off. Dredge it in the flour mixture, pressing firmly so the coating adheres. Place the coated chicken on the wire rack, leaving space between the pieces.
Brush the tops of the chicken with melted butter or spray lightly with olive oil. Bake for 35 to 40 minutes, turning once halfway through, until the coating is deep golden brown and the internal temperature of the thickest pieces reaches 165°F. Let rest for 5 minutes before serving.
Tips & Things That Go Wrong
The coating can fall off if the chicken is too wet when dredged. Let the excess buttermilk drip off, but do not pat the chicken dry. You want a thin layer of buttermilk to help the flour stick. The bottom of the chicken can stick to the rack if it is not sprayed. Spray the rack lightly with oil before adding the chicken. If the coating is browning too fast, tent the pan loosely with foil for the last 10 minutes.
Substitutions
Use a gluten-free flour blend for a gluten-free version. If you do not have buttermilk, combine 2 cups of whole milk with 2 tablespoons of lemon juice or vinegar and let it sit for 5 minutes. Use smoked paprika for a deeper, smokier flavor.
Storage & Reheating
This keeps in the refrigerator for 3 days. The coating loses its crunch after refrigeration. Reheat in a 375°F oven on a wire rack for 10 to 12 minutes to bring back some of the crispness. The microwave makes the coating soft and is not recommended. Leftovers are good cold or chopped into a salad.
Approximate Nutrition Per Serving: 460 calories, 38g protein, 22g carbs, 24g fat, 1g fiber
Bake the chicken on a wire rack, not directly on the sheet pan. The rack lets the hot air circulate underneath and gives you a crisp bottom, not a soggy one.
6. Creamy Shrimp and Grits
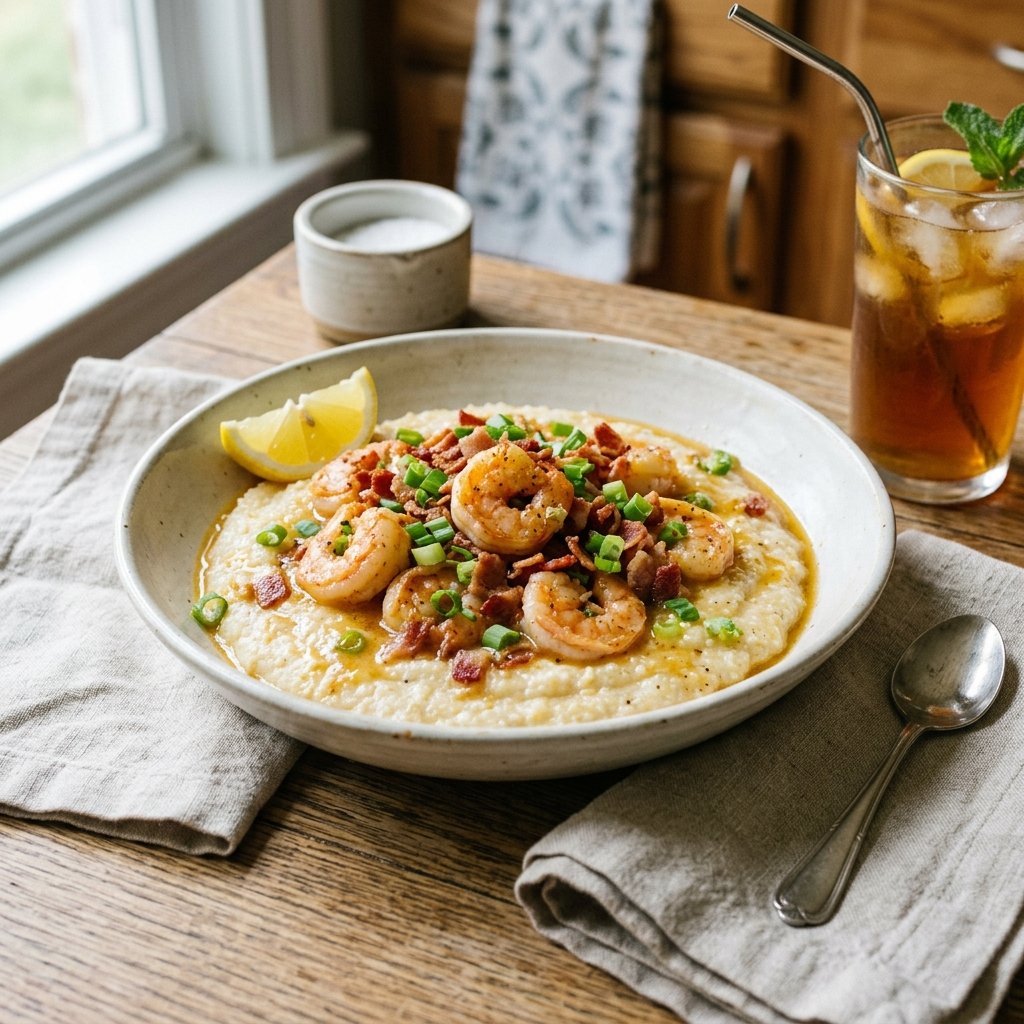
Shrimp and grits is the dish that turned me into a believer in Southern coastal cooking. It sounds fancy. It tastes like something from a restaurant. And it comes together in about 30 minutes with one skillet and one pot. The grits are creamy and rich, the shrimp are plump and garlicky, and the sauce ties everything together with a little smoke and a little tang.
One thing most recipe cards leave out is that the grits need time and attention. Instant grits are fine in a pinch, but stone-ground grits are worth the extra 10 minutes. Stir them often. If you walk away, they will stick to the bottom of the pot and burn. Stand there with a spoon and a cup of coffee, and stir.
This is where the texture changes. The shrimp cook in about 3 minutes. Any longer and they turn rubbery. Add them at the very end, toss them in the sauce until they just turn pink, and get them off the heat. The residual heat will finish the cooking.
Prep: 10 minutes Cook: 25 minutes Total: 35 minutes Serves: 4 Difficulty: Easy to medium
Ingredients
- 1 cup stone-ground grits
- 4 cups water or chicken broth
- 1 cup whole milk
- 4 tablespoons butter, divided
- 1 cup shredded sharp cheddar cheese
- 1 teaspoon salt, plus more to taste
- 4 slices bacon, chopped
- 1 pound large shrimp, peeled and deveined
- 3 cloves garlic, minced
- ¼ cup chicken broth
- 2 tablespoons fresh lemon juice
- 2 green onions, sliced
- Hot sauce to taste
Instructions
Bring the water or broth to a boil in a medium saucepan. Slowly whisk in the grits and reduce the heat to low. Cook, stirring often, for 15 to 20 minutes until the grits are thick and creamy. Stir in the milk, 2 tablespoons of butter, the cheddar cheese, and 1 teaspoon of salt. Keep warm over low heat, stirring occasionally.
While the grits cook, heat a large skillet over medium heat. Add the chopped bacon and cook for 5 to 6 minutes until crisp. Remove the bacon with a slotted spoon and set aside, leaving the rendered fat in the pan.
Add the shrimp to the skillet in a single layer. Cook for 1 to 2 minutes per side until they just turn pink. Do not overcook. Remove the shrimp to a plate. Add the garlic to the skillet and cook for 30 seconds. Pour in the chicken broth and lemon juice, scraping up the browned bits from the bottom. Simmer for 2 minutes until the sauce reduces slightly. Add the remaining 2 tablespoons of butter and whisk until the sauce is glossy.
Return the shrimp and bacon to the skillet and toss to coat. Spoon the shrimp and sauce over the grits. Garnish with green onions and a dash of hot sauce.
Tips & Things That Go Wrong
The grits can turn lumpy if they are added to the water too quickly. Whisk them in slowly and keep whisking. The shrimp can turn rubbery if they are overcooked. Cook them just until they turn pink and curl into a loose C shape. If they curl into a tight O, they are overcooked. The cheese can seize if the grits are too hot. Take the pot off the heat before stirring in the cheese.
Substitutions
Use quick grits or polenta in place of stone-ground grits. Reduce the cooking time according to the package directions. Use smoked sausage instead of bacon for a different flavor. For a dairy-free version, use plant milk and dairy-free cheese, and finish the grits with olive oil instead of butter.
Storage & Reheating
This is best eaten fresh. The grits thicken considerably after refrigeration and the shrimp toughen on reheating. If you have leftovers, store the grits and shrimp separately. Reheat the grits on the stovetop with a splash of milk or broth, stirring constantly. Reheat the shrimp gently in a skillet for 1 to 2 minutes. Do not freeze.
Approximate Nutrition Per Serving: 520 calories, 32g protein, 34g carbs, 28g fat, 3g fiber
Cook the shrimp for 1 to 2 minutes per side, just until they turn pink and curl into a loose C. A tight O means they are overcooked and rubbery.
Frequently Asked Questions About Southern Family Dinners
What makes Southern cooking different from other regional American cooking?
Southern cooking is built around a few core ideas: using inexpensive ingredients well, cooking low and slow, and layering flavor over time. Dried beans, cheap cuts of pork, cornmeal, and buttermilk all play a role. It is also deeply influenced by African, Indigenous, and European cooking traditions, and the best versions of it are generous, unfussy, and rooted in hospitality.
Can I make these dinners ahead of time?
Most of them, yes. The pinto beans and the smothered pork chops are actually better the next day. The tamale pie reheats well. The chicken and dumplings are best the day they are made, but they hold for a few days in the refrigerator. The oven-fried chicken loses its crunch after refrigeration, so it is best fresh. Shrimp and grits should be eaten immediately.
What are the essential pantry staples for Southern cooking?
All-purpose flour, cornmeal, dried beans, rice, buttermilk, butter, bacon, smoked paprika, garlic powder, onion powder, black pepper, dried thyme, and a good hot sauce. With those on hand, you can make almost anything in this article without a special trip to the store.
How do I keep my gravy from getting lumpy?
Two rules. First, whisk the flour into the fat and cook it for at least a full minute before adding any liquid. Second, add the liquid in a slow, steady stream while whisking constantly. If a few lumps do form, pour the gravy through a fine-mesh strainer and return it to the pan.
Can I lighten these recipes up without losing the flavor?
In some cases, yes. Use less butter and more olive oil where you can. Swap in low-fat milk for whole milk in the cornbread and the grits, though the texture will be a little less rich. Add extra vegetables to the tamale pie and the chicken and dumplings. But be honest with yourself: the appeal of these dishes comes from their richness. Cutting too many corners leaves you with food that satisfies no one.
Putting Southern Dinner on Your Table
The practical decision you have to make is not which recipe to try first. It is how you want to spend your time in the kitchen. If you have an afternoon, the chicken and dumplings or the pinto beans will reward you with the kind of deep, slow flavor that only comes from patience. If you have 30 minutes, the shrimp and grits or the smothered pork chops will still put something honest on the table.
If I had to point you to one recipe to start with, it would be the pinto beans. A pound of dried beans and two ham hocks cost less than a fast-food meal, and the slow cooker does almost all of the work. You come home to a pot of something that tastes like it took all day because it did. From there, move on to the tamale pie for a weeknight and the chicken and dumplings for a Sunday.
Southern cooking is not a trend or a gimmick. It is a way of feeding people well with what you have. These dinners are built on that idea, and they will stick to your ribs long after the plates are cleared.