
The morning rush is a universal problem, but the stakes feel higher when you are packing lunchboxes and trying to get a child out the door with enough energy to make it through a school day. A breakfast that looks filling can leave a kid dragging by 10:00 AM, and a breakfast that is too heavy can sit like a rock in a small stomach. The real issue is not whether breakfast gets eaten—it is whether it actually fuels the hours ahead without causing a crash or a sugar spike that leads to tears before recess.
Most breakfast advice for kids falls into two categories: sugar-coated cereal that disappears in two minutes or elaborate weekend brunch recipes that are impossible on a Tuesday. The middle ground is where real solutions live—breakfasts that come together quickly, contain enough protein and complex carbohydrates to sustain energy, and actually taste good enough that children eat them without negotiation. The recipes that circulate online often ignore the constraints of a real morning: limited time, half-awake children, and the need to clean up before the school bus arrives.
This collection solves those specific problems. Some recipes are prep-ahead and ready to grab. Some take less than ten minutes from start to plate. Some use leftovers or ingredients you already have. Every recipe here has been tested with actual children in actual kitchens, not in a studio with unlimited time. These are breakfasts that work when the clock is ticking and the energy levels are low.
1. High-Protein Cottage Cheese Breakfast Wraps
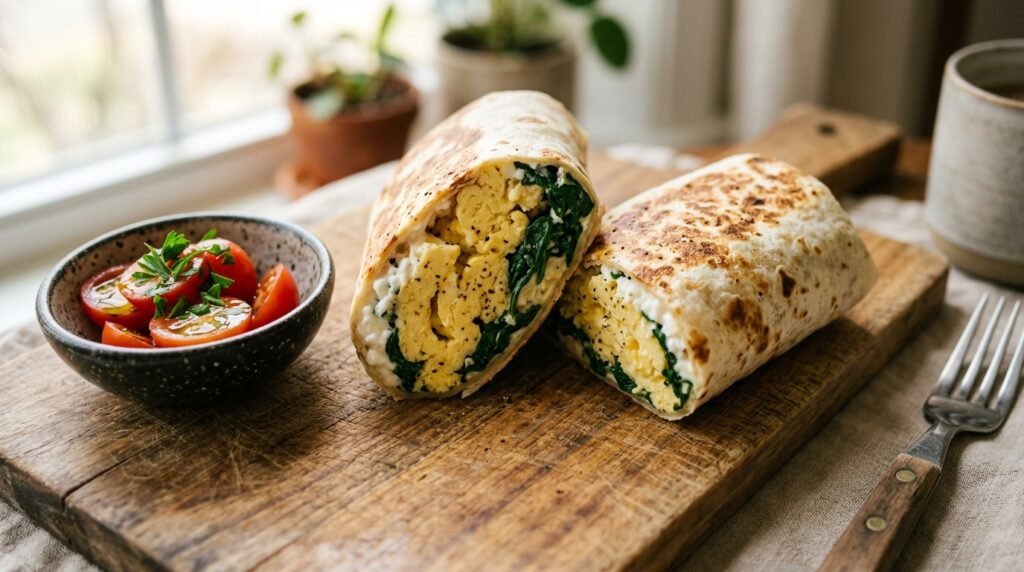
These wraps solve the problem of the breakfast that disappears too quickly. The cottage cheese adds protein without making the wrap heavy, and the scrambled eggs provide the familiar texture kids already trust. I started making these when my own children needed something more substantial than toast but would not sit still for a plate of eggs. The wrap format makes it portable and easy to eat with one hand.
The cottage cheese melts into the eggs as they warm, creating a creamy texture that is not too wet and not too dry. I use full-fat cottage cheese here because the lower-fat versions can make the filling watery. These wraps are also flexible—you can add whatever vegetables your child will tolerate, though I find spinach is the easiest to hide because it wilts down to almost nothing.
Prep: 5 minutes Cook: 8 minutes Total: 13 minutes Serves: 4 Difficulty: Easy
Ingredients:
- 6 large eggs
- 1/2 cup cottage cheese (full-fat works best)
- 1 cup fresh spinach, roughly chopped
- 4 small flour tortillas
- Salt and pepper to taste
- Optional: shredded cheese for sprinkling
Instructions:
- In a bowl, whisk the eggs until the yolks and whites are fully combined. Stir in the cottage cheese and a pinch of salt and pepper.
- Heat a nonstick skillet over medium heat and add a small pat of butter or a splash of oil.
- Pour the egg mixture into the skillet and let it set for about 30 seconds before stirring. Add the spinach and cook, stirring occasionally, until the eggs are just set and the spinach has wilted—about 3 to 4 minutes. The eggs should still look moist, not dry.
- Warm the tortillas in a dry skillet or microwave for a few seconds to make them pliable.
- Divide the egg mixture evenly among the tortillas, sprinkle with extra cheese if using, and roll into tight wraps.
- Serve immediately or wrap in foil for a grab-and-go breakfast.
Cooking Tips & Mistakes to Avoid
Do not overcook the eggs. They will continue to cook from the residual heat of the tortilla, so pull them off the heat when they are still slightly soft. Dry eggs are the enemy of a good breakfast wrap. The cottage cheese adds moisture, but it does not rescue eggs that have been cooked into rubber.
If you are making these for the week, assemble them fully and wrap them tightly in foil or parchment. They reheat well in a toaster oven or microwave, though the tortilla softens in the microwave. I prefer to reheat them in a dry skillet for a minute per side to restore some crispness.
Substitutions:
- Turkey sausage or bacon instead of eggs for a different protein source.
- Kale instead of spinach, though kale needs a little more time to wilt.
- Whole-wheat tortillas for added fiber.
Storage & Reheating:
Wraps keep in the refrigerator for up to three days. Reheat in a toaster oven at 375°F for 5 to 7 minutes or in a microwave for 45 seconds. The microwave will soften the tortilla, so eat them quickly before they become chewy.
Approximate Nutrition Per Serving: 280 calories, 18g protein, 22g carbohydrates, 14g fat, 2g fiber
Pull the eggs off the heat while they are still a little soft. They continue cooking in the wrap, and leftover eggs are much better when they started moist rather than dry.
2. Energy-Boosting Overnight Oats
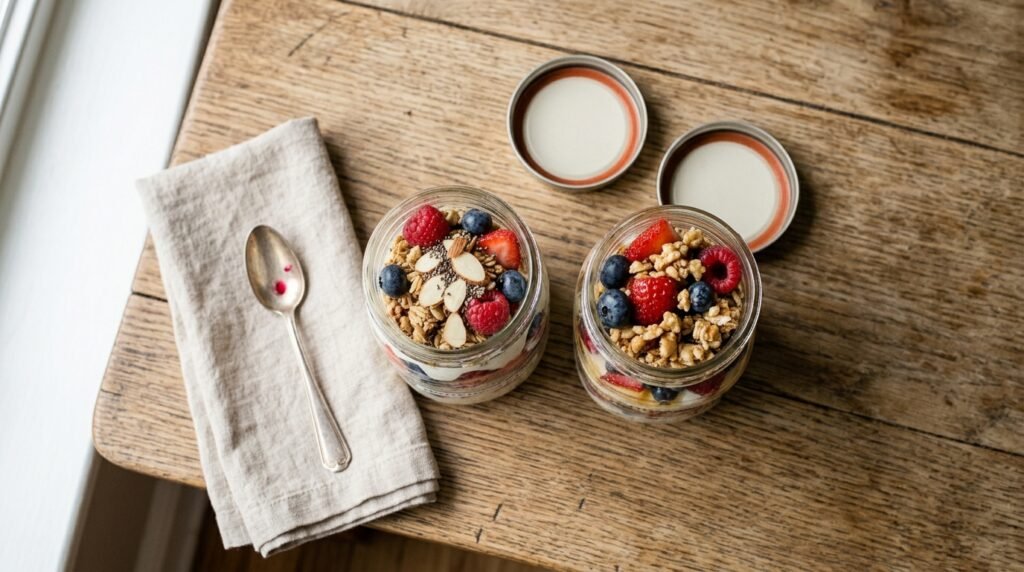
Overnight oats are the breakfast that requires almost no morning effort. You assemble them the night before, and they are ready to eat directly from the jar. The oats soften in the milk and yogurt, creating a creamy texture that is filling without being heavy. The berries add natural sweetness and color, which appeals to kids who are used to cereal.
The key to making these work is the ratio of liquid to oats. Too much liquid and you get soup. Too little and the oats stay crunchy and unpleasant. I use a combination of milk and Greek yogurt for the best texture—the yogurt adds protein and tang, and the milk ensures the oats soften properly. These are also easy to customize; if your child does not like berries, use sliced banana or applesauce.
Prep: 5 minutes Cook: 0 minutes Total: 5 minutes (plus overnight chilling) Serves: 4 Difficulty: Very Easy
Ingredients:
- 2 cups rolled oats (old-fashioned, not instant)
- 2 cups milk (any kind works, but whole milk is creamier)
- 1 cup plain Greek yogurt
- 2 tablespoons honey or maple syrup
- 1 teaspoon vanilla extract
- Toppings: fresh berries, sliced banana, or chopped nuts
Instructions:
- In a large bowl or individual jars, combine the oats, milk, Greek yogurt, honey, and vanilla. Stir until everything is well mixed.
- Divide the mixture into four jars or containers with tight-fitting lids.
- Refrigerate for at least 4 hours, or overnight, until the oats have softened and the mixture has thickened.
- In the morning, top with fresh berries, banana slices, or nuts before serving. The toppings add texture and visual appeal.
Cooking Tips & Mistakes to Avoid
Do not use instant oats for this recipe. They break down too quickly and turn into a pasty mess. Old-fashioned rolled oats hold their shape and give you the right chewy-creamy texture. Steel-cut oats do not soften enough in the refrigerator without cooking first, so stick with rolled oats.
If your child finds the texture too thick, stir in an extra splash of milk in the morning before serving. The oats absorb liquid overnight and can become quite dense. A little extra milk loosens things up and makes the consistency more appealing.
Substitutions:
- Almond milk, oat milk, or soy milk instead of dairy milk.
- Coconut yogurt instead of Greek yogurt for a dairy-free version.
- Frozen berries instead of fresh—they will thaw overnight and release some juice.
Storage & Reheating:
Overnight oats keep in the refrigerator for up to four days. They are eaten cold, so no reheating is required. If you are packing them for breakfast on the go, keep the toppings separate until you are ready to eat so they stay fresh.
Approximate Nutrition Per Serving: 240 calories, 12g protein, 34g carbohydrates, 7g fat, 5g fiber
Use old-fashioned rolled oats, not instant. Instant oats dissolve into a paste overnight, and nobody wants to eat that texture first thing in the morning.
3. Sheet Pan Vegetable and Egg Muffins

These egg muffins are the breakfast version of meal prep. You make a large batch on the weekend, and they are ready to grab and reheat all week. The vegetables are baked right into the eggs, so you are getting a serving of vegetables without any extra effort in the morning. My kids eat these cold or reheated, and they do not complain about the broccoli because it is mixed in with cheese.
The sheet pan approach is faster than filling individual muffin tins. You pour the egg mixture into a single pan, bake it, and then cut it into squares. It is less fiddly and produces a more consistent result. The egg base is sturdy enough to hold up in a lunchbox or a backpack without falling apart.
Prep: 10 minutes Cook: 20 minutes Total: 30 minutes Serves: 6 (makes 12 muffins or 18 squares) Difficulty: Easy
Ingredients:
- 12 large eggs
- 1/2 cup milk
- 1 cup shredded cheddar cheese
- 1 cup chopped broccoli (small pieces)
- 1/2 cup diced bell pepper
- 1/4 cup diced onion (optional)
- 1/2 teaspoon garlic powder
- Salt and pepper to taste
Instructions:
- Preheat the oven to 375°F. Grease a 9×13-inch baking dish or line a muffin tin with paper liners.
- In a large bowl, whisk the eggs and milk until smooth and frothy. Add the cheese, broccoli, bell pepper, onion, garlic powder, salt, and pepper. Stir until everything is evenly distributed.
- Pour the mixture into the prepared baking dish or divide evenly among the muffin cups.
- Bake for 18 to 20 minutes, until the eggs are set and the tops are lightly golden. The edges should pull away slightly from the pan.
- Let cool for 5 minutes before cutting into squares or removing from the muffin tin. The muffins firm up as they cool.
Cooking Tips & Mistakes to Avoid
Do not overbake the egg muffins. They become rubbery and dry if left in the oven too long. The center should be just set—a toothpick inserted should come out clean or with a few moist crumbs. The residual heat will continue to cook them slightly after they come out of the oven.
The vegetables release water as they bake, which can make the bottom of the muffins slightly wet. To avoid this, pat the chopped vegetables dry with a paper towel before adding them to the egg mixture. This step is especially important with frozen vegetables, which have a higher water content.
Substitutions:
- Any cheese that melts well—Monterey Jack, provolone, or a Mexican blend.
- Spinach or kale instead of broccoli (add them at the end so they do not overcook).
- Dairy-free cheese and milk for a dairy-free version.
Storage & Reheating:
Refrigerate egg muffins for up to four days. Reheat in a microwave for 30 to 45 seconds or in a toaster oven at 375°F for 5 minutes. They also freeze well—freeze in a single layer on a baking sheet, then transfer to a freezer bag for up to three months.
Approximate Nutrition Per Serving (2 muffins or 3 squares): 200 calories, 14g protein, 6g carbohydrates, 13g fat, 1g fiber
Pat the vegetables dry before adding them to the eggs. Wet vegetables release moisture as they bake and can make the bottom of the muffins watery and soft instead of firm and golden.
4. Peanut Butter Banana Oatmeal Smoothie
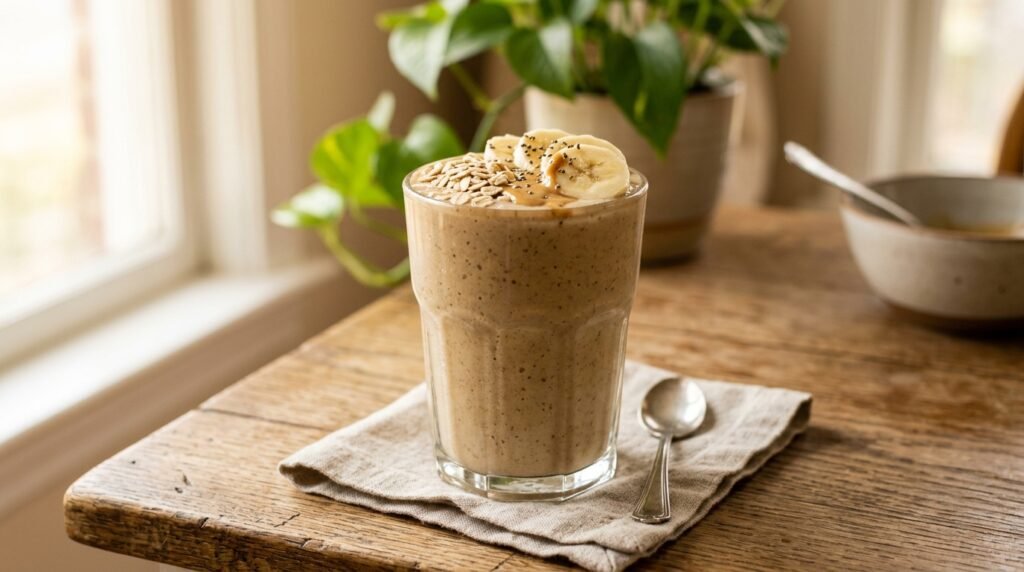
Smoothies are a breakfast lifesaver when a child refuses to sit down and eat. This particular smoothie is thick enough to be satisfying but thin enough to drink through a straw. The peanut butter and banana provide natural sweetness and protein, and the oats add fiber that keeps a child full longer than a fruit-only smoothie.
The key to making this smoothie work is using frozen banana. A frozen banana gives the smoothie a thick, creamy texture without needing to add ice, which can water things down. I keep a bag of frozen banana slices in my freezer specifically for this recipe. The oats soften as they blend, so you do not end up with gritty bits in the drink.
Prep: 5 minutes Cook: 0 minutes Total: 5 minutes Serves: 2 Difficulty: Very Easy
Ingredients:
- 2 frozen bananas
- 2 tablespoons peanut butter
- 1/2 cup rolled oats
- 1 cup milk (or milk alternative)
- 1 tablespoon honey (optional)
- 1/2 teaspoon cinnamon
Instructions:
- Place all ingredients in a blender: frozen bananas, peanut butter, oats, milk, honey (if using), and cinnamon.
- Blend on high until smooth and creamy, about 1 to 2 minutes. Stop and scrape down the sides if needed.
- Pour into glasses and serve immediately. The smoothie thickens as it sits, so drink it right away or thin it with a splash of milk.
Cooking Tips & Mistakes to Avoid
Do not use fresh bananas if you want a thick smoothie. Fresh bananas create a thin, watery result that is less satisfying. Frozen bananas are the secret to the creamy texture. If you do not have frozen bananas, add a handful of ice cubes to achieve a similar consistency, though the flavor will be slightly diluted.
If your child is not used to the texture of oats in a smoothie, blend the oats first on their own until they are a fine powder, then add the rest of the ingredients. This creates a smoother texture that is less noticeable to kids who are picky about texture.
Substitutions:
- Almond butter or sunflower seed butter instead of peanut butter.
- Almond milk or oat milk instead of dairy milk.
- Medjool dates instead of honey for a different sweetener.
Storage & Reheating:
This smoothie is best fresh, but you can store leftovers in the refrigerator for up to 24 hours. Shake or stir before drinking, as separation occurs. Freeze any leftovers in ice cube trays to use later as smoothie starters.
Approximate Nutrition Per Serving: 310 calories, 12g protein, 42g carbohydrates, 12g fat, 6g fiber
Use frozen bananas for a thick, creamy texture. Fresh bananas make a thin smoothie that runs right through the straw and leaves kids hungry sooner.
5. Healthy Whole-Wheat Pancakes
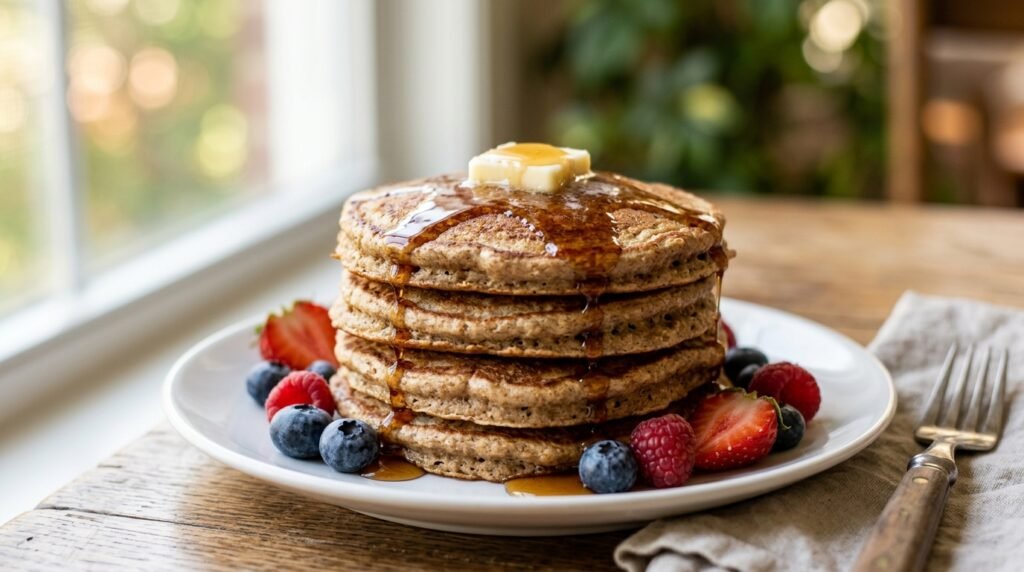
Pancakes are a breakfast staple, but the boxed mixes are often low in protein and high in sugar. These whole-wheat pancakes are made from scratch with simple ingredients, and they actually keep a child full for longer than the typical fluffy version. The whole-wheat flour adds fiber and a nutty flavor that pairs well with maple syrup and fruit.
The texture is slightly denser than a traditional pancake, which is exactly what you want for a sustaining breakfast. My kids eat these plain, with fruit, or with a little syrup, and they never complain about the whole-wheat flour. The trick is to mix the batter just until the ingredients are combined—overmixing develops gluten and makes the pancakes tough.
Prep: 10 minutes Cook: 15 minutes Total: 25 minutes Serves: 4 (makes about 10 pancakes) Difficulty: Easy
Ingredients:
- 1 cup whole-wheat flour
- 2 tablespoons sugar
- 1 teaspoon baking powder
- 1/2 teaspoon baking soda
- 1/2 teaspoon salt
- 1 cup milk
- 1 large egg
- 2 tablespoons melted butter
- 1 teaspoon vanilla extract
Instructions:
- In a large bowl, whisk together the flour, sugar, baking powder, baking soda, and salt.
- In a separate bowl, whisk the milk, egg, melted butter, and vanilla.
- Pour the wet ingredients into the dry ingredients and stir just until combined. The batter will be lumpy—that is fine. Do not overmix.
- Heat a griddle or skillet over medium heat and lightly grease with butter or oil.
- Pour 1/4 cup of batter onto the griddle for each pancake. Cook until bubbles form on the surface and the edges look set, about 2 to 3 minutes. Flip and cook for another 1 to 2 minutes, until golden-brown.
- Keep the cooked pancakes warm in a 200°F oven while you cook the remaining batter.
Cooking Tips & Mistakes to Avoid
Do not overmix the pancake batter. Stir just until the dry ingredients are moistened. The batter should look a little lumpy. Overmixing activates the gluten in the flour, which makes the pancakes dense and tough instead of light and fluffy.
Let the batter rest for 5 minutes before cooking if you have time. This allows the baking powder to work and gives you more tender pancakes. If the batter seems too thick, add a tablespoon of milk at a time until it reaches the right consistency.
Substitutions:
- All-purpose flour instead of whole-wheat for a lighter texture.
- Buttermilk instead of regular milk for extra fluffiness.
- Almond milk or oat milk for a dairy-free version.
Storage & Reheating:
Refrigerate pancakes for up to four days or freeze for up to three months. Reheat in a toaster or toaster oven for the best texture, or in the microwave for 30 seconds if you are in a hurry.
Approximate Nutrition Per Serving (2 pancakes): 220 calories, 8g protein, 30g carbohydrates, 8g fat, 3g fiber
Mix the batter until it is just combined. Lumpy batter makes tender pancakes. Overmixing makes tough pancakes that nobody wants to eat.
6. Greek Yogurt Parfaits
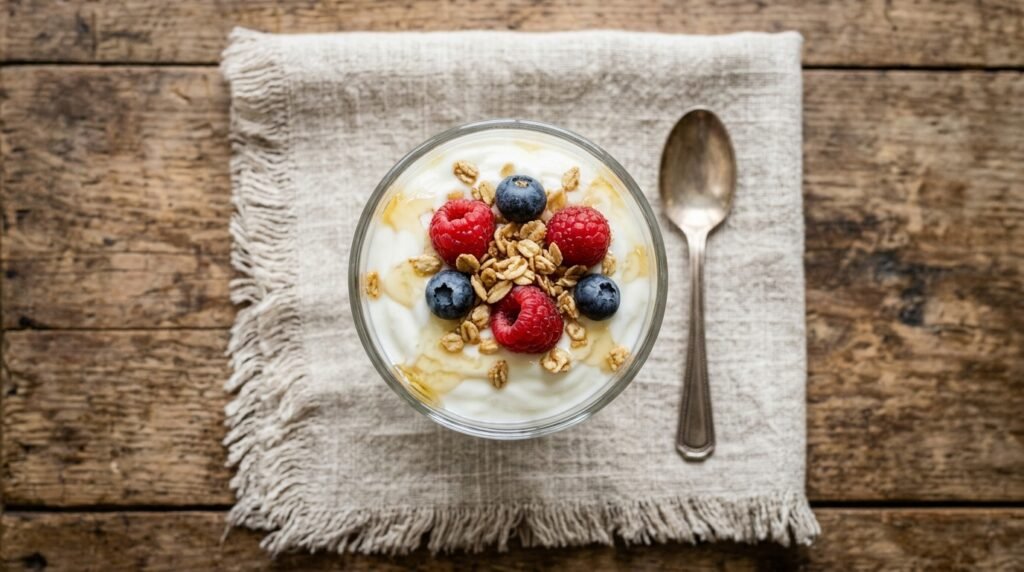
Parfaits are the breakfast that looks like a dessert but provides a solid amount of protein and fiber. The Greek yogurt is thick and creamy, the granola adds crunch, and the fruit provides natural sweetness. My kids assemble their own parfaits, which gives them some control over what they are eating and makes them more likely to finish it.
The key to a good parfait is using plain Greek yogurt and adding just enough sweetener to balance the tang. Flavored yogurts are often loaded with sugar, so I prefer to control the sweetness myself with a drizzle of honey or a little maple syrup. The granola should be added at the last minute if you are making these ahead, because it softens quickly in the yogurt.
Prep: 5 minutes Cook: 0 minutes Total: 5 minutes Serves: 4 Difficulty: Very Easy
Ingredients:
- 2 cups plain Greek yogurt (full-fat is best for satiety)
- 1/4 cup honey or maple syrup
- 1 cup granola (choose a lower-sugar option)
- 1 1/2 cups mixed berries (fresh or thawed frozen)
Instructions:
- In a small bowl, stir the honey or maple syrup into the Greek yogurt until smooth.
- Layer the yogurt, granola, and berries in individual glasses or jars, starting with yogurt and ending with fruit on top.
- Serve immediately if you want crunchy granola, or refrigerate for later—just keep in mind the granola will soften.
Cooking Tips & Mistakes to Avoid
Add the granola just before serving if you want it to stay crunchy. If you are making these for the week, store the granola separately and let each person add their own at breakfast. Pre-assembled parfaits with granola become soft and chewy after a few hours.
If your child does not like plain yogurt, start with a flavored yogurt and gradually mix in plain yogurt to reduce the sugar content over time. The berries and honey already add sweetness, so you can dial back the added sugar as the child adjusts.
Substitutions:
- Vanilla yogurt instead of plain for a sweeter version.
- Muesli instead of granola for a less sweet crunch.
- Any fruit you have on hand—peaches, mango, or sliced apple.
Storage & Reheating:
Refrigerate parfaits without granola for up to three days. Add the granola when you are ready to eat. No reheating required.
Approximate Nutrition Per Serving: 290 calories, 15g protein, 34g carbohydrates, 11g fat, 4g fiber
Add the granola just before serving. Once it sits in the yogurt, it absorbs moisture and loses its crunch. Keep it separate until you are ready to eat.
7. Breakfast Quesadillas
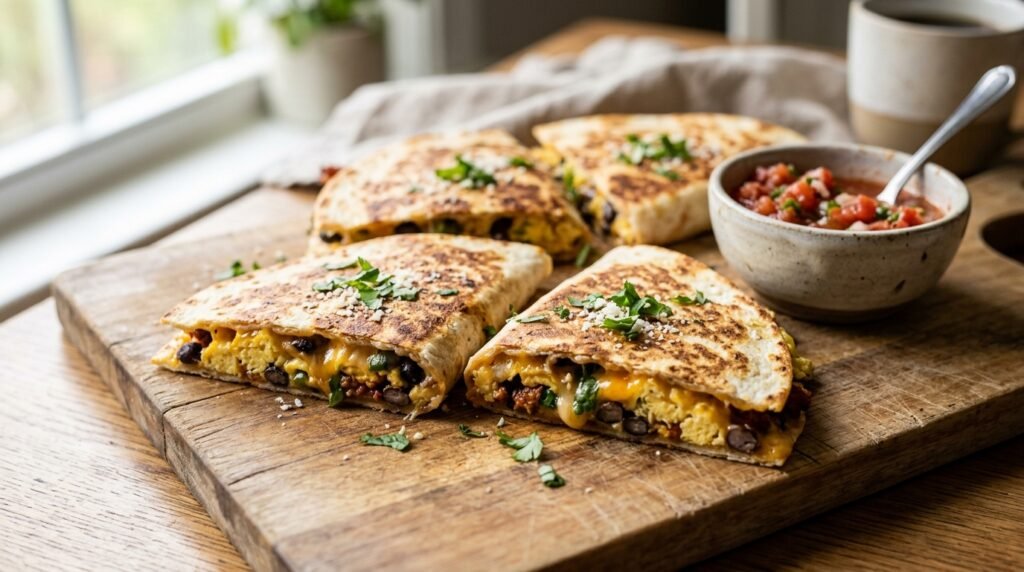
Breakfast quesadillas take the familiar format of a quesadilla and fill it with eggs and protein-packed add-ins. The cheese holds everything together, and the tortilla provides a crisp exterior that children enjoy. These are fast enough for a weekday morning and flexible enough to use whatever leftovers you have in the refrigerator.
I started making these when my oldest decided that eggs on a plate were boring but eggs in a tortilla were acceptable. The black beans add fiber and protein without changing the flavor profile too much. My kids eat these with salsa, but they are also good plain or with a dollop of Greek yogurt.
Prep: 5 minutes Cook: 10 minutes Total: 15 minutes Serves: 4 Difficulty: Easy
Ingredients:
- 4 large flour tortillas
- 6 large eggs
- 1 cup shredded cheddar or Monterey Jack cheese
- 1/2 cup black beans, rinsed and drained
- Salt and pepper to taste
- Olive oil or butter for the pan
- Optional: salsa, sour cream, or Greek yogurt for serving
Instructions:
- In a bowl, whisk the eggs with a pinch of salt and pepper.
- Heat a small skillet over medium heat and scramble the eggs until they are just set and still moist. Remove from the heat.
- Place a tortilla in a clean skillet or griddle over medium heat. Sprinkle half of the cheese over one half of the tortilla, then top with a quarter of the scrambled eggs and a quarter of the black beans. Sprinkle with a little more cheese.
- Fold the empty half of the tortilla over the filling and press down gently with a spatula. Cook for 2 to 3 minutes per side, until golden and crisp and the cheese is melted.
- Repeat with the remaining tortillas and filling. Cut each quesadilla into wedges and serve with your choice of toppings.
Cooking Tips & Mistakes to Avoid
Do not overfill the quesadillas. Too much filling makes them difficult to flip and can result in cheese spilling out into the pan. A moderate amount of eggs and beans is easier to handle and gives you a more balanced final product.
If your child is not a fan of beans, leave them out and add a little extra cheese. The quesadillas still have plenty of protein from the eggs and cheese. You can also add cooked sausage or bacon for a more traditional breakfast feel.
Substitutions:
- Corn tortillas for a gluten-free version (they are smaller and more delicate).
- Refried beans instead of black beans for a smoother texture.
- Any cheese that melts well—pepper jack, provolone, or a Mexican blend.
Storage & Reheating:
Refrigerate quesadillas for up to three days. Reheat in a skillet with a little oil to restore the crispness, or in a toaster oven at 375°F for 5 minutes. Microwaving makes the tortilla soft and chewy.
Approximate Nutrition Per Serving (1 quesadilla): 340 calories, 18g protein, 30g carbohydrates, 17g fat, 4g fiber
Do not overfill the quesadilla. A moderate amount of filling makes flipping easier and gives you a more balanced, less messy breakfast. Keep the cheese on the edges to help seal the filling in.
8. Egg and Cheese Breakfast Sliders

Breakfast sliders are the mini sandwich format that children love. They are small enough to handle easily and feel like a special treat, even though they are made from simple ingredients. The egg is folded into a small square that fits perfectly on the mini bun, and the cheese melts into the egg for a cohesive, easy-to-eat sandwich.
These are particularly good for mornings when you need breakfast on the go. They hold up well in a lunchbox and are just as good cold or at room temperature. I make a batch of these on Sunday afternoon and wrap them individually in foil for the week. They reheat in about a minute in the microwave and are ready to eat.
Prep: 5 minutes Cook: 10 minutes Total: 15 minutes Serves: 4 (makes 8 sliders) Difficulty: Easy
Ingredients:
- 8 mini slider buns or dinner rolls
- 6 large eggs
- 1/4 cup milk
- 8 slices cheddar cheese (or shredded cheese)
- Salt and pepper to taste
- Butter for the pan
Instructions:
- In a bowl, whisk the eggs, milk, salt, and pepper until smooth.
- Heat a nonstick skillet over medium-low heat and add a pat of butter. Pour the egg mixture into the pan and let it set for about 30 seconds. Using a spatula, gently push the cooked eggs toward the center, tilting the pan to let the uncooked egg flow to the edges. Cook until the eggs are set but still moist, about 4 to 5 minutes.
- Fold the cooked egg into a rectangle about the size of your sliders, then cut it into 8 squares.
- Split the slider buns and lightly toast them if desired. Place a square of egg on the bottom half of each bun, top with a slice of cheese, and close with the bun top.
- Serve warm or wrap individually for grab-and-go breakfasts.
Cooking Tips & Mistakes to Avoid
Cook the eggs over medium-low heat to keep them moist. High heat makes eggs rubbery. The eggs should look slightly undercooked when they come off the pan because they continue cooking from the residual heat of the buns.
If you are making these for the week, wrap each slider individually in foil or parchment paper. They reheat best in a toaster oven, but the microwave works in a pinch—just watch the time so the buns do not get soggy.
Substitutions:
- English muffins instead of slider buns.
- Provolone or Swiss cheese instead of cheddar.
- Add cooked bacon or sausage for extra protein.
Storage & Reheating:
Refrigerate sliders for up to four days. Reheat in a microwave for 30 to 45 seconds or in a toaster oven at 375°F for 5 minutes. They are also fine cold if you are packing them for a lunchbox.
Approximate Nutrition Per Serving (2 sliders): 310 calories, 18g protein, 28g carbohydrates, 14g fat, 2g fiber
Cook the eggs over medium-low heat and pull them off before they look completely dry. They continue cooking after you cut them, and leftover egg is only good if it started moist.
Frequently Asked Questions
Can I make these breakfasts ahead of time?
Yes. The egg muffins, pancakes, sliders, and wraps all refrigerate or freeze well and can be reheated throughout the week. The overnight oats and parfaits need to be assembled the night before and are ready to go in the morning. The smoothie is best fresh, but the ingredients can be prepped and frozen in advance.
What is the best way to store these breakfasts?
Use airtight containers for the egg muffins and pancakes. Wrap wraps and sliders individually in foil or parchment paper to make grabbing them easier in the morning. Overnight oats and parfaits should be kept in jars with tight-fitting lids. For frozen items, freeze in a single layer on a baking sheet, then transfer to a freezer bag for longer storage.
Can I freeze any of these recipes?
The egg muffins, pancakes, sliders, and wraps all freeze well. The parfaits and overnight oats are best kept in the refrigerator—freezing yogurt and milk changes the texture significantly. The smoothie can be frozen as ice cubes to use later as a smoothie starter.
How can I increase the protein in these breakfasts?
Add extra cheese to the egg muffins and wraps. Serve the pancakes and sliders with a side of Greek yogurt. Add a scoop of protein powder to the smoothie if you want, though the recipe already has a good amount of protein from the peanut butter, oats, and milk. The parfaits are already high in protein from the yogurt.
What if my child is allergic to dairy or nuts?
Several recipes are dairy-free with simple substitutions. Use dairy-free cheese and milk for the egg muffins, quesadillas, and sliders. Use sunflower seed butter instead of peanut butter in the smoothie. The overnight oats and parfaits can be made with coconut yogurt and non-dairy milk.
How can I make these recipes more interesting for kids who get bored easily?
Let them customize their breakfast. Set up a topping bar for the pancakes, parfaits, and wraps. Rotate the fruits, vegetables, and cheeses each week to keep things varied. Involve your children in the preparation—they are much more likely to eat something they helped make. The overnight oats and parfaits are particularly good for this because the layering is fun and the possibilities are endless.
Conclusion
These recipes are built for the reality of a busy morning. Some require a little prep on the weekend, some come together in less than ten minutes, and all of them provide enough energy to get through the morning without a 10:00 AM crash. The common thread is that they are all food children actually want to eat—no negotiations, no battles, no leftovers sitting on the plate.
If you are starting from scratch, begin with the overnight oats and the egg muffins. Both are forgiving, make large batches, and can be adapted to your child’s preferences. Once you have those in rotation, add the pancakes and sliders—they take a little more time but are worth the effort for the variety they bring to the week. The wraps and quesadillas are the fast options for mornings when time is particularly tight.
A good breakfast does not need to be complicated or require restaurant-level cooking skills. It just needs to be ready when the school bus is coming, and it needs to keep a child going until lunch. These recipes give you options for every kind of morning, and that makes all the difference.