
The moment after dinner when the inevitable question comes. Can we have something sweet? The desire for dessert is real, but so is the concern about sugar, empty calories, and the post-dessert energy crash that follows. Parents want to offer treats without feeling like they are setting bad habits. Kids want something that tastes like a reward. The gap between those two things is where the struggle lives.
Most healthy dessert content is either dishonest or impractical. The recipes that claim to be healthy are often packed with sugar substitutes that taste artificial. The recipes that claim to be kid-friendly often require specialty ingredients that sit in the pantry unused for months. And the recipes that look good on a blog often fail in a real kitchen because they take too long or require skills that children do not have and parents do not have time to teach. What is needed is a middle ground. Desserts that taste genuinely good, use real ingredients, and are achievable on a weeknight.
These seven desserts solve specific problems. One is for the kid who only eats chocolate. One is for the afternoon when you need a treat that doubles as a snack. One is for the freezer that needs to be used. One is for the child who wants to help bake. One is for the parent who wants to use up leftover fruit. Every recipe has a reason to exist beyond just being another dessert. They are built with real ingredients, real constraints, and real kids in mind.
1. No-Bake Chocolate Oat Bites That Taste Like Cookie Dough
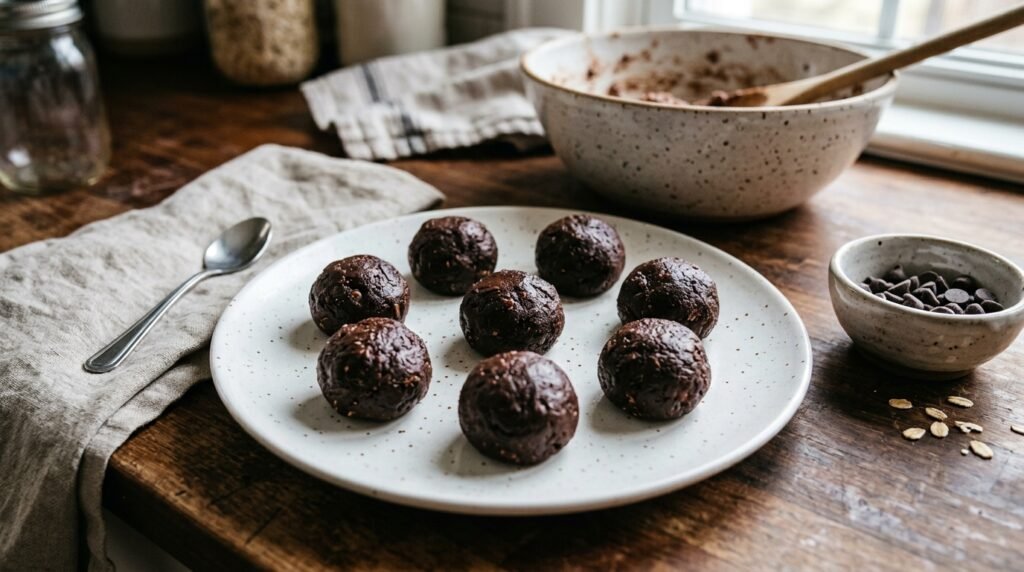
These are the dessert for the kid who asks for chocolate chip cookies but does not want to wait for the oven to preheat. They come together in about ten minutes and require no baking at all. The texture is dense and chewy, similar to cookie dough, with the satisfying crunch of oats and the richness of cocoa. They taste like a treat, but the oats provide fiber and the nut butter adds protein and healthy fats.
One thing most recipe cards leave out is that the texture depends entirely on the consistency of the nut butter. If the nut butter is too runny, the bites will be soft and sticky. If it is too thick, the bites will be dry and crumbly. The solution is simple. Use a nut butter that is thick enough to hold its shape but soft enough to stir. Natural peanut butter that has been stirred well works perfectly. If you only have runny nut butter, add a little more oats until the mixture comes together.
Prep: 10 minutes Cook: None Total: 10 minutes Serves: 4 (makes about 16 bites) Difficulty: Very easy
Ingredients
- 1 cup old-fashioned rolled oats
- ½ cup creamy peanut butter or almond butter
- ¼ cup honey or maple syrup
- ¼ cup unsweetened cocoa powder
- ¼ cup mini chocolate chips
- 1 teaspoon vanilla extract
- Pinch of salt
Instructions
Combine all the ingredients in a medium bowl. Stir until everything is evenly incorporated and the mixture starts to come together. It should be sticky enough to hold its shape when pressed. If the mixture seems too dry, add a little more honey or nut butter. If it seems too wet, add a little more oats.
Roll the mixture into small balls, about one inch in diameter. Use your hands to press them firmly so they hold together. Place them on a plate or baking sheet lined with parchment paper. Refrigerate for at least 20 minutes to firm up. They will set and become more solid as they chill.
Serve chilled or at room temperature. They can be eaten immediately, but they hold their shape better after refrigeration. Store them in the refrigerator for the best texture.
Tips & Things That Go Wrong
The mixture can be frustrating to work with if it is not the right consistency. If it is too sticky to roll, wet your hands with a little water. The water creates a barrier and prevents the mixture from sticking to your palms. This is a trick I learned after making these with sticky fingers for years.
Do not skip the refrigeration step. The bites need time to firm up. If you try to eat them immediately, they will be soft and fall apart. The chilling time is not optional.
Substitutions
Use any nut or seed butter. Sunflower seed butter works well for nut-free options. Use coconut sugar or date syrup instead of honey. Add dried fruit, shredded coconut, or chopped nuts for extra texture. For a protein boost, add a scoop of your favorite protein powder, but adjust the liquid to compensate for the extra dry ingredient.
Storage & Reheating
These keep in the refrigerator for up to two weeks and freeze well for up to three months. They are excellent straight from the fridge and do not need reheating. In fact, they are better cold. The fridge firms them up and the texture becomes more solid and satisfying.
Approximate Nutrition Per Bite (2 per serving): 120 calories, 4g protein, 12g carbs, 7g fat, 2g fiber
Wet your hands with a little water before rolling the bites. It prevents the sticky mixture from clinging to your palms and makes the process much easier.
2. Frozen Yogurt and Fruit Popsicles With Hidden Greens
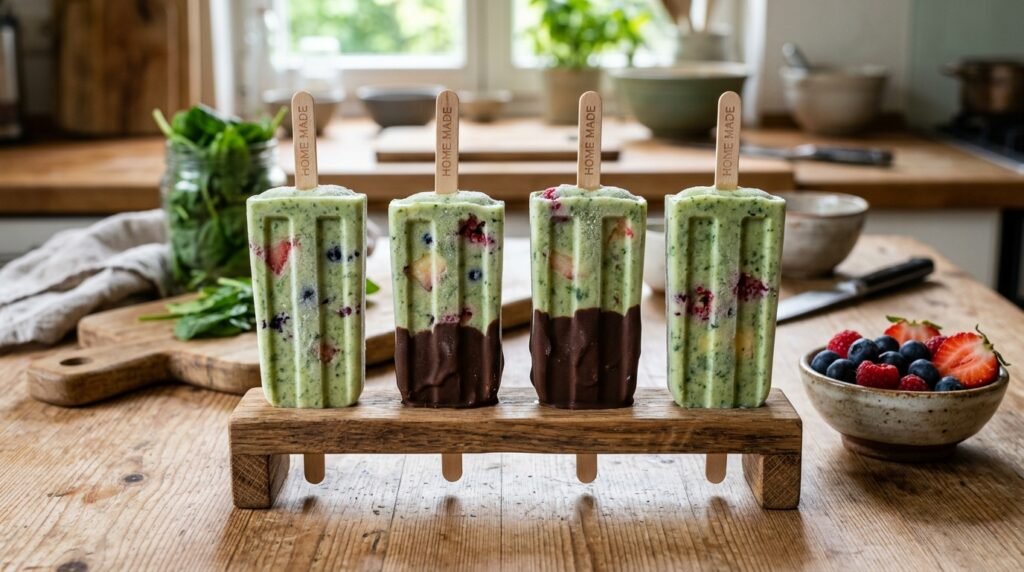
Popsicles are the dessert that feels like a treat but can be surprisingly nutritious. The frozen format makes them appealing to children and the fruit and yogurt base makes them satisfying without being heavy. The addition of a handful of spinach adds nutrients and color without affecting the taste. This is the dessert for the afternoon when everyone is hot and cranky and needs something cold.
Honestly, I would make these on a weekend afternoon when the kids are asking for ice cream. They take about ten minutes to assemble and freeze into something that looks and feels like a special treat. The spinach is invisible in the finished popsicle. The flavor is fruity and creamy. The texture is smooth and icy. It is the kind of dessert that feels like a cheat but is actually a win.
Prep: 10 minutes Freeze: 4 hours Total: 4 hours 10 minutes Serves: 4 (makes 6 to 8 popsicles) Difficulty: Easy, with patience required for freezing
Ingredients
- 2 cups plain Greek yogurt
- 2 cups mixed frozen fruit (berries, mango, or peaches)
- 1 large handful fresh spinach
- 2 to 3 tablespoons honey or maple syrup (adjust to taste)
- Optional: melted chocolate for dipping
Instructions
Combine all the ingredients in a blender. Blend until completely smooth and the spinach is fully incorporated. The mixture should be thick and creamy. If it is too thick to pour, add a splash of milk or water to thin it slightly. Taste the mixture and adjust the sweetness. The frozen popsicles will taste slightly less sweet than the liquid mixture, so aim for a little sweeter than you think you need.
Pour the mixture into popsicle molds. Tap the molds gently on the counter to remove any air bubbles. Insert the popsicle sticks and freeze for at least 4 hours, or until completely solid. To remove the popsicles, run the molds under warm water for a few seconds and gently pull the sticks.
If you want to dip the popsicles in chocolate, melt the chocolate in a small bowl and dip the bottom half of each popsicle into it. Place them on parchment paper to set. The chocolate adds a layer of flavor that makes the popsicles feel even more dessert-like.
Tips & Things That Go Wrong
The biggest problem here is texture. If the mixture is not smooth enough, the popsicles will be icy and unpleasant. Blend for at least 30 seconds longer than you think is necessary. The spinach needs time to break down completely. If you have a high-powered blender, this is the recipe to use it for.
Do not overfill the molds. The mixture expands slightly as it freezes, and overfilled molds can crack. Leave a little space at the top of each mold.
If you do not have popsicle molds, use small paper cups. Fill the cups, cover with foil, and insert a popsicle stick through the foil. The foil holds the stick in place while the popsicle freezes.
Substitutions
Use coconut yogurt for a dairy-free version. Use any fruit you have on hand. Bananas, strawberries, or pineapple all work well. Use maple syrup, agave, or date syrup as a sweetener. For a protein boost, add a scoop of unflavored protein powder.
Storage & Reheating
These keep in the freezer for up to 2 months. They are best eaten within the first month for the best texture. After that, they can develop ice crystals and become less creamy. There is no reheating needed. They are a frozen dessert, so keep them frozen until serving.
Approximate Nutrition Per Popsicle (1/6 of recipe): 90 calories, 6g protein, 12g carbs, 2g fat, 2g fiber
Blend the mixture until it is completely smooth. The spinach needs time to break down completely. Any visible green flecks may be rejected by children, so blend it thoroughly.
3. Fruit and Cream Cheese Stuffed Whole Wheat Pockets
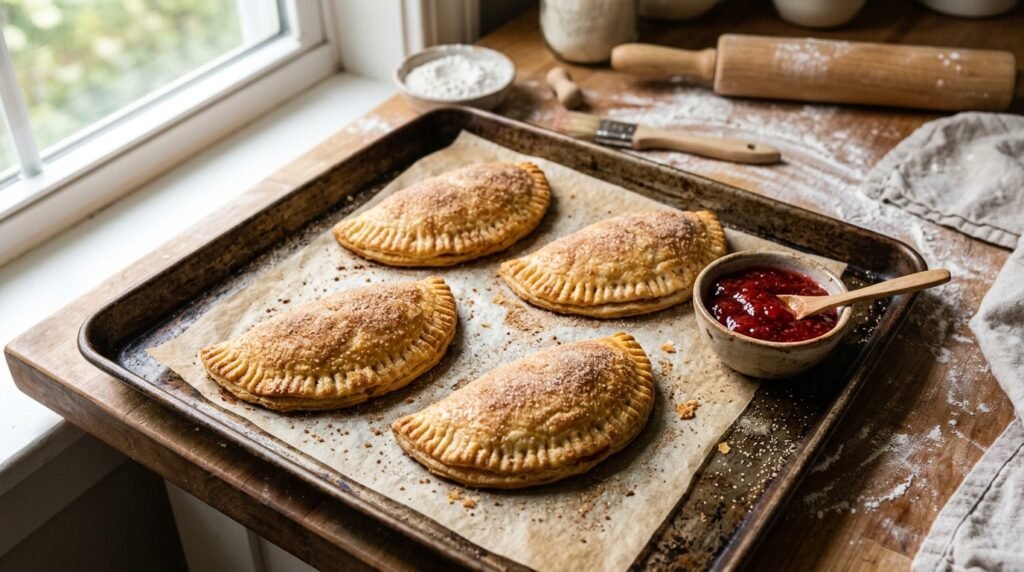
These are the dessert that doubles as a breakfast. The whole wheat dough is sturdy enough to hold a sweet filling without falling apart. The cream cheese adds creaminess. The fruit adds natural sweetness. And the cinnamon sugar on top adds the kind of warmth that makes dessert feel special.
The trick is sealing the pockets properly. If the edges are not sealed, the filling leaks out and the pocket becomes a flat, disappointing pastry. I have had more failures with leaking pockets than I want to admit. The solution is to press the edges firmly with a fork and make sure the filling is not too close to the edge. Leave a margin of at least half an inch around the filling.
Prep: 20 minutes Cook: 15 minutes Total: 35 minutes Serves: 4 (makes 6 to 8 pockets) Difficulty: Medium, because of the dough
Ingredients
For the Dough:
- 1 ½ cups whole wheat flour
- 1 ½ teaspoons baking powder
- ¼ teaspoon salt
- 2 tablespoons coconut oil or butter, cold and cubed
- ½ cup milk (or plant-based milk)
For the Filling:
- 4 ounces cream cheese, softened
- 2 tablespoons honey or maple syrup
- ½ teaspoon vanilla extract
- ½ cup fresh or frozen berries
For the Topping:
- 1 tablespoon melted butter
- 1 tablespoon sugar mixed with ½ teaspoon cinnamon
Instructions
Preheat the oven to 375°F and line a baking sheet with parchment paper. In a large bowl, whisk together the flour, baking powder, and salt. Cut in the cold butter using a pastry blender or your fingers until the mixture resembles coarse crumbs. Add the milk and stir until the dough comes together. It should be soft and slightly sticky. If it is too dry, add a splash more milk. If it is too wet, add a little more flour.
Roll the dough out on a floured surface to about ¼ inch thickness. Use a round cutter or a glass to cut out circles, about 4 inches in diameter. This should yield 6 to 8 circles. In a separate bowl, mix the cream cheese, honey, and vanilla until smooth. Place a spoonful of the cream cheese mixture in the center of each dough circle, leaving a generous border. Top with a few berries.
Fold each circle in half to create a half-moon shape. Press the edges firmly with a fork to seal. Place the pockets on the prepared baking sheet. Brush the tops with melted butter and sprinkle with the cinnamon sugar mixture. Bake for 12 to 15 minutes, until golden brown and puffed. Let cool slightly before serving.
Tips & Things That Go Wrong
Leaking is the main problem. The filling needs to be centered and the edges need to be sealed firmly. If you are using frozen berries, do not thaw them first. Thawed berries release too much liquid and make the filling runny. Add them straight from the freezer.
Do not overfill the pockets. It is tempting to add as much filling as possible, but overfilled pockets burst and leak. A moderate amount of filling is better than a generous amount that escapes.
Substitutions
Use all-purpose flour instead of whole wheat for a softer texture. Use any jam or fruit you have on hand. Peaches, apples, or cherries all work well. For a dairy-free version, use vegan cream cheese and plant milk. The texture will be slightly different but still good.
Storage & Reheating
These keep in the refrigerator for 3 days and freeze well for up to 2 months. Reheat in the toaster oven or oven for 5 to 7 minutes to restore the crispness. The microwave makes them soft and is not recommended. If you are freezing them, freeze them on a baking sheet first, then transfer to a freezer bag.
Approximate Nutrition Per Pocket (1/6 of recipe): 210 calories, 6g protein, 26g carbs, 9g fat, 4g fiber
Seal the edges firmly with a fork. Leaking filling is the most common problem with these pockets. A well-sealed edge makes all the difference.
4. Chocolate Chickpea Brownies That Are Actually Good
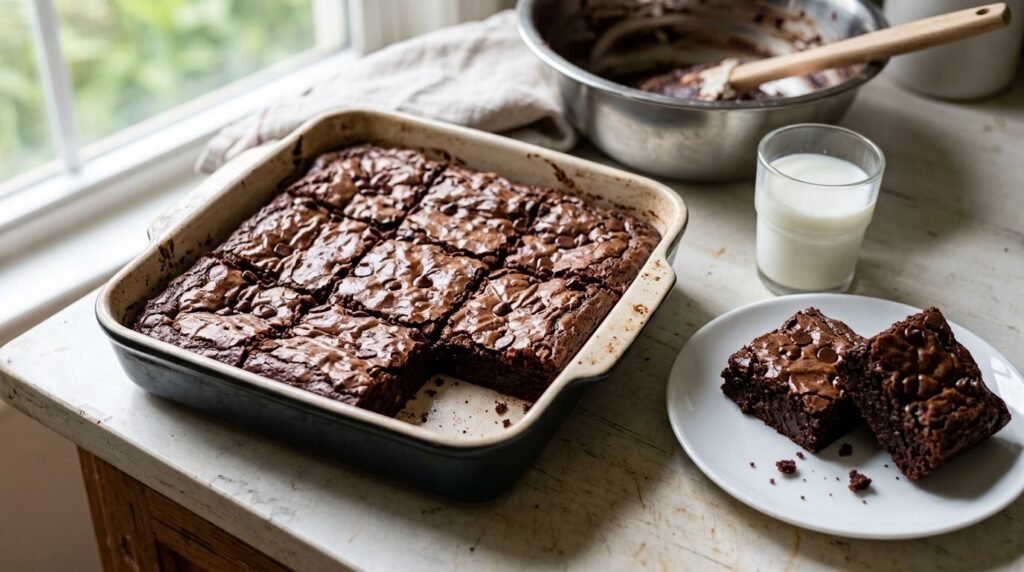
Brownies made with chickpeas sound like a compromise. They sound like the kind of dessert that is healthy but not actually good. I was skeptical when I first tried this recipe. But the texture is surprisingly dense and fudgy, and the flavor is rich and chocolatey. The chickpeas disappear into the batter and the result is a brownie that satisfies the chocolate craving without the heavy feeling that comes after a traditional brownie.
One thing most recipe cards leave out is that these brownies are best when they are slightly underbaked. Overbaked chickpea brownies become dry and crumbly. Underbaked they are fudgy and moist. Pull them out when the center is just set and the edges are pulling away from the pan. Let them cool completely before cutting. They continue to set as they cool.
Prep: 15 minutes Cook: 25 minutes Total: 40 minutes Serves: 9 Difficulty: Easy to medium, depending on blending
Ingredients
- 1 can chickpeas, drained and rinsed
- 2 large eggs
- ½ cup peanut butter or almond butter
- ⅓ cup honey or maple syrup
- ¼ cup unsweetened cocoa powder
- 1 teaspoon vanilla extract
- ½ teaspoon baking powder
- ¼ teaspoon salt
- ½ cup chocolate chips
Instructions
Preheat the oven to 350°F and grease an 8×8-inch baking dish or line it with parchment paper. Combine the chickpeas, eggs, nut butter, honey, cocoa powder, vanilla, baking powder, and salt in a food processor. Blend until the mixture is completely smooth and no chickpea pieces remain. This takes at least 2 to 3 minutes of processing. Scrape down the sides of the bowl as needed.
Fold in the chocolate chips by hand. Pour the batter into the prepared baking dish and smooth the top with a spatula. Bake for 22 to 25 minutes, until the edges are set and the center is just firm to the touch. Do not overbake. The brownies should be fudgy and moist. Let them cool completely in the pan before slicing. This is essential. Warm chickpea brownies are soft and fall apart easily.
Tips & Things That Go Wrong
Overbaking is the main risk. The brownies will seem slightly underdone when they come out of the oven. That is fine. They continue to cook from residual heat. If you wait until they look fully set, they will be dry. Pull them out at 22 minutes if you like fudgy brownies, 25 if you like them slightly more done.
The food processor is essential here. A blender may not break down the chickpeas thoroughly enough, leaving a gritty texture. If you do not have a food processor, mash the chickpeas by hand and blend the rest of the ingredients as thoroughly as possible. The texture will not be as smooth, but it will still work.
Substitutions
Use any nut butter you have on hand. Sunflower seed butter works for nut-free options. Use coconut sugar or date syrup instead of honey. For a dairy-free version, this recipe is already dairy-free. For an egg-free version, use a flax egg, but the texture will be slightly less fudgy.
Storage & Reheating
These keep in the refrigerator for up to 5 days and freeze well for up to 3 months. They are excellent cold or at room temperature. If you are freezing them, wrap individual squares in plastic wrap and store in a freezer bag. They thaw quickly at room temperature.
Approximate Nutrition Per Brownie (1/9 of recipe): 180 calories, 7g protein, 18g carbs, 10g fat, 4g fiber
Pull the brownies out at 22 minutes even if the center looks slightly underdone. They will set as they cool. Overbaked chickpea brownies are dry and crumbly. Underbaked is always better.
5. Fruit and Cinnamon Baked Apple Crisp for Two
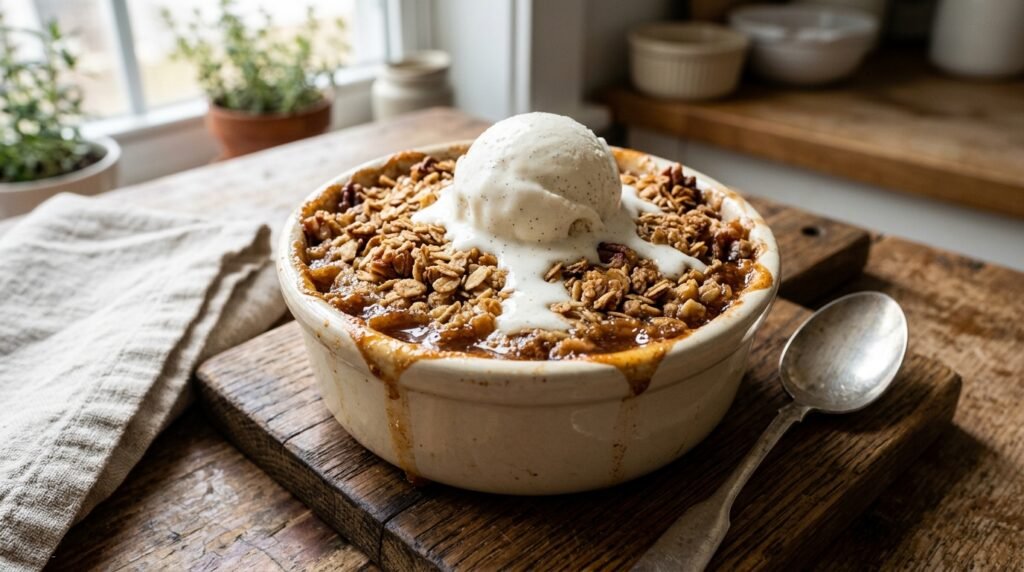
This is the dessert for the evening when you want something warm and comforting but do not want to make a full pie. The apple crisp comes together in minutes, bakes in about 30 minutes, and fills the kitchen with the kind of smell that makes everyone happy. The oats and nuts provide a satisfying crunch, and the apples soften into a sweet, tender filling.
The trick is using a mix of apple varieties. Tart apples like Granny Smith hold their shape and provide acidity. Sweet apples like Honeycrisp provide natural sweetness. A combination of the two creates the best texture and flavor. I learned this by making crisps with one variety and finding them either too tart or too sweet. The mix solves the problem.
Prep: 15 minutes Cook: 30 minutes Total: 45 minutes Serves: 2 Difficulty: Easy
Ingredients
For the Filling:
- 2 medium apples, peeled and sliced thin
- 1 tablespoon maple syrup or honey
- 1 tablespoon lemon juice
- ½ teaspoon cinnamon
For the Topping:
- ½ cup old-fashioned rolled oats
- ¼ cup whole wheat flour
- ¼ cup chopped walnuts or pecans
- 2 tablespoons maple syrup or honey
- 2 tablespoons coconut oil or butter, melted
- ½ teaspoon cinnamon
- Pinch of salt
Instructions
Preheat the oven to 375°F and grease two small ramekins or an 8×8-inch baking dish. In a bowl, combine the sliced apples with the maple syrup, lemon juice, and cinnamon. Stir to coat evenly. Divide the apple mixture between the ramekins.
In a separate bowl, mix the topping ingredients until crumbly. The mixture should hold together in clumps when pressed. Sprinkle the topping evenly over the apples. Bake for 25 to 30 minutes, until the topping is golden and the fruit is bubbling. Let cool for 5 minutes before serving. Serve warm with ice cream or yogurt.
Tips & Things That Go Wrong
The topping can burn if the crisp is placed too close to the oven element. Place the crisp on the middle rack and cover loosely with foil if the topping is browning too quickly. The filling can be too watery if the apples release too much liquid. If the apples are particularly juicy, add a teaspoon of cornstarch to the filling to thicken it.
Do not slice the apples too thin. They will become mushy during baking. Slice them about ¼ inch thick. This gives them time to soften without disintegrating.
Substitutions
Use any fruit you have on hand. Pears, peaches, or plums all work well. For a gluten-free version, use gluten-free flour and certified gluten-free oats. Use any nuts you like. Almonds, pecans, or walnuts all work. For a dairy-free version, use coconut oil instead of butter.
Storage & Reheating
This keeps in the refrigerator for 3 days. Reheat in the toaster oven or oven for 10 minutes to restore the crispness. The microwave makes the topping soft. If you are making this ahead, prepare the topping and filling separately and assemble just before baking.
Approximate Nutrition Per Serving (1/2 of recipe): 330 calories, 7g protein, 42g carbs, 16g fat, 6g fiber
Use a mix of apple varieties for the best flavor. Tart apples like Granny Smith and sweet apples like Honeycrisp together create the perfect balance of sweetness and acidity.
6. Banana Oat Cookies With Chocolate Chunks
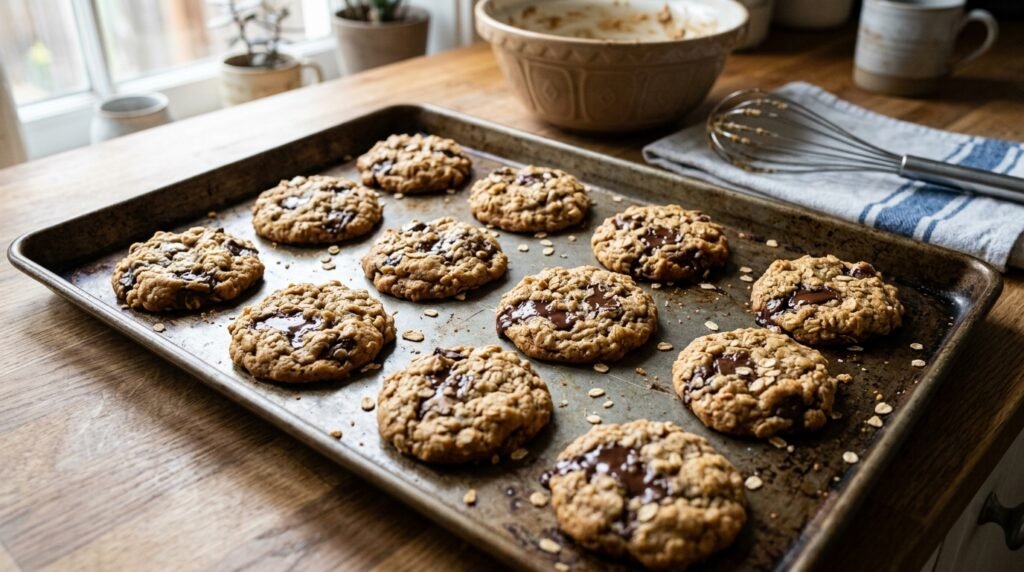
These are the cookies that taste like a treat but are built from ingredients that you probably already have in the pantry. The bananas provide natural sweetness and moisture. The oats provide texture and fiber. The chocolate chunks provide the satisfaction that makes a cookie feel like a cookie. They are soft, chewy, and satisfying.
Here is the part I would not skip. The bananas need to be overripe. Brown bananas with speckled skin are ideal. They are sweeter and more flavorful than yellow bananas, and they mash more easily. Green or yellow bananas do not work as well. The cookies will be less sweet and the texture will be different. I have tried it with suboptimal bananas and the result was disappointing.
Prep: 10 minutes Cook: 15 minutes Total: 25 minutes Serves: 4 (makes about 12 cookies) Difficulty: Easy
Ingredients
- 2 large overripe bananas, mashed
- 1 ½ cups old-fashioned rolled oats
- ¼ cup peanut butter or almond butter
- 2 tablespoons honey or maple syrup
- ½ teaspoon cinnamon
- ½ teaspoon vanilla extract
- ¼ teaspoon salt
- ¼ cup dark chocolate chunks
Instructions
Preheat the oven to 350°F and line a baking sheet with parchment paper. In a medium bowl, mash the bananas until smooth. Add the oats, peanut butter, honey, cinnamon, vanilla, and salt. Stir until everything is evenly combined. The mixture should be thick and sticky. Fold in the chocolate chunks.
Drop rounded tablespoons of the mixture onto the prepared baking sheet. Flatten each cookie slightly with the back of a spoon or your fingers. They will not spread much, so shape them before baking. Bake for 12 to 15 minutes, until the edges are golden and the cookies are set. Let cool on the baking sheet for 5 minutes before transferring to a cooling rack.
Tips & Things That Go Wrong
The cookies can be too moist if the bananas are very ripe. If the dough seems too wet, add a little more oats. If it seems too dry, add a little more banana or a splash of milk. The texture should be like a thick cookie dough that holds together when squeezed.
Do not overbake these cookies. They will be soft and chewy when they come out of the oven. That is the desired texture. If you bake them until they look firm, they will become dry and hard. Pull them out when the edges are just golden and the center is set.
Substitutions
Use any nut butter you have on hand. Sunflower seed butter works for nut-free options. Use dried fruit, shredded coconut, or seeds instead of chocolate chunks. For a gluten-free version, use certified gluten-free oats. For a lower-sugar version, reduce the honey and add extra ripe banana.
Storage & Reheating
These keep in the refrigerator for up to 5 days and freeze well for up to 3 months. They are good cold or at room temperature. If you prefer them warm, microwave them for 10 seconds. The texture holds up well to freezing and reheating.
Approximate Nutrition Per Cookie (2 per serving): 120 calories, 4g protein, 16g carbs, 5g fat, 3g fiber
Use overripe bananas with brown spots. They are sweeter and more flavorful than yellow bananas, and they mash more easily. This is the key to the recipe.
7. No-Sugar-Added Fruit Sorbet in a Bowl
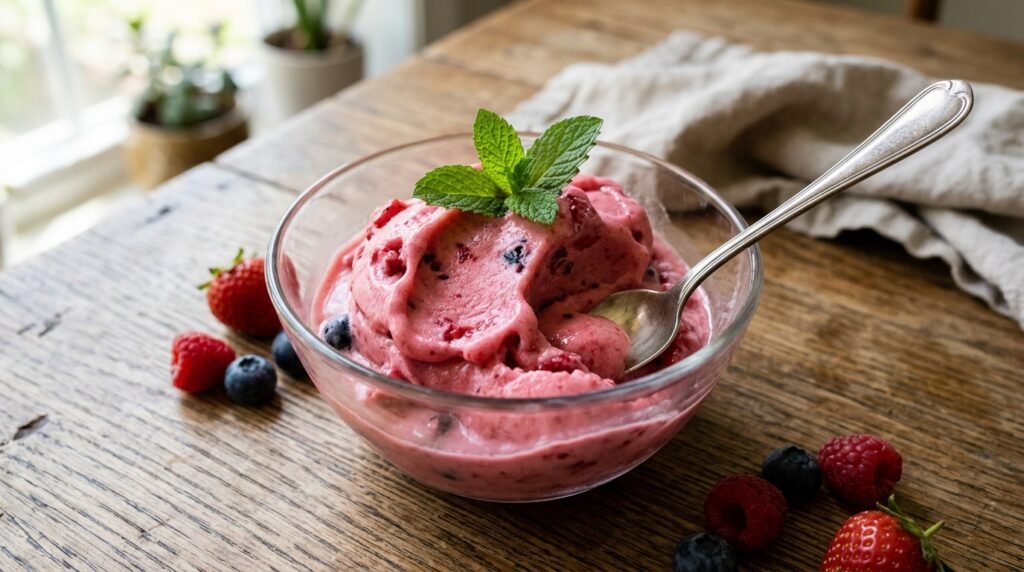
Sorbet is the dessert for the day when you want something cold and refreshing but do not want to add any sugar to the equation. The fruit provides all the sweetness. The texture is icy and satisfying. And the whole thing comes together in a few minutes with a blender and a freezer.
The trick is using frozen fruit. Frozen fruit creates the sorbet texture without the need for an ice cream maker. The frozen fruit breaks down in the blender and creates a smooth, scoopable consistency. If you use fresh fruit, you will need to freeze the mixture for several hours and stir it occasionally to prevent ice crystals. Frozen fruit is the shortcut that makes this recipe practical.
Prep: 5 minutes Freeze: 1 hour (optional) Total: 5 minutes plus freezing Serves: 2 Difficulty: Very easy
Ingredients
- 2 cups frozen fruit (berries, mango, or peaches)
- ¼ cup plain Greek yogurt or coconut cream (optional, for creaminess)
- 1 to 2 tablespoons honey or maple syrup (optional, for added sweetness)
- Splash of milk or water (to help blending)
Instructions
Combine all the ingredients in a blender or food processor. Blend until smooth and creamy. The mixture will be thick, so you may need to stop and scrape down the sides a few times. If it is too thick to blend, add a splash of milk or water to help it along. The less liquid you add, the thicker and more sorbet-like the texture will be.
Taste the mixture and adjust sweetness if needed. If you want a firmer texture, transfer the sorbet to a container and freeze for 1 to 2 hours. If you want to eat it immediately, serve it soft. The texture is different but still satisfying. Top with fresh fruit or a sprinkle of coconut if desired.
Tips & Things That Go Wrong
The blender can struggle with frozen fruit. If the blade is not moving, add a little more liquid. Do not add too much, or the sorbet will become watery. A small splash is enough to get the blender going. If you have a food processor, it is better for this task because it handles thick mixtures more easily.
Do not overblend. The sorbet will become too thin if the friction heats it up. Blend until smooth and stop. If the sorbet becomes too thin, freeze it for an hour to firm it up.
Substitutions
Use any frozen fruit you have on hand. Pineapple, strawberries, and blueberries all work well. Use coconut cream instead of yogurt for a dairy-free version. For a sweeter sorbet, add a date or a little honey. The sweetness of the sorbet depends entirely on the fruit you use.
Storage & Reheating
This keeps in the freezer for up to 2 months. The texture will become firmer and icier the longer it is frozen. If the sorbet becomes too hard, let it sit at room temperature for 10 to 15 minutes before serving. It softens quickly and returns to a scoopable consistency.
Approximate Nutrition Per Serving (1/2 of recipe, no added sweetener): 80 calories, 3g protein, 16g carbs, 1g fat, 4g fiber
Use frozen fruit directly from the freezer. No thawing required. The frozen fruit creates the sorbet texture without the need for an ice cream maker.
Frequently Asked Questions About Healthy Kids Desserts
Are these desserts really healthy?
They are healthier than traditional desserts, but they are still desserts. They use whole-food ingredients, natural sweeteners, and real fruits and grains. They do not use refined sugar, artificial sweeteners, or processed ingredients. They are lower in added sugar and higher in fiber and protein than most traditional desserts. That said, they are treats and should be treated as such. They are not a replacement for vegetables.
Can I reduce the sugar further in these recipes?
Yes, but understand that the texture and flavor will change. The sweetness in these recipes comes from honey, maple syrup, or fruit. You can reduce the sweetener by a tablespoon or two, but the recipe will be less sweet and the texture may be drier. If you are concerned about sugar, focus on the recipes that use fruit as the primary sweetener, such as the Frozen Yogurt Popsicles and the Banana Oat Cookies.
Can I freeze these desserts?
The No-Bake Chocolate Oat Bites, Chocolate Chickpea Brownies, and Banana Oat Cookies all freeze well. The Frozen Yogurt Popsicles are meant to be frozen. The Fruit and Cream Cheese Pockets and the Fruit Sorbet can also be frozen. The Apple Crisp is best eaten fresh, but leftovers can be frozen. Always wrap items well and label them with the date.
How do I make these recipes nut-free?
Use sunflower seed butter instead of peanut or almond butter. Sunflower seed butter is widely available and works well as a substitute. It has a slightly different flavor, but it is neutral enough to work in most of these recipes. For the Fruit and Cream Cheese Pockets, the nut-free version is already nut-free if you use a nut-free butter.
Can my child help make these desserts?
Yes, most of these recipes are excellent for involving children. The No-Bake Chocolate Oat Bites are simple enough for small hands to roll. The Fruit Sorbet requires blending, but children can add the ingredients and press the button. The Banana Oat Cookies are a good first baking project. The Fruit and Cream Cheese Pockets require more dexterity, but older children can help with sealing. The involvement increases the likelihood of eating.
Making Healthy Desserts Work in Your Home
The most important decision you will make is not which dessert to try first. It is how you frame it. If you present these as a healthy alternative that is a compromise, children will approach them with suspicion. If you present them as a treat that happens to be made with good ingredients, they will be accepted more readily. The framing matters as much as the recipe.
If I had to recommend a starting point, I would say start with the Banana Oat Cookies. They are the most familiar and the least likely to be met with skepticism. They look like cookies and taste like cookies. The banana and oats are invisible. The chocolate chunks provide the reward. From there, branch out to the recipe that fits your particular need.
Dessert does not have to be a source of conflict. It can be a moment of connection, a reward without the aftermath, a treat that actually nourishes. These recipes are designed to make that easier. They are not perfect, and they are not magic. But they are real food that tastes good, and that is a powerful thing to bring to the table.