
The after-practice hunger hits before the cleats are even off, and half the time what’s on hand is a granola bar that reads more like a candy bar once you check the label. “High protein” gets slapped on packaging that has almost nothing to do with actual protein content, and a lot of what’s marketed to kids specifically is just sugar with a stronger marketing budget behind it.
Most protein-snack advice for kids either leans on protein powder blended into something that tastes faintly chalky, or it recommends the same three foods — string cheese, a hard-boiled egg, almonds — on repeat until a kid stops wanting any of them. None of that accounts for a picky eater, a nut-free classroom, or an afternoon where nobody has fifteen minutes to spare.
The eight snacks here pull protein from real, whole ingredients — turkey, eggs, beans, yogurt, tuna, peanut butter — and I’ve noted exactly where the protein is coming from in each one, along with which ones are worth batching ahead and which ones fall apart if you try. A few need the oven or a skillet; the rest need nothing more than a cutting board.
1. Turkey and Cheese Roll-Ups With Ranch Yogurt Dip
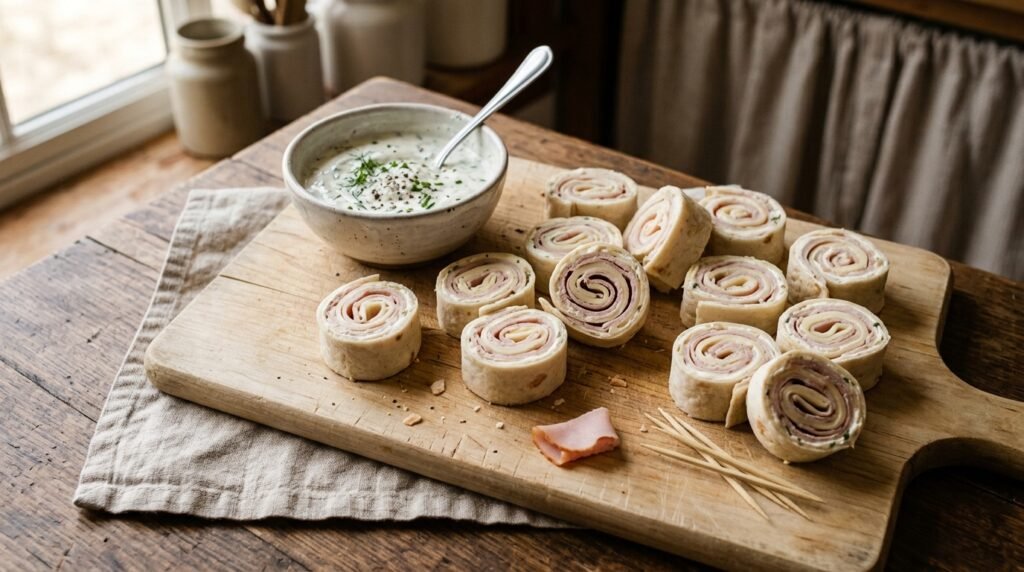
This is the snack that requires the least amount of decision-making, which is exactly why it works on the days when nobody has the energy for a project. Sliced deli turkey wrapped around a strip of cheese, rolled tight, sliced into rounds — protein from two directions with almost no prep.
The texture is straightforward: cool, slightly firm turkey against a softer cheese center, with a little chew where the two meet. Kids who like to pull food apart before eating it tend to unroll these instead of biting through, which is fine — either way it gets eaten.
One thing worth knowing: the roll-ups hold their shape better with string cheese or a firm block cheese cut into strips than with sliced cheese, which tends to slide out the side once you cut into rounds. If sliced cheese is what you have, press the roll-up firmly before slicing to help it hold.
Prep: 8 minutes Cook: 0 minutes Total: 8 minutes Serves: 4, about 3 roll-ups each Difficulty: Easy
- 8 slices deli turkey (about 8 oz / 225g)
- 4 mozzarella or cheddar string cheese sticks, or 8 strips firm block cheese
- 1/2 cup plain Greek yogurt (120g)
- 1 teaspoon garlic powder
- 1/2 teaspoon dried dill
- Pinch of salt
- 1 teaspoon milk, to thin as needed
- Lay a slice of turkey flat on a cutting board. Place a piece of cheese along one edge.
- Roll the turkey around the cheese tightly, so there are no gaps for the cheese to slip through.
- Repeat with the remaining turkey and cheese, then slice each roll into 3 or 4 rounds using a sharp knife, wiping the blade between cuts if it gets sticky with cheese.
- In a small bowl, stir together the yogurt, garlic powder, dill, and salt. Thin with the milk a little at a time until the dip is smooth and easy to scoop.
- Serve the roll-ups with the dip alongside.
Chill the rolled turkey for 5 minutes before slicing if it feels floppy. A cold roll holds its shape under the knife much better than a room-temperature one, and you get cleaner rounds instead of ones that unravel.
Ham works in place of turkey with no real change. For a dairy-free version, skip the cheese and dip and swap in a thin layer of hummus spread on the turkey before rolling — the protein count changes slightly, but the format still works the same way.
These keep for about 2 days in the fridge in an airtight container, though the cheese firms up and the roll-ups are noticeably better on day one. I would not freeze these — the turkey turns watery and stringy once thawed.
Approximate nutrition per serving, 3 roll-ups plus 2 tablespoons dip: 160 calories, 14g protein, 3g carbohydrates, 10g fat.
Chill the rolls for a few minutes before slicing. A cold roll cuts clean; a warm one falls apart under the knife.
2. Baked Mini Egg and Cheese Muffins
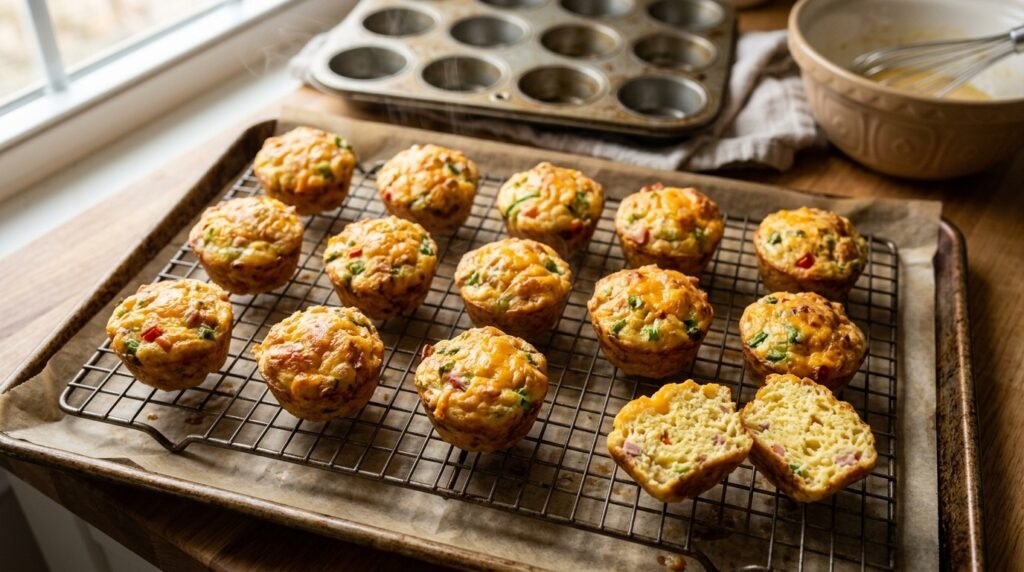
These are the one recipe in this list that actually goes in the oven, and they are worth the extra step because they hold up so well over a busy week. Whisked eggs baked in a muffin tin with cheese and small bits of vegetable, essentially a crustless mini quiche sized for small hands.
The texture out of the oven is soft and a little puffed, similar to a frittata, and it settles into something slightly denser once it cools and sits in the fridge overnight — still tender, just less airy.
Here is the part I would not skip: grease the muffin tin generously, even if it says nonstick. Eggs are notorious for sticking, and a muffin that tears apart trying to get it out of the tin is a lot less appealing to a kid than a whole, neat one.
Honestly, I make a double batch on Sunday specifically because these freeze so well. It is one of the few recipes here where making extra genuinely saves time later instead of just creating more dishes.
Prep: 10 minutes Cook: 15 minutes Total: 25 minutes Serves: makes 12 mini muffins Difficulty: Easy to moderate
- 6 large eggs
- 1/4 cup milk (60ml)
- 1/2 cup shredded cheddar cheese (60g)
- 1/3 cup finely diced bell pepper
- 1/3 cup finely diced ham or cooked turkey (optional)
- Pinch of salt and pepper
- Nonstick spray or butter, for greasing
- Preheat the oven to 350°F (175°C) and generously grease a 12-cup mini muffin tin, or use silicone liners.
- In a bowl, whisk the eggs, milk, salt, and pepper together until fully combined and slightly frothy.
- Stir in the cheese, bell pepper, and ham if using.
- Divide the mixture evenly among the muffin cups, filling each about three-quarters full.
- Bake for 12 to 15 minutes, until the tops are set and lightly golden and a muffin springs back gently when pressed in the center. Let cool for 5 minutes before running a butter knife around the edges to release them.
Do not overbake these. Eggs left in the oven a few minutes too long turn rubbery instead of tender, and that texture is a common reason kids reject egg dishes outright.
Swap the bell pepper for finely chopped spinach or grated zucchini if your kid dislikes visible pepper pieces — either blends into the eggs almost invisibly once baked. Any melty cheese works in place of cheddar; just avoid pre-shredded cheese with a lot of anti-caking starch if you want the smoothest texture, since it can leave a slightly grainy finish.
These keep in the fridge for about 4 days in an airtight container, and they freeze very well for up to 2 months. To reheat, microwave from frozen for about 45 seconds, or from the fridge for about 20 seconds — just enough to take the chill off without drying them out.
Approximate nutrition per 2 muffins: 110 calories, 8g protein, 2g carbohydrates, 7g fat.
Grease the tin more than feels necessary. A muffin that comes out whole gets eaten; one that tears apart in the tin usually ends up in pieces nobody wants.
3. Crispy Baked Chickpea Snacks
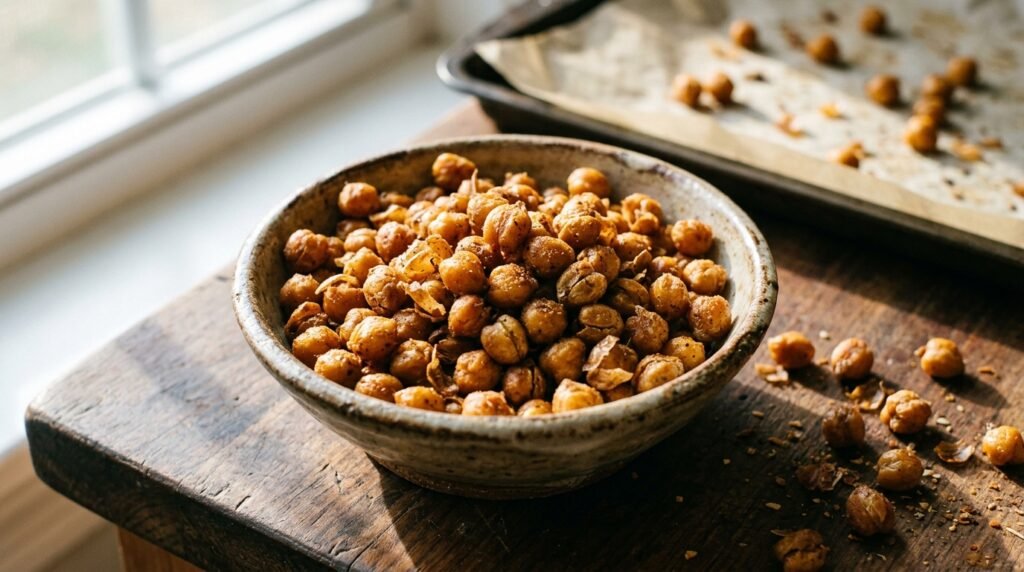
This is the crunchy one, and it is worth making because most packaged crunchy snacks for kids are just some form of fried starch. Roasted chickpeas get genuinely crisp in the oven and carry a decent amount of plant protein for something that eats like a chip.
The trick is moisture. Chickpeas straight out of the can are wetter than they look, and any leftover moisture steams instead of crisping in the oven. Drying them properly before roasting is the difference between a crunchy snack and a chewy, slightly soggy one.
That said, do not expect chip-level crunch on day one if your chickpeas were extra wet going in — sometimes a second short round in the oven is needed. It is a small amount of trial and error, but a worthwhile one.
Prep: 10 minutes, plus drying time Cook: 30 minutes Total: about 45 minutes Serves: 4, about 1/3 cup each Difficulty: Easy
- 1 can (15 oz) chickpeas, drained and rinsed
- 1 tablespoon olive oil
- 1/2 teaspoon garlic powder
- 1/4 teaspoon smoked paprika (optional)
- 1/4 teaspoon salt
- Preheat the oven to 400°F (200°C).
- Spread the chickpeas on a clean kitchen towel and pat them thoroughly dry, rolling them gently to help loosen and remove some of the papery skins. Discard any skins that come off easily.
- Toss the dried chickpeas with olive oil, garlic powder, paprika if using, and salt until evenly coated.
- Spread the chickpeas in a single layer on a parchment-lined baking sheet, making sure they are not touching or crowded, which would cause them to steam instead of crisp.
- Roast for 25 to 30 minutes, shaking the pan halfway through, until deeply golden and crisp all the way through. Let cool for 10 minutes on the pan; they crisp up further as they cool.
Do not skip drying the chickpeas. Wet chickpeas going into a hot oven release steam that keeps the outsides soft no matter how long you roast them.
Any spice blend works here instead of garlic powder and paprika — a little cinnamon and a touch of honey drizzled on after roasting turns these into more of a sweet snack, which is worth trying if your kid is more into sweet than savory.
These are best within about 2 days. They start out genuinely crisp, but chickpeas reabsorb moisture from the air and soften noticeably by day 3, even in an airtight container. If they do soften, a quick 5-minute re-crisp in a 350°F oven brings most of the crunch back.
Approximate nutrition per serving: 90 calories, 5g protein, 12g carbohydrates, 3g fat, 3g fiber.
Dry the chickpeas before they go anywhere near the oven. It takes two extra minutes and it is the actual difference between crisp and merely roasted.
4. Black Bean and Cheese Quesadilla Wedges
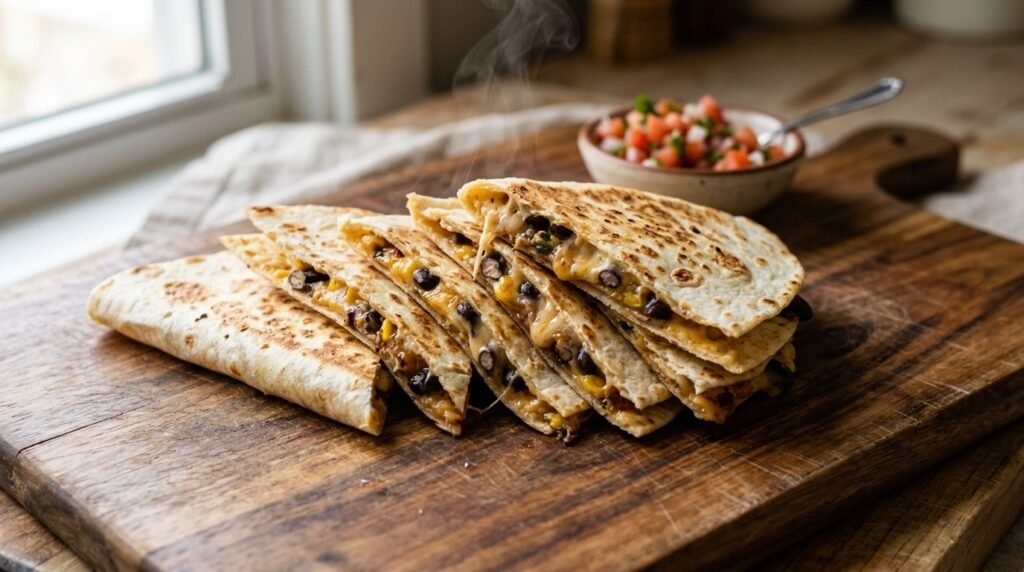
This is the warm, filling option on the list, closer to a small meal than a snack, which makes it the one I reach for after sports practice when a granola bar clearly is not going to cut it.
Mashed black beans and melted cheese between two tortillas, cooked until the outside is crisp and the inside is fully melted. The bean layer adds enough protein and fiber that this holds a kid over longer than cheese alone would.
A crowded pan is the main risk here. Cook the quesadilla over medium heat with enough room to flip it cleanly, and resist the urge to rush it on high heat — the tortilla will brown before the cheese fully melts, leaving a cold, unmelted center.
Prep: 5 minutes Cook: 8 minutes Total: 13 minutes Serves: 2, makes 2 quesadillas Difficulty: Easy
- 1/2 cup canned black beans, drained, rinsed, and lightly mashed
- 4 small flour tortillas (6-inch)
- 3/4 cup shredded cheddar or Monterey Jack cheese
- 1 tablespoon butter or oil, for the pan
- Optional: salsa or sour cream, for serving
- Spread the mashed black beans over one tortilla, leaving a small border around the edge, then sprinkle cheese evenly on top. Place a second tortilla on top to close the quesadilla.
- Heat the butter or oil in a nonstick skillet over medium heat.
- Place the quesadilla in the pan and cook for 3 to 4 minutes, until the bottom is golden brown in patches and the cheese along the edges starts to soften.
- Carefully flip the quesadilla using a wide spatula, and cook for another 3 to 4 minutes, until the second side is golden and the cheese is fully melted through the center.
- Slide onto a cutting board, let sit for a minute, then cut into wedges.
Let the quesadilla rest for a minute before cutting. Slicing it straight out of the pan lets the melted cheese run out through the cut, instead of staying put inside.
Refried beans work in place of mashed black beans and add a creamier texture. Corn tortillas can replace flour tortillas for a different flavor, though they crack more easily when folded, so handle them gently or warm them slightly first to make them more pliable.
Quesadillas are really a same-day food — the tortilla goes soft and a little gummy once refrigerated and reheated. If you want to prep ahead, mash the beans and shred the cheese in advance and assemble and cook just before serving.
Approximate nutrition per serving, 1 quesadilla: 320 calories, 15g protein, 30g carbohydrates, 15g fat, 5g fiber.
Keep the heat at medium, not high. A rushed quesadilla browns on the outside before the cheese melts, and a cold cheese center is the main way this recipe goes wrong.
5. Greek Yogurt Protein Popsicles
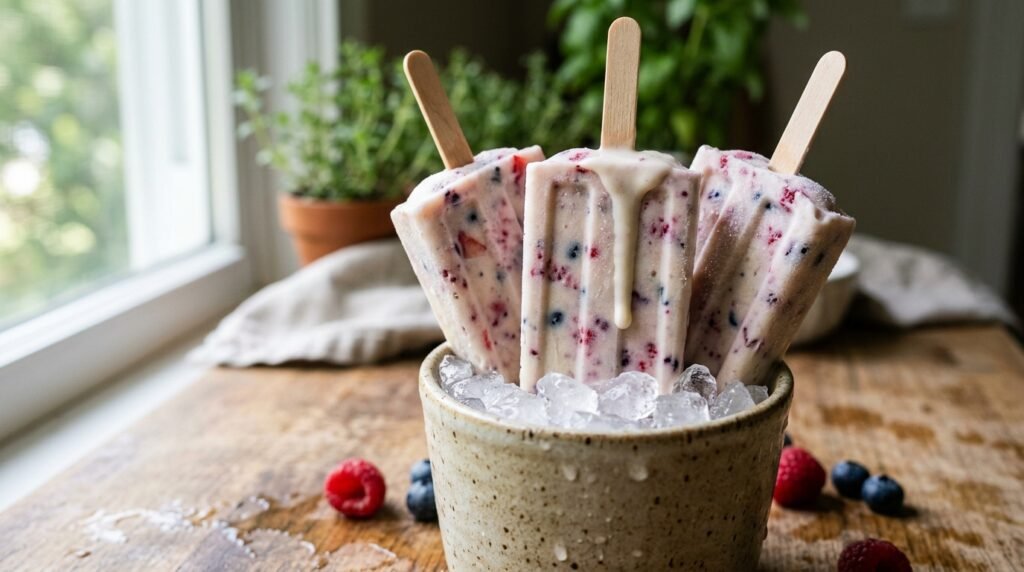
This is the freezer option for the days that call for something cold rather than something warm. Greek yogurt blended with fruit and frozen on a stick, closer to a creamy popsicle than the icy fruit-juice kind.
The texture is dense and a little chewy right out of the freezer, softening to something closer to soft-serve within a few minutes. That softening window is short, so this is a snack better eaten outside or over a plate than while walking around the house.
The version that actually holds up: blend the fruit smooth rather than leaving chunks. Chunky fruit pieces freeze into hard, icy bits inside an otherwise creamy popsicle, which is an odd texture contrast for a kid who is expecting something uniform.
Prep: 10 minutes Freeze: 5 to 6 hours, or overnight Total: about 6 hours, mostly hands-off Serves: makes 6 popsicles Difficulty: Easy
- 2 cups plain Greek yogurt (480g)
- 1 cup mixed berries, fresh or thawed frozen
- 2 to 3 tablespoons honey or maple syrup, to taste
- 1/2 teaspoon vanilla extract
- In a blender, combine the berries, honey, and vanilla and blend until smooth.
- Add the yogurt and pulse a few times, just until combined; over-blending can thin the mixture more than you want.
- Pour the mixture into popsicle molds, leaving a little room at the top since the mixture expands slightly as it freezes.
- Insert popsicle sticks and freeze for at least 5 hours, or overnight, until completely solid.
- To unmold, run the outside of the mold under warm water for about 10 seconds, then gently pull the stick to release.
Blend the fruit fully smooth. Whole or roughly chopped berries turn into hard icy pockets once frozen, which is a jarring texture next to the creamy yogurt around them.
Mango or banana works well in place of berries for a milder flavor. A dairy-free yogurt alternative can be used, though it tends to freeze slightly icier than Greek yogurt, which has more protein and fat helping keep the texture creamy.
These keep in the freezer for about 2 months in the molds or transferred to a freezer bag once solid. There is no good way to store these outside the freezer — they are a straight-from-the-freezer snack, not a make-ahead-for-the-lunchbox one, unless the lunchbox has serious insulation.
Approximate nutrition per popsicle: 70 calories, 8g protein, 8g carbohydrates, 1g fat.
Blend the fruit until it is completely smooth. Chunks that seem fine in the blender turn into hard icy bits once frozen, and that is not the texture anyone is hoping for.
6. Cottage Cheese Fruit and Granola Bowl
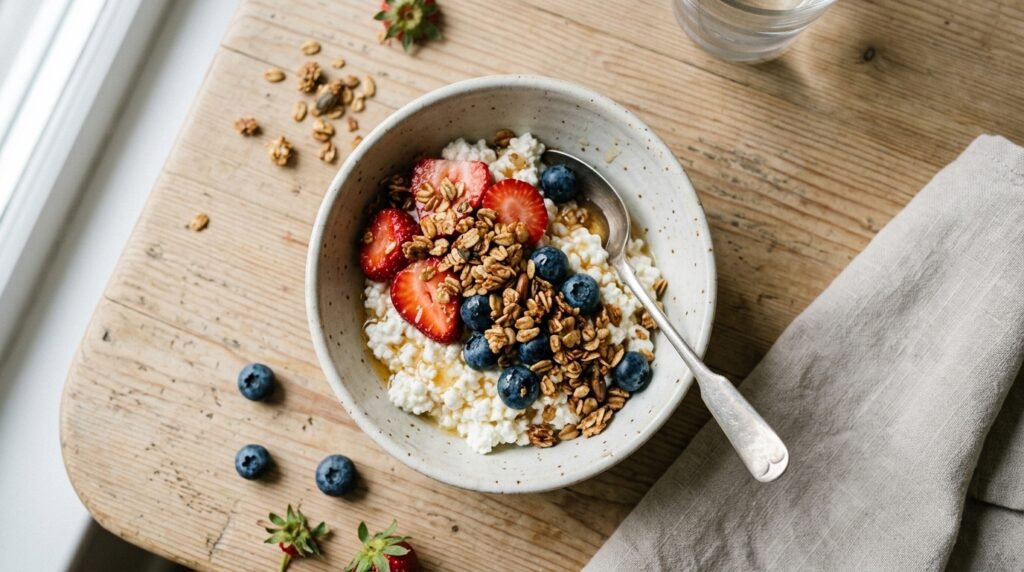
Cottage cheese does not have a great reputation with kids, mostly because of the texture, but it carries more protein per cup than almost anything else on this list and is genuinely fast to put together — no cooking, no waiting, just assembly.
The curds are the sticking point for a lot of kids. If yours is one of them, a quick pulse in a blender or food processor smooths cottage cheese into something closer to a thick yogurt, with none of the texture that tends to get rejected on sight.
One thing most recipe cards leave out: fresh berries cut ahead of time release juice into the cottage cheese and turn the whole bowl watery within about 20 minutes. Cut and add the fruit right before serving if you are prepping this even slightly ahead.
Prep: 5 minutes Cook: 0 minutes Total: 5 minutes Serves: 2 Difficulty: Easy
- 1 cup cottage cheese (225g), full-fat or 2%
- 1/2 cup sliced strawberries
- 1/4 cup blueberries
- 2 tablespoons granola
- 1 teaspoon honey (optional)
- Divide the cottage cheese between two bowls.
- Top each with sliced strawberries and blueberries.
- Sprinkle granola over the top.
- Drizzle with honey if using, and serve right away.
If your kid rejects the curd texture, blend the cottage cheese smooth first. It changes the mouthfeel completely while keeping the same protein content, and most kids do not notice the difference once it looks more like yogurt.
Any soft fruit works in place of berries — diced peach, mango, or banana are all good options. Greek yogurt can stand in for cottage cheese for a similar protein boost with a smoother starting texture, though the protein count runs slightly lower.
This is a make-it-and-eat-it snack rather than a make-ahead one. Cottage cheese on its own keeps for several days in the fridge, but once fruit and granola are added, plan to eat it within about 20 minutes before the fruit releases water and the granola loses its crunch.
Approximate nutrition per serving: 140 calories, 13g protein, 14g carbohydrates, 4g fat, 2g fiber.
Add the fruit right before serving, not before. Berries left sitting in cottage cheese turn the whole bowl watery within about twenty minutes.
7. Tuna Salad Cucumber Bites
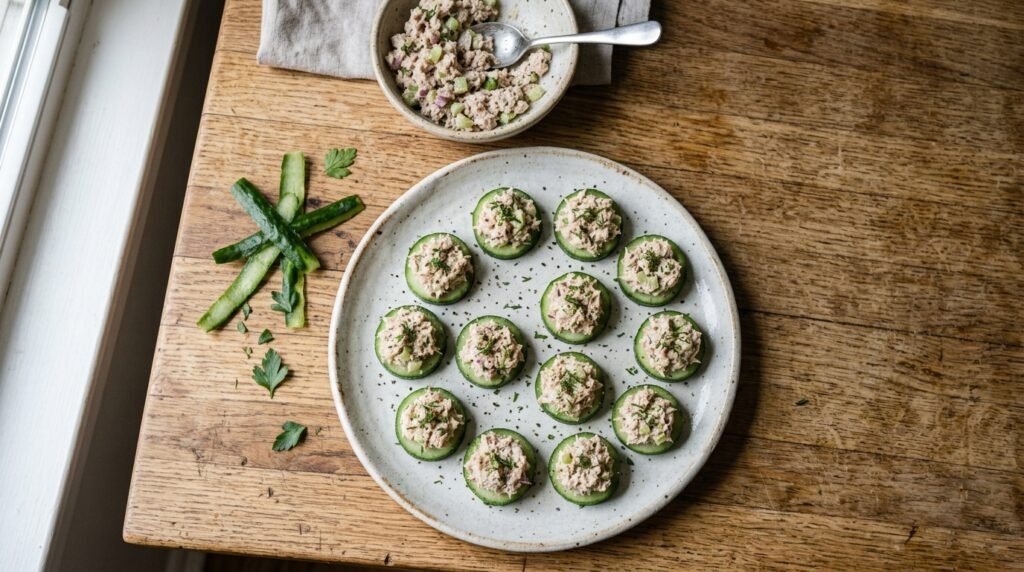
This is the one I make when there is a can of tuna in the pantry and nothing else planned. Tuna salad scooped onto cucumber rounds instead of bread, which keeps things lighter and adds a cold, crisp crunch that plain crackers do not give you.
The flavor stays mild here on purpose — a light hand with mayo and no strong onion, since a sharp tuna salad tends to get more resistance from kids than an adult version would. It is easy to make a spicier batch for yourself alongside a milder one for them.
Do not rush this part: cucumber rounds sitting under tuna salad for more than an hour start releasing water, which makes the tuna salad slide right off. Assemble these close to serving time, or serve the tuna salad and cucumber separately for kids to build their own.
Prep: 10 minutes Cook: 0 minutes Total: 10 minutes Serves: 3 Difficulty: Easy
- 1 can (5 oz) tuna packed in water, drained well
- 2 tablespoons plain Greek yogurt or mayonnaise
- 1 teaspoon lemon juice
- Pinch of salt and pepper
- 1 large cucumber, sliced into rounds about 1/2 inch thick
- Fresh dill or parsley, chopped, for topping (optional)
- In a bowl, flake the tuna with a fork and stir in the yogurt or mayonnaise, lemon juice, salt, and pepper until evenly combined.
- Arrange the cucumber rounds on a plate.
- Spoon a small scoop of tuna salad onto each cucumber round.
- Sprinkle with fresh herbs if using, and serve right away.
Drain the tuna well before mixing. Tuna straight from the can carries a surprising amount of liquid, and skipping this step leaves the tuna salad thin and runny instead of scoopable.
Canned salmon works in place of tuna with a milder flavor that some kids prefer. Whole grain crackers can replace cucumber if you want something that holds up longer at room temperature, though you lose the lighter, crunchier bite.
The tuna salad on its own keeps for about 3 days in the fridge in an airtight container. Once assembled on cucumber, though, eat within about an hour — the cucumber releases water underneath the tuna salad and the bites get soggy fast.
Approximate nutrition per serving: 90 calories, 12g protein, 3g carbohydrates, 3g fat.
Assemble these close to serving time. Cucumber sitting under tuna salad releases water fast, and a soggy bite is a hard sell to a kid who was on board a few minutes earlier.
8. Peanut Butter Protein Oat Bites
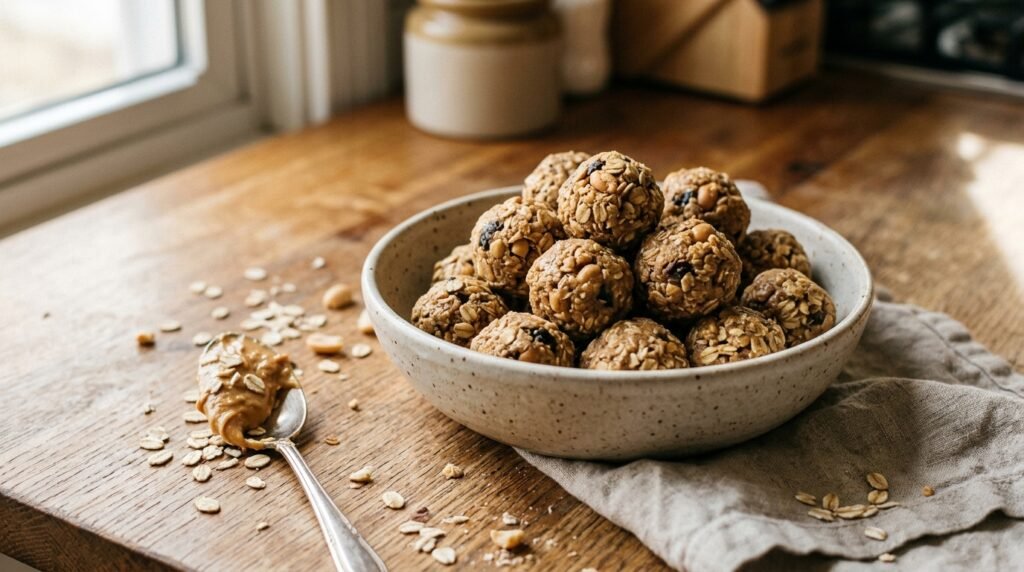
This is the grab-and-go option, the one that lives in the fridge for whenever a snack is needed in under a minute. Peanut butter, oats, and a little dry milk powder come together into a chewy, no-cook bite that holds up in a lunchbox better than almost anything else on this list.
Unlike a lot of protein bites recipes, this one skips flavored protein powder, which can leave a chalky aftertaste that kids notice immediately. Peanut butter and a small amount of nonfat dry milk powder add protein without changing the taste much.
The version that actually holds together needs a short rest before rolling — the oats need a few minutes to soak up moisture from the peanut butter, or the bites crumble apart in small hands on the way to the mouth.
Prep: 12 minutes, includes a 10-minute rest Chill: 20 minutes Total: about 30 minutes Serves: makes 14 bites Difficulty: Easy
- 1 cup rolled oats (90g)
- 1/2 cup creamy peanut butter (130g)
- 1/4 cup honey (60ml)
- 3 tablespoons nonfat dry milk powder
- 1/2 teaspoon vanilla extract
- Pinch of salt
- In a bowl, stir the peanut butter and honey together until smooth.
- Add the oats, dry milk powder, vanilla, and salt, mixing until every oat is coated and no dry powder streaks remain.
- Let the mixture rest for 10 minutes so the oats can absorb some moisture.
- Roll into 1-inch balls, about a tablespoon each.
- Chill for at least 20 minutes before serving, so the bites firm up.
Do not skip the rest before rolling. Oats mixed in and rolled immediately do not have time to soften, and the bites crumble instead of holding together.
Sunflower seed butter works for nut-free households, though the bites end up slightly less sweet — an extra teaspoon of honey balances that out. Instant oats work in a pinch but make a denser, slightly gummier bite than rolled oats.
These keep in an airtight container in the fridge for about a week and freeze well for up to 3 months. They travel fine in a lunchbox without an ice pack for a normal school morning, since they hold their shape at room temperature for a few hours.
Approximate nutrition per bite: 85 calories, 4g protein, 9g carbohydrates, 4g fat.
Let the mixture rest before rolling. Ten minutes is a small ask for bites that actually hold together instead of falling apart on the way to snack time.
Mixing These Into a Weekly Snack Rotation
A few of these are worth batching, and a few are not. The egg muffins, peanut butter oat bites, and yogurt popsicles all keep well across a full week, so those are the ones to make on a weekend when there is a little extra time. The quesadillas, tuna cucumber bites, and cottage cheese bowls come together fast enough that making them fresh each time barely costs more effort than pulling something premade from the fridge.
Pairing two lighter options — like the roll-ups and a piece of fruit — covers similar ground to one bigger snack, and gives a picky eater more than one thing to say yes to.
Frequently Asked Questions
Can I make these snacks ahead of time for the week?
The baked egg muffins, peanut butter oat bites, and yogurt popsicles all hold up well made in advance and are the ones worth batching on a weekend. The quesadillas, tuna cucumber bites, and cottage cheese bowls are better made fresh each time — they take only a few minutes and lose texture quickly once assembled.
Which of these are best after sports practice or a busy afternoon?
The black bean and cheese quesadilla and the baked egg muffins are the most filling options here, closer to a small meal than a snack, which makes them a better fit after an active afternoon than something light like the cucumber bites.
What can I use instead of dairy in these recipes?
The turkey roll-ups can skip the cheese and dip in favor of hummus. The yogurt popsicles and cottage cheese bowl can use a dairy-free yogurt alternative, though the protein count runs a little lower and the texture freezes slightly icier. The egg muffins, chickpeas, quesadilla, and tuna bites are naturally more flexible, since the cheese in each is easy to reduce or swap out.
Can I freeze any of these snacks?
The egg muffins freeze very well for up to 2 months, and the peanut butter oat bites freeze for up to 3 months. The yogurt popsicles are meant to live in the freezer. The roll-ups, chickpeas, quesadilla, cottage cheese bowl, and tuna bites do not freeze well — the textures of turkey, roasted chickpeas, tortillas, and fresh dairy all suffer after thawing.
How can I add more protein without using protein powder?
A second egg muffin, an extra tablespoon of peanut butter, or a bigger scoop of cottage cheese or Greek yogurt all add protein without changing the flavor much. Doubling the cheese in the quesadilla or roll-ups is another easy way to boost the protein count without introducing a new ingredient.
How do I make these more appealing to a picky eater?
Start with whichever protein source your kid already accepts elsewhere — cheese, peanut butter, and turkey tend to have the widest acceptance. If a texture is the issue rather than a flavor, the cottage cheese bowl and tuna bites can be blended smoother, and the egg muffins can be made with finely chopped or grated vegetables instead of visible pieces.
If you only add one of these to the rotation, make it the baked egg muffins. They freeze well, reheat in under a minute, and cover more of a week’s worth of snacks from a single batch than anything else on this list.
The larger point is that high-protein does not have to mean a bar with a wrapper full of ingredients nobody can pronounce. Turkey, eggs, beans, yogurt, and peanut butter get you there just as reliably, usually for less money and with a lot fewer additives.
A protein snack only works if it actually gets eaten — the rest is just nutrition on paper.