
The weekend mornings when nobody wants to get out of bed, but everyone is hungry by 7:30. The breakfast that looks promising on Instagram but leaves the kids hungry by mid-morning. The battle between something nutritious and something they will actually eat. This is the real weekend breakfast problem.
Most kids’ breakfast content falls into two camps. Either it is ridiculously complicated with ingredient lists that require a specialty grocery store, or it is so basic that it barely qualifies as cooking. Pancakes from a mix, cereal, or toast. Fine for a Tuesday, but a weekend deserves something more interesting. And yet, the recipes that look exciting often fall apart in real kitchens because they take too long, create too many dishes, or get rejected by small eaters.
These eight breakfast recipes are built for actual weekend mornings. They work with normal ingredients. They involve the kids without making a disaster zone. They taste good enough that the adults will eat them too. And they solve specific breakfast problems. One is for the morning when you want to be in the kitchen. One is for the morning when you want to be anywhere else. One is for using up leftover odds and ends. One is for the kid who wants to build their own breakfast. One is for the child who insists on eating toast soldiers. Every recipe has a reason to exist beyond simply being a breakfast item.
1. Fluffy Oatmeal Pancakes With Yogurt and Fruit Topping
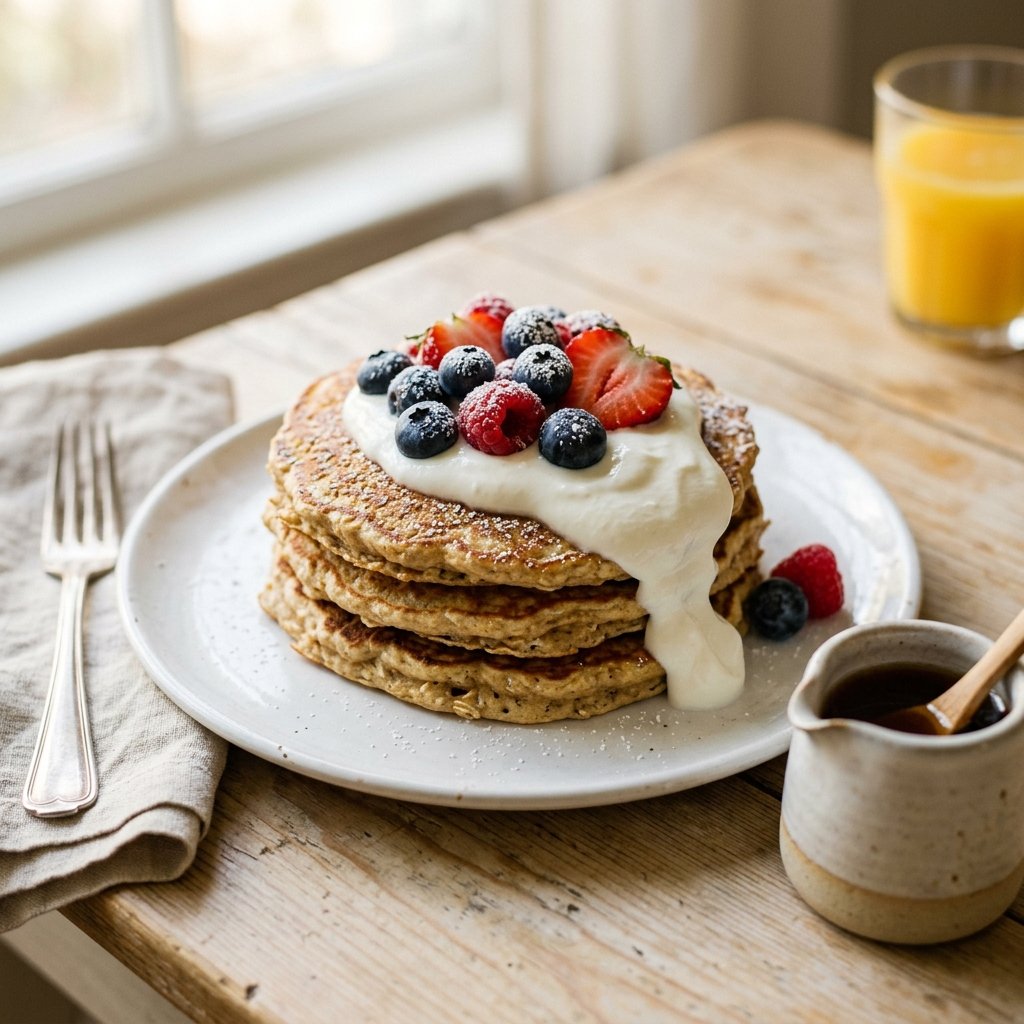
I have tried a lot of pancake recipes that claim to be healthier than the standard version, and most of them turn out dense, gummy, or lacking in flavor. These are different. The oats get soaked briefly in milk, which softens them enough to blend right into the batter, and the Greek yogurt makes the pancakes tender and slightly tangy. The final texture is closer to a traditional pancake than you might expect from something built around oats.
Here is what I would not skip. Soaking the oats for those ten minutes is not optional. Without that step, the batter will be gritty and the pancakes will not cook through evenly. I have forgotten this step exactly once. The pancakes looked fine on the outside but had a raw, chewy center. It was a waste of ingredients and a disappointed kid. So let the oats soak.
Prep: 15 minutes Cook: 10 minutes Total: 25 minutes Serves: 4 (makes about 12 medium pancakes) Difficulty: Easy to medium, depending on patience with flipping
Ingredients
- 1 ½ cups old-fashioned rolled oats (not instant)
- 1 ½ cups milk (whole or 2% work best; oat milk works too)
- 1 cup plain Greek yogurt (full-fat recommended for texture)
- 2 large eggs
- 2 tablespoons melted butter or coconut oil, plus extra for the pan
- 1 tablespoon honey or maple syrup
- 1 teaspoon vanilla extract
- 1 cup all-purpose flour (whole wheat pastry flour works well as a substitute)
- 1 ½ teaspoons baking powder
- ½ teaspoon baking soda
- ½ teaspoon cinnamon
- ¼ teaspoon salt
- Extra Greek yogurt, fresh fruit, and maple syrup for serving
Instructions
Start with the oats. Combine the oats and milk in a large bowl and let them sit for at least 10 minutes. The mixture will look thick and porridge-like. In the meantime, measure out the dry ingredients and whisk them together in a separate bowl.
Add the Greek yogurt, eggs, melted butter, honey, and vanilla to the oat mixture and stir until everything is combined. The batter will be thick, thicker than a standard pancake batter, which is exactly what you want. Fold the dry ingredients into the wet mixture until just combined. A few lumps are fine. Overmixing makes the pancakes tough.
Heat a griddle or large skillet over medium heat and add a little butter or oil. When the pan is hot enough that a drop of water sizzles and dances, drop the batter in using a ¼-cup measure. Cook until bubbles form on the surface and the edges start to look set, about 3 minutes per side. The pancakes should be golden brown and cooked through. Keep finished pancakes warm in a low oven while you cook the rest, or serve them straight to the table because they smell too good to wait.
Tips & Things That Go Wrong
The biggest mistake here is cooking the pancakes over heat that is too high. They will burn on the outside and stay raw inside. Medium heat is your friend. If the pancakes are browning too fast, turn the heat down slightly. The first pancake is often a test pancake. That is normal. Use it to dial in the temperature.
Do not crowd the pan. Each pancake needs room to spread and room for air to circulate. I only cook three at a time on a standard skillet, maybe four on a griddle.
If the batter thickens too much while you wait, stir in a splash of milk. It gets thicker as the oats continue to absorb liquid.
Substitutions
Use gluten-free all-purpose flour in place of regular flour. The texture will be slightly different but still good. Use plant-based milk and a flax egg for a dairy-free, egg-free version, but understand that the texture will change. The pancakes will be less tender and more likely to fall apart. Low-fat Greek yogurt works in a pinch but makes the pancakes slightly thinner and less fluffy.
Storage & Reheating
These pancakes freeze well. Cool them completely on a wire rack, then stack with parchment paper between each pancake and store in a freezer bag. To reheat, pop them straight from the freezer into a toaster or toaster oven. They come back to life better than microwave reheating, which makes them soggy. Refrigerated pancakes keep for 3 days and can be reheated in a toaster or skillet.
Approximate Nutrition Per Serving (2 pancakes, no syrup): 320 calories, 14g protein, 38g carbs, 14g fat, 4g fiber
Soak the oats for the full 10 minutes. This is not a tip to speed through. The batter will be gritty and the pancakes will not cook through if you skip this step.
2. Build-Your-Own Breakfast Tacos With Scrambled Eggs and Avocado
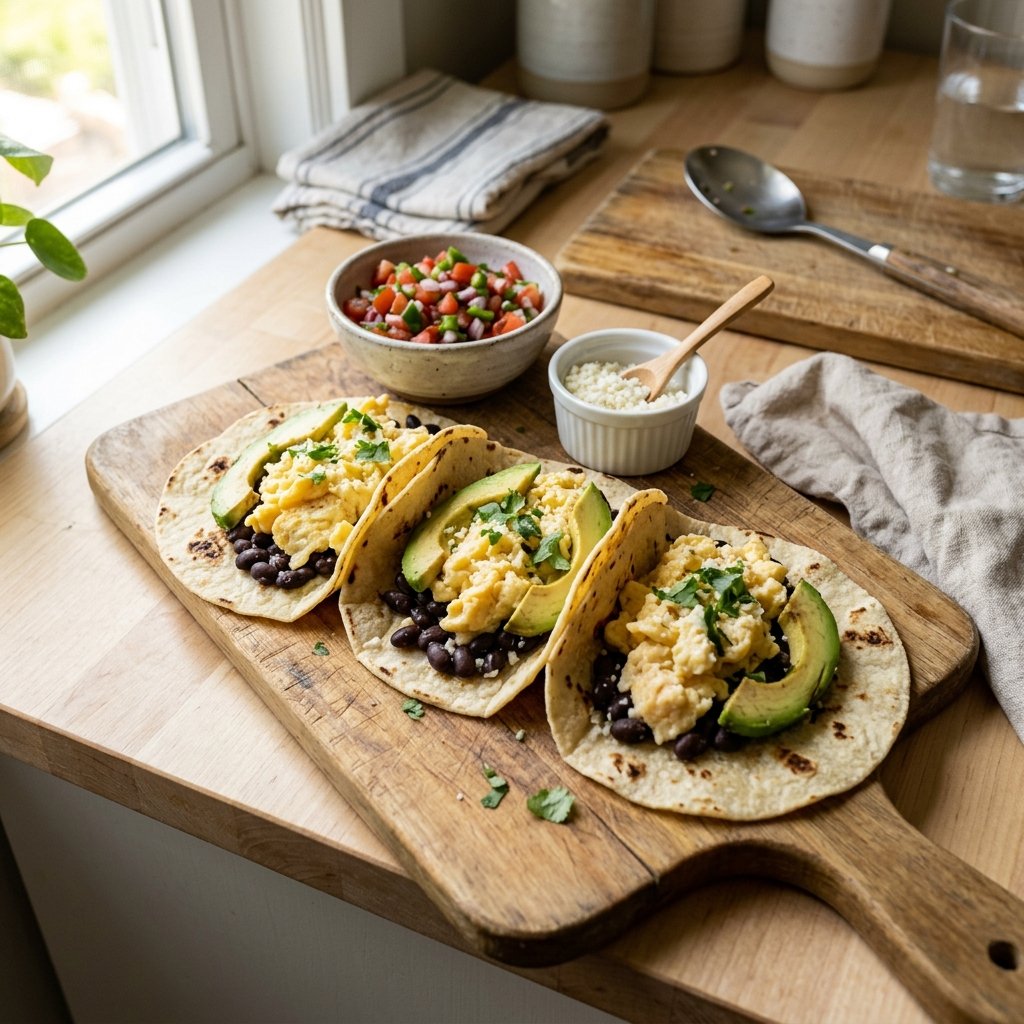
Breakfast tacos solve two important problems. They get protein into everyone without a fight, and they give children a sense of control over what they eat. I have watched kids who normally push eggs around their plate willingly eat two tacos because they assembled them themselves. The interactive element changes the dynamic completely.
These are soft, warm, and forgiving. If the eggs get a little overcooked, they still taste fine folded into a tortilla with cheese and salsa. If a child does not like avocado, they can skip it. If they only want cheese and eggs, that is also a valid taco. This is breakfast built for individual preferences without requiring short-order cooking.
Prep: 10 minutes Cook: 10 minutes Total: 20 minutes Serves: 4 (makes 8 tacos, 2 per person) Difficulty: Easy
Ingredients
- 8 small corn or flour tortillas (soft taco size)
- 8 large eggs
- ¼ cup milk or water
- ½ teaspoon salt
- ¼ teaspoon black pepper
- 2 tablespoons butter or olive oil for scrambling
- 1 can black beans, drained and rinsed (about 1 ½ cups)
- 1 large avocado, sliced
- ½ cup crumbled cotija or feta cheese
- ½ cup pico de gallo or fresh salsa
- Optional: hot sauce, sour cream, or Greek yogurt for the adults
Instructions
Warm the tortillas in a dry skillet over medium heat for about 30 seconds per side, just until they are warm and pliable. Stack them on a plate and cover with a clean kitchen towel so they stay soft. Do not skip this step. Cold tortillas crack and fall apart.
Whisk the eggs with the milk, salt, and pepper until the yolks and whites are completely combined. Heat the butter in a nonstick skillet over medium-low heat. Add the eggs and let them sit for a moment before stirring. Using a rubber spatula, push the eggs gently from the edges toward the center in slow, folding movements. This creates large, soft curds. Remove them from the heat while they are still slightly glossy and underdone. They will continue to cook from residual heat.
Set everything out on the table in separate bowls. The eggs, the warmed tortillas, the black beans, the sliced avocado, the cheese, and the salsa. Let everyone build their own tacos. This is the kind of breakfast that looks like more effort than it actually is because of the presentation, but the total hands-on cooking time is under 15 minutes.
Tips & Things That Go Wrong
The eggs are the most important element. Overcooked eggs ruin the tacos. Take them off the heat earlier than you think is necessary. They should look slightly wet and soft. The residual heat will finish them. If you cook them until they look completely done in the pan, they will be dry and rubbery on the plate.
Corn tortillas can be stubborn. They break if not warmed properly. If you find corn tortillas too finicky, use flour tortillas. They are more forgiving and kids usually prefer them anyway.
Do not put the avocado out too early. It browns quickly. Slice it right before serving or squeeze a little lime juice over the slices to slow the oxidation.
Substitutions
Use leftover roasted vegetables or sautéed bell peppers in place of beans. If you do not have cotija cheese, shredded cheddar or Monterey Jack works just fine. For a lower-carb version, serve the fillings over a bed of lettuce or in large lettuce leaves. The black beans can be swapped for pinto beans or refried beans.
Storage & Reheating
This is best eaten immediately. Leftover eggs become less appealing after refrigeration, and the avocado goes brown. If you have leftover components, store them separately. The eggs and beans can be refrigerated for 2 days and reheated gently in a skillet. The tortillas can be wrapped and reheated in a toaster oven. But honestly, the texture is never quite the same. Make these for a weekend morning when everyone is present and hungry.
Approximate Nutrition Per Taco (using corn tortilla, no sour cream): 180 calories, 9g protein, 14g carbs, 10g fat, 4g fiber
Take the eggs off the heat while they are still slightly glossy. They will finish cooking in the warm tortilla and stay soft instead of turning into rubber.
3. DIY Omelet Muffins With Vegetables and Cheese
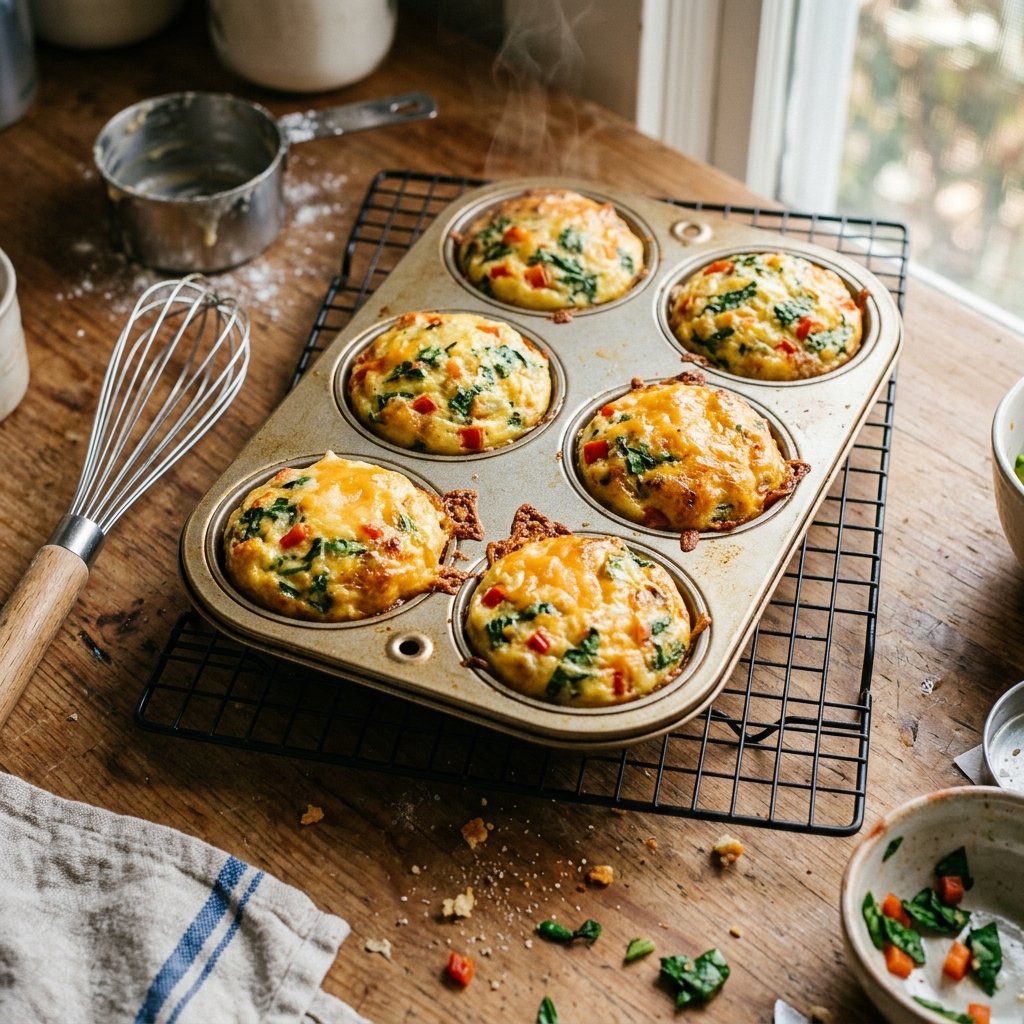
Omelet muffins are one of those recipes that look like they belong on a parenting blog, but I make them because they actually work. They are baked, not pan-fried, which means no standing over a stove flipping individual omelets. They are portioned into individual servings. They can be customized with whatever vegetables are in the refrigerator. And children who are suspicious of visible green bits can help mix the ingredients themselves, which somehow makes the vegetables more acceptable.
One thing most recipe cards leave out is that these can be dry and rubbery if baked incorrectly. The texture goes from perfectly tender to disappointing in about two minutes of extra cooking. The trick is checking them early and pulling them out when they are just set.
Prep: 15 minutes Cook: 18 minutes Total: 33 minutes Serves: 6 (makes 12 muffin cups) Difficulty: Easy, with some attention to baking time
Ingredients
- 12 large eggs
- ½ cup milk
- ½ teaspoon salt
- ¼ teaspoon black pepper
- 1 cup finely chopped vegetables (bell pepper, spinach, onion, mushrooms, or any combination)
- 1 cup shredded cheese (cheddar, Monterey Jack, or a blend)
- Olive oil or nonstick spray for the muffin tin
Instructions
Preheat the oven to 375°F and generously grease a 12-cup muffin tin. If you have a silicone muffin pan, this is the time to use it. The eggs release from silicone without any sticking, and the cleanup is almost nonexistent.
Whisk the eggs, milk, salt, and pepper in a large bowl until the mixture is completely smooth and uniform. This is the base. Add the vegetables and the cheese and stir to distribute them evenly throughout the egg mixture. Divide the mixture evenly among the muffin cups. Each cup should be about three-quarters full.
Bake for 16 to 18 minutes, but start checking at 15 minutes. The muffins are done when they are puffed and set in the center. They should not jiggle when you gently shake the pan. The tops will be lightly golden and slightly domed. Let them cool in the pan for about 5 minutes. They will deflate slightly, which is normal, and they will release more easily when they have cooled slightly. Run a thin spatula around the edges and pop them out.
Tips & Things That Go Wrong
The most common problem with these muffins is that they stick. Even with greasing, some muffins will cling to the pan. If the pan is not nonstick, use muffin liners. It adds a step but prevents frustration. I have had mornings where I spent longer scraping egg out of the pan than I did preparing the batter.
Do not overfill the muffin cups. They will puff up and spill over the edges, and then you have a messy pan and uneven muffins. Fill them no more than three-quarters full. The baking time varies depending on the vegetables. If you use watery vegetables like mushrooms, the muffins will take slightly longer to set because of the extra moisture. Pat the vegetables dry with a paper towel before adding them if you notice they are particularly wet.
Substitutions
Use any combination of cooked meats, vegetables, or cheeses you have on hand. Diced ham, crumbled cooked sausage, or chopped turkey all work. For a dairy-free version, skip the cheese and use unsweetened plant milk. The texture will be slightly less rich but still fine. If you want to add greens like spinach, chop them very finely so they distribute evenly throughout the muffins.
Storage & Reheating
These are excellent for meal prep. Refrigerate them in an airtight container for up to 4 days. They reheat in the microwave in 20 seconds or in a toaster oven for a few minutes. They also freeze well for up to 3 months. Freeze them on a baking sheet and then transfer to a freezer bag. Reheat frozen muffins in the microwave for 45 seconds to 1 minute. The texture holds up remarkably well for a baked egg product.
Approximate Nutrition Per Muffin (2 per serving): 120 calories, 9g protein, 3g carbs, 8g fat, 1g fiber
Check these at 15 minutes even if the recipe says 18. Every oven runs differently, and overbaked egg muffins have a rubbery texture that no amount of cheese can fix.
4. Baked French Toast Casserole With Mixed Berries
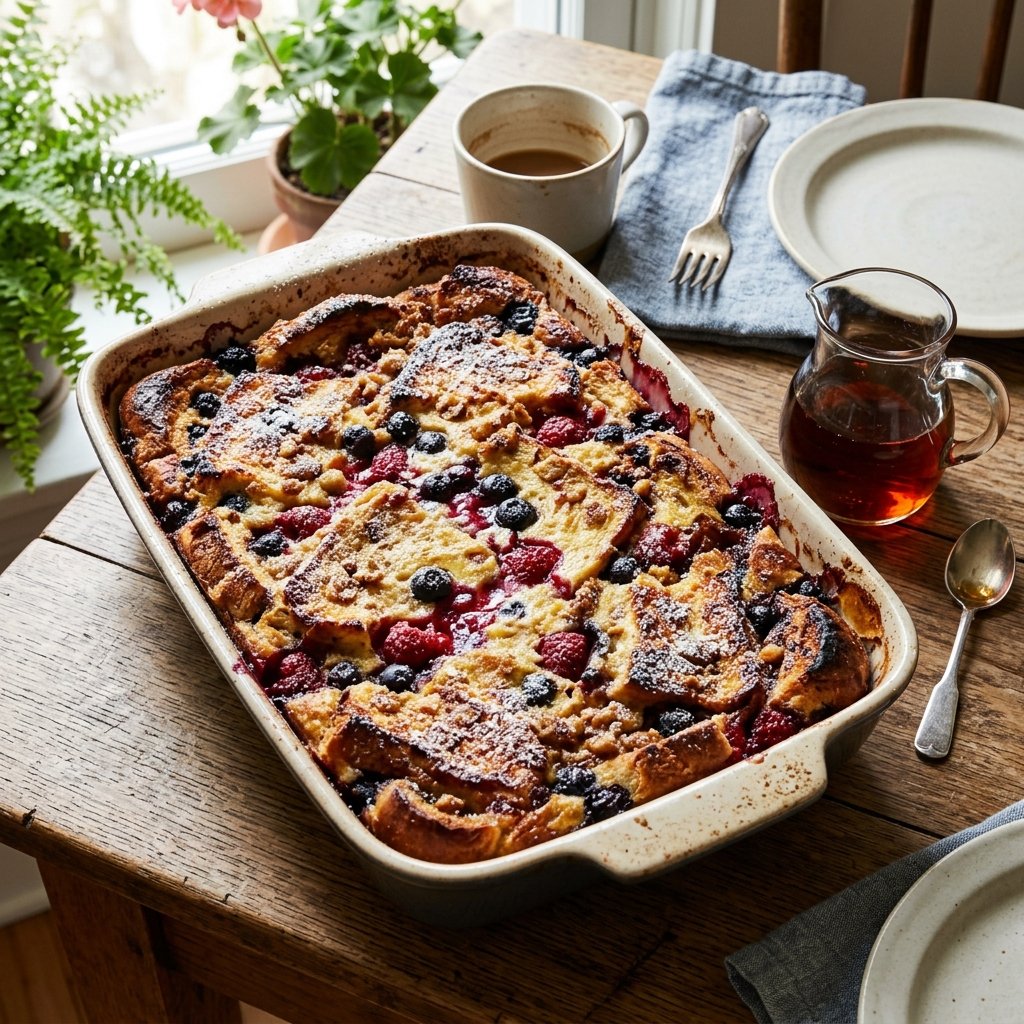
This is the breakfast for the weekend morning when you want to sleep in but still want to produce something impressive. The preparation happens the night before. The baking happens while everyone is getting dressed. The result is a warm, custardy, crowd-pleasing dish that feels like a special occasion but actually takes minimal morning effort.
The version that actually holds up in a baking dish is different from the kind you would make in a skillet. The bread needs to be slightly stale so it absorbs the custard without turning into mush. The custard needs enough eggs to set properly. And the berries need to be distributed evenly so they do not all end up on one side. I learned that one the hard way. The kids who got the berry-heavy corner had a messy plate and the kids with the bland corner were disappointed.
Prep: 15 minutes + 1 hour to overnight chilling Cook: 40 minutes Total: About 1 hour plus chilling Serves: 6 to 8 Difficulty: Easy, with planning required
Ingredients
- 1 loaf of slightly stale brioche, challah, or thick-sliced white bread (about 10 to 12 slices)
- 8 large eggs
- 2 cups milk (whole milk is best, but 2% works)
- ⅓ cup maple syrup or brown sugar
- 1 tablespoon vanilla extract
- 1 teaspoon cinnamon
- ¼ teaspoon nutmeg
- ½ teaspoon salt
- 2 cups mixed fresh or frozen berries (blueberries, raspberries, blackberries)
- Powdered sugar for dusting
Instructions
Grease a 9×13-inch baking dish. Tear or cut the bread into rough chunks, about 1 to 2 inches in size. Arrange them in the baking dish in a single layer with some overlap. The bread should fill the dish but not be compressed. There should be small gaps where the custard can seep in.
Whisk together the eggs, milk, maple syrup, vanilla, cinnamon, nutmeg, and salt until the mixture is smooth and the eggs are completely incorporated. Pour the custard evenly over the bread. Press the bread down gently with a spatula so every piece gets coated. Sprinkle the berries over the top and press them gently into the bread. Cover the dish with plastic wrap and refrigerate for at least 1 hour, or ideally overnight. This step is critical for the bread to absorb the custard fully.
When you are ready to bake, preheat the oven to 350°F and remove the dish from the refrigerator. Let it sit on the counter while the oven preheats. Bake for 35 to 40 minutes, until the top is golden brown and the casserole is set in the center. A knife inserted into the center should come out clean. The berries will have burst and created streaks of color through the bread. Let it rest for 5 minutes before serving. Dust with powdered sugar and serve with maple syrup on the side.
Tips & Things That Go Wrong
Do not use fresh, soft bread. It will disintegrate into the custard and turn into a paste. Stale bread is essential. If your bread is fresh, spread the slices out on a baking sheet and toast them in the oven at 300°F for about 10 minutes to dry them out.
The custard needs to be thoroughly mixed. If the eggs are not fully incorporated, the casserole will have streaks of cooked egg white in spots, which is unappealing. Whisk vigorously until the mixture is completely uniform.
Frozen berries work fine and are often more affordable. Do not thaw them first. Add them to the casserole straight from the freezer. Thawed berries release too much liquid and make the casserole soggy.
Substitutions
Use any bread you have, but the richer the bread, the better the texture. Croissants, panettone, or even leftover cinnamon rolls work well. For a dairy-free version, use oat milk or almond milk. The texture will be slightly less custardy, but it still works. Use a mix of fruits if berries are not available. Sliced peaches, chopped apples, or even mashed banana work well.
Storage & Reheating
This keeps in the refrigerator for up to 3 days. The texture changes after the first day. The bread becomes softer and more pudding-like, which some people actually prefer. Reheat individual portions in the microwave for 1 minute or in the toaster oven for 5 minutes. You can freeze the unbaked casserole for up to 2 months. Assemble it completely, wrap it well, and freeze. To bake, thaw in the refrigerator overnight and then bake as directed.
Approximate Nutrition Per Serving (1/8 of dish): 280 calories, 12g protein, 35g carbs, 10g fat, 3g fiber
Stale bread is not optional. Fresh bread will not hold its shape in the custard. If you do not have stale bread, dry fresh bread in the oven before assembling.
5. One-Pan Veggie and Egg Scramble With Toast
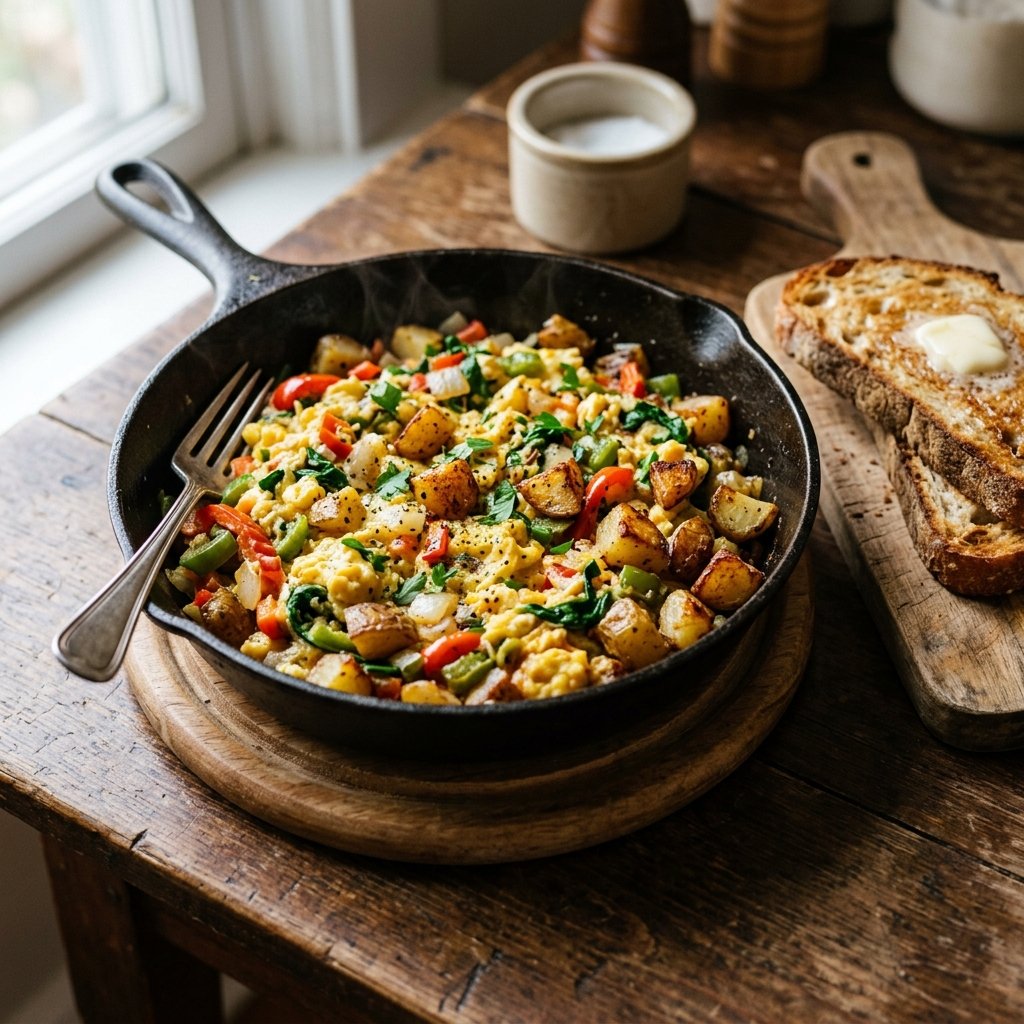
This is the breakfast for the morning when you need to use up vegetables that are about to go bad and you do not want to dirty a dozen dishes. Everything cooks in one pan. The vegetables go in first, the eggs go in last, and the whole thing comes together in under 20 minutes. It is not pretty in the way a composed breakfast plate is pretty, but it is deeply satisfying and practically efficient.
The trick is layering the cooking. The vegetables and potatoes need time to soften and brown before the eggs go in. If you throw everything in at once, the eggs will be overcooked by the time the potatoes are done. I have made that mistake more times than I want to admit. The eggs turned out gray and the potatoes were still crunchy in the middle.
Prep: 10 minutes Cook: 18 minutes Total: 28 minutes Serves: 4 Difficulty: Easy to medium, depending on timing
Ingredients
- 1 medium potato or sweet potato, diced small
- 1 bell pepper, diced
- ½ onion, diced
- 2 cups fresh spinach
- 8 large eggs
- ¼ cup milk or water
- ½ teaspoon salt
- ¼ teaspoon black pepper
- 1 tablespoon olive oil or butter
- ¼ cup shredded cheese (optional)
- Toast for serving
Instructions
Heat the olive oil in a large skillet over medium heat. Add the diced potato and cook for 5 to 6 minutes, stirring occasionally, until the potato pieces start to soften and get golden edges. The smaller the potato dice, the faster this will happen. Add the onion and bell pepper and cook for another 4 to 5 minutes, until the vegetables are tender and the onion is translucent.
Add the spinach to the pan and cook for about 1 minute, just until it wilts. Stir it into the vegetables so everything is evenly distributed. While the spinach is wilting, whisk the eggs with the milk, salt, and pepper in a bowl.
Pour the eggs into the skillet and stir immediately with a spatula. Cook for 2 to 3 minutes, stirring and folding the eggs gently as they set. The eggs should be soft and slightly underdone when you pull the pan off the heat. If you are using cheese, sprinkle it over the top during the last minute of cooking and stir it in. Serve immediately with toast.
Tips & Things That Go Wrong
The potato dice size is the key to this recipe. If the potato chunks are too large, they will not cook through before the eggs are done. Dice them small, about ½ inch. Sweet potatoes take slightly longer to cook than regular potatoes. If you are using sweet potato, you may need to add 2 to 3 minutes of cooking time.
A crowded pan will steam instead of brown. If you have a small skillet and a lot of vegetables, the potatoes will not get crispy edges. Use a large skillet and do not overload it.
The eggs will keep cooking after they leave the pan. Pull them off the heat while they still look slightly wet. The residual heat from the skillet will finish them. If you wait until they look perfectly set in the pan, they will be overcooked by the time they reach the plate.
Substitutions
Use any vegetables you have on hand. Zucchini, mushrooms, or diced tomatoes work well. Add cooked sausage or bacon for extra protein and flavor. For a dairy-free version, skip the cheese and use water instead of milk. The texture will be slightly lighter but still good.
Storage & Reheating
This is best eaten fresh. Leftovers keep for 2 days in the refrigerator but the texture changes. The eggs become less soft and the potatoes lose their crispness. Reheat gently in a skillet over low heat or in the microwave for 30 seconds. Do not overheat, or the eggs will become rubbery.
Approximate Nutrition Per Serving (without toast): 220 calories, 14g protein, 15g carbs, 12g fat, 3g fiber
Pull the scramble off the heat while the eggs still look slightly wet. The residual heat will finish them perfectly. Overcooked eggs are the most common way to ruin this dish.
6. Cinnamon Sugar Toast Soldiers With Dippy Eggs
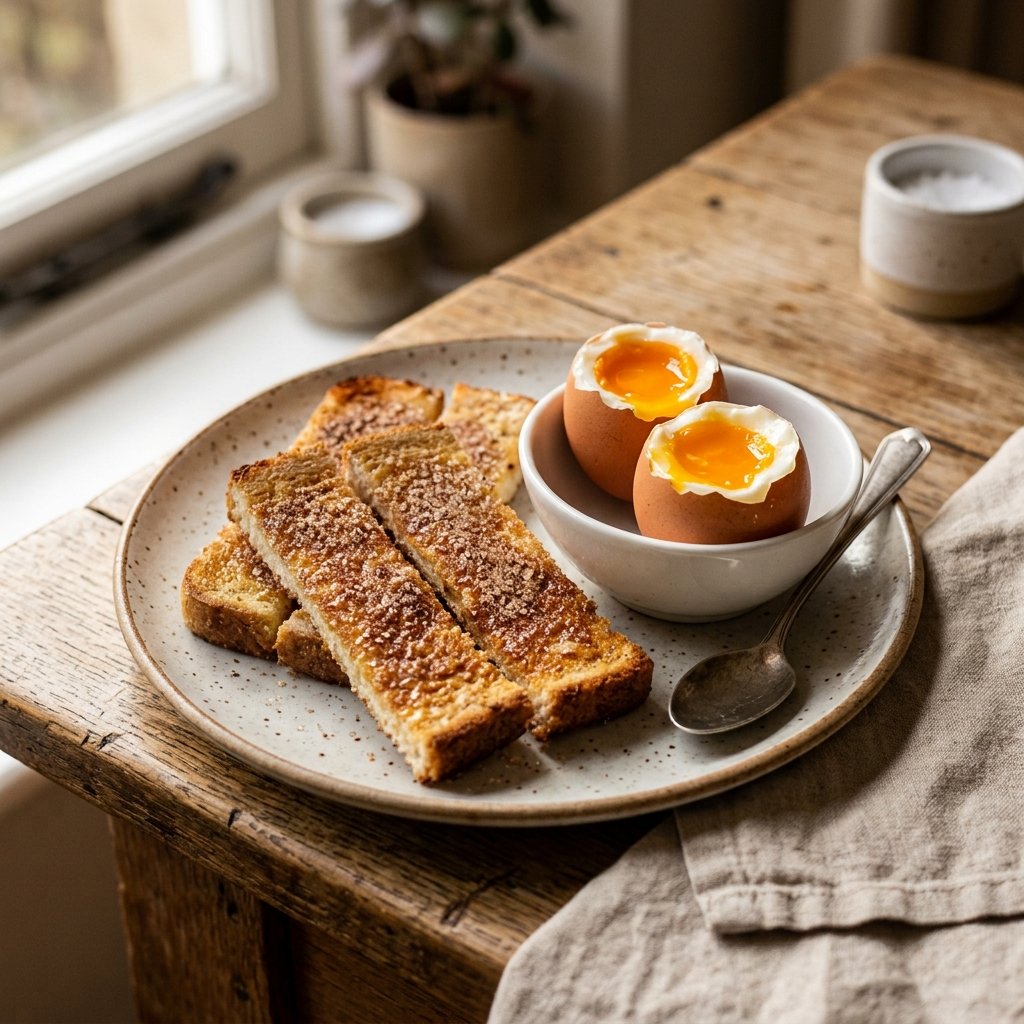
If you have a child who refuses to eat eggs any other way, this recipe is for you. The eggs are cooked to the perfect dippy consistency, and the toast is cut into narrow strips for maximum dipping surface area. It is not a complicated breakfast, but it requires precision in the cooking timing. A minute too long and the yolks set. A minute too short and the whites are still runny.
This is one of those breakfasts that children actually ask for. There is something inherently fun about dipping toast into a runny egg yolk. The cinnamon sugar adds just enough sweetness to make it feel special without turning into dessert. I usually serve this with fruit on the side for some freshness and color on the plate.
Prep: 5 minutes Cook: 8 minutes Total: 13 minutes Serves: 2 to 4 (depending on number of eggs and toast) Difficulty: Medium, because timing the soft-boiled eggs matters
Ingredients
- 4 large eggs (at room temperature for more reliable cooking)
- 4 slices of bread (white, whole wheat, or sourdough)
- 2 tablespoons butter, softened
- 1 tablespoon granulated sugar
- 1 teaspoon cinnamon
- Fresh fruit for serving (berries, sliced banana, or apple wedges)
Instructions
Bring a saucepan of water to a rolling boil. Gently lower the eggs into the water using a slotted spoon to prevent cracking. Set a timer for 6 to 7 minutes depending on how runny you want the yolks. For a perfect dippy egg with a set white and a runny yolk, 6 minutes and 30 seconds is ideal. If your eggs were cold from the refrigerator, add 30 seconds. Cook the eggs, then transfer them to a bowl of cold water to stop the cooking process. This also makes them easier to handle.
While the eggs are cooking, toast the bread until golden and crisp. Toast it slightly more than you would for regular toast because it needs to hold up to dipping. Mix the sugar and cinnamon together in a small bowl. Butter the warm toast and sprinkle generously with the cinnamon sugar. Cut each slice of toast into 4 long strips, about 1 inch wide.
When the eggs are cool enough to handle but still warm inside, place them in egg cups or small bowls. Gently tap the top of each egg with the back of a spoon and remove the shell from the top quarter of the egg, revealing the bright orange yolk underneath. Serve immediately with the toast soldiers and fresh fruit.
Tips & Things That Go Wrong
The timing is everything. If you want perfectly dippy eggs, use a timer and start timing when the water boils, not when you drop the eggs in. Room-temperature eggs cook more evenly than cold ones. If you have the foresight, take them out of the refrigerator 20 minutes before cooking.
Do not overcook the toast. It needs to be sturdy enough to dip without breaking but not so hard that it is difficult to bite through. The cinnamon sugar is best applied while the toast is warm so it melts into the butter.
Peeling the eggs can be tricky. The cold water bath helps the shells separate from the whites. Tap the top of the egg gently, and peel carefully so you do not tear the white underneath. The goal is to expose the yolk without making a mess.
Substitutions
Skip the cinnamon sugar and serve the toast soldiers plain or with jam for dipping. For a savory version, butter the toast and add a sprinkle of salt and black pepper. Use any kind of bread you have. Sourdough works well because it has a sturdy crust. Gluten-free bread also works if you toast it until it is crispy.
Storage & Reheating
This is a breakfast that must be eaten immediately. Soft-boiled eggs do not reheat well. The yolks set and the whites become rubbery. The toast soldiers can be made ahead and stored in an airtight container for a day, but they will lose their crispness. This is a breakfast for the moment, not for meal prep.
Approximate Nutrition Per Serving (2 eggs, 2 slices of toast): 340 calories, 16g protein, 32g carbs, 16g fat, 3g fiber
Set a timer and do not guess. Six minutes and thirty seconds gives a perfectly runny yolk with a fully set white. A minute on either side changes the result completely.
7. Fruit and Yogurt Parfait Jars With Homemade Granola
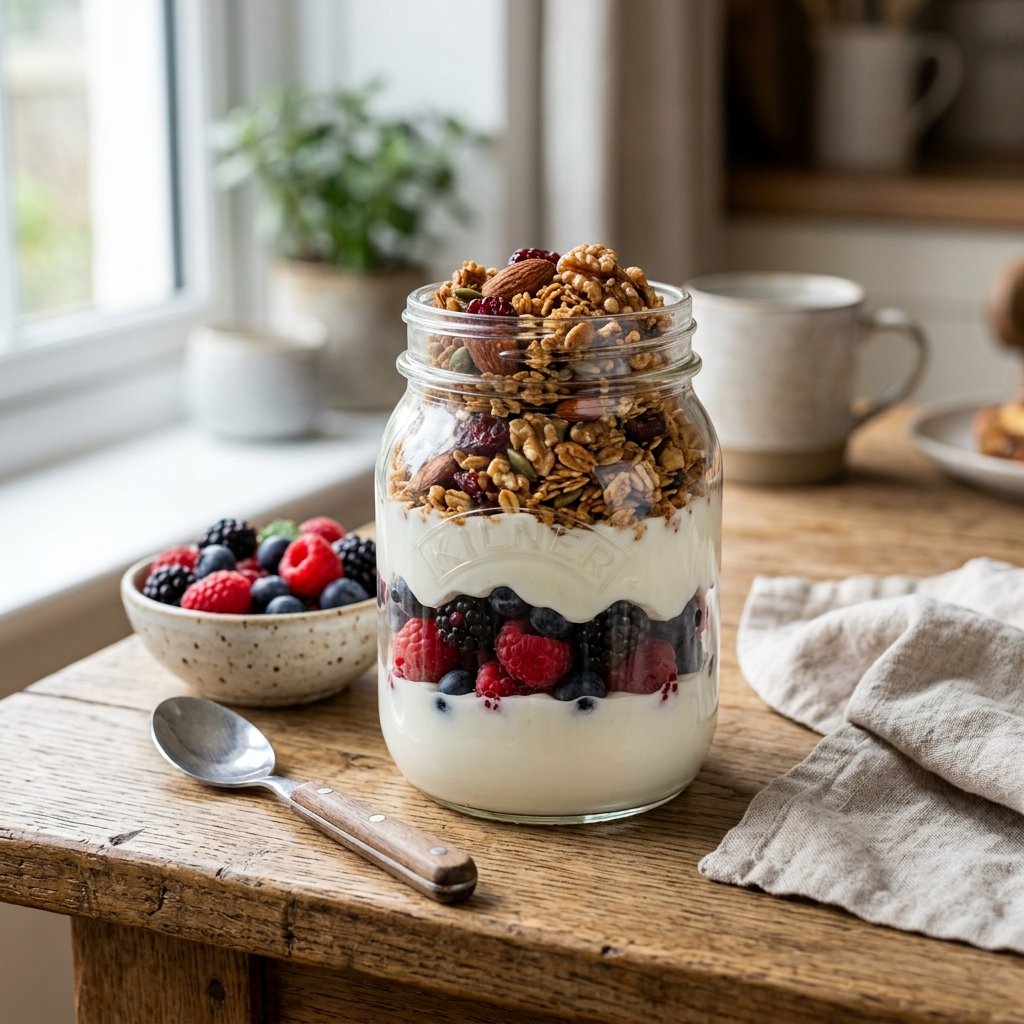
Parfaits are a breakfast that looks impressive and requires almost no effort. The trick is making them feel like an intentional breakfast rather than a snack. Using a tall glass or jar creates visual appeal. The layers separate the textures so the granola stays crunchy until the last bite. And homemade granola takes about 15 minutes to make and tastes significantly better than anything from a bag.
The version that actually holds up in a jar is about layering strategy. If you mix everything together, the granola gets soggy and the yogurt loses its distinct texture. If you assemble it correctly, the experience is completely different. The crunch, the creaminess, the burst of fruit. This is a breakfast that feels like a treat but is actually balanced.
Prep: 10 minutes Cook: 15 minutes (for granola) Total: 25 minutes Serves: 4 Difficulty: Easy
Ingredients
For the Granola:
- 2 cups old-fashioned rolled oats
- ½ cup chopped nuts (almonds, pecans, or walnuts)
- ¼ cup honey or maple syrup
- 2 tablespoons coconut oil or olive oil
- ½ teaspoon cinnamon
- ¼ teaspoon salt
For the Parfaits:
- 2 cups plain Greek yogurt (full-fat recommended)
- 2 cups mixed fresh berries (blueberries, strawberries, raspberries)
- 2 tablespoons honey or maple syrup (optional, for added sweetness)
Instructions
To make the granola, preheat the oven to 325°F. Combine the oats, nuts, cinnamon, and salt in a bowl. Whisk the honey and oil together in a small bowl, then pour over the dry ingredients and stir until everything is coated. Spread the mixture on a baking sheet lined with parchment paper. Bake for 12 to 15 minutes, stirring once halfway through, until the granola is golden brown and fragrant. It will not be fully crunchy until it cools. Let it cool completely on the baking sheet.
To assemble the parfaits, layer the yogurt, berries, and granola in jars or glasses. Start with a layer of yogurt, then a layer of berries, then a layer of granola. Repeat the layering, ending with a layer of granola on top. Drizzle with a little extra honey if you want added sweetness. The granola will stay crunchy for a few hours, but it is best eaten relatively soon after assembly.
Tips & Things That Go Wrong
Do not stir the granola while it is still hot. It will break apart into small pieces instead of forming those desirable clusters. Let it cool completely before breaking it into pieces. The clusters are what make granola special.
The granola will look slightly undercooked when you take it out of the oven. That is fine. It finishes crisping as it cools. If you bake it until it looks fully browned, it will be burnt by the time it is cool.
If you are meal prepping these parfaits, store the granola separately. The texture is the reason this recipe works, and soggy granola ruins the whole experience. I would pack the granola in a small bag or container and add it just before eating.
Substitutions
Use any nuts or seeds you have on hand. Sunflower seeds or pumpkin seeds work well for nut-free granola. Swap the berries for sliced banana, peaches, or any seasonal fruit. Use coconut yogurt for a dairy-free version. The homemade granola stores well in an airtight container for up to 2 weeks.
Storage & Reheating
The granola keeps in an airtight container at room temperature for 2 weeks. The parfaits are best assembled fresh. If you need to make them ahead, store the yogurt and berries in the jar and add the granola just before serving. This keeps the granola crunchy and the breakfast enjoyable.
Approximate Nutrition Per Parfait (1/4 of recipe): 350 calories, 16g protein, 38g carbs, 16g fat, 5g fiber
Store the granola separately from the yogurt and berries. Soggy granola is a disappointment. The crunch is what makes this breakfast feel special.
8. Mini Bagel Pizzas With Scrambled Eggs and Bacon
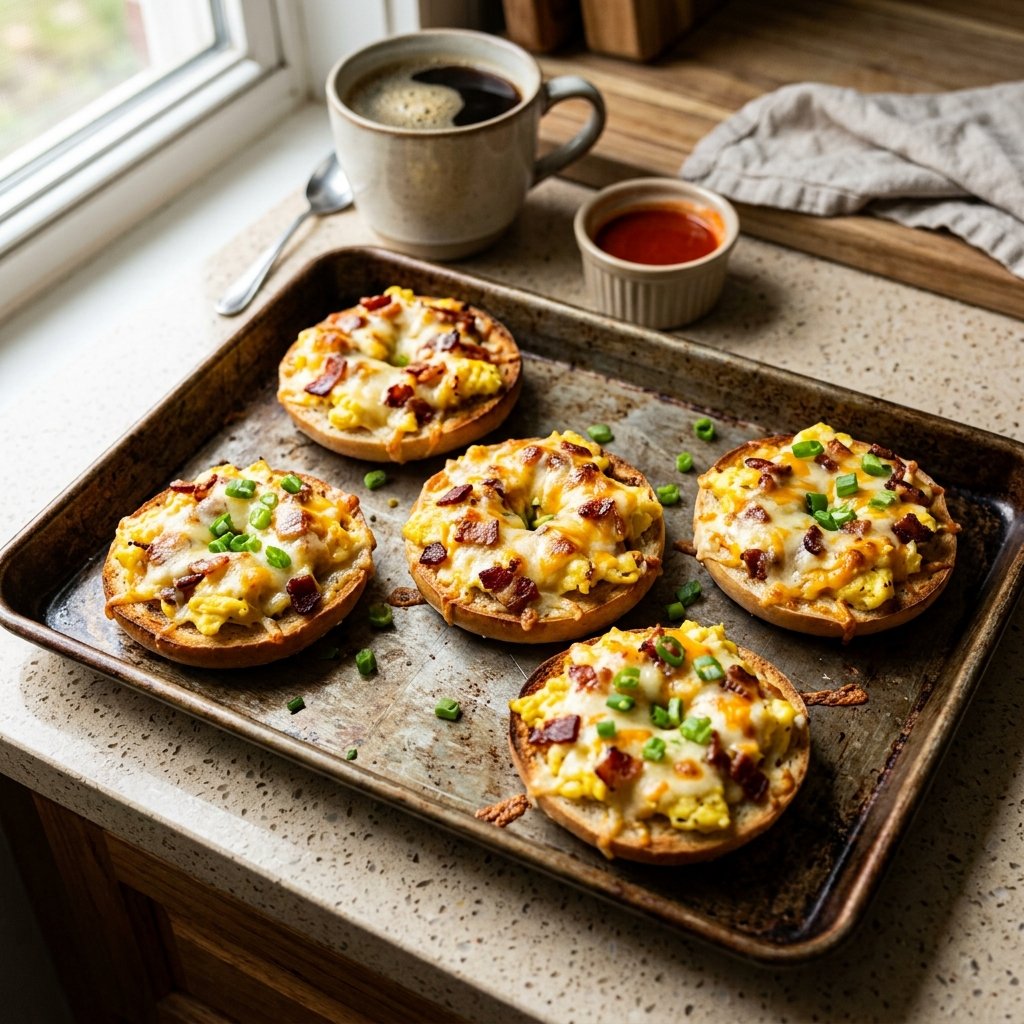
This is the breakfast for the kid who wants pizza for breakfast. The mash-up of flavors and the familiar format of a mini pizza makes it instantly appealing. And unlike an actual pizza, this comes together in 15 minutes and uses leftover bagels or English muffins. The eggs and bacon add protein, the cheese adds fat, and the bagel provides a satisfying chew.
Honestly, I would make these on a weekend when everyone is in a good mood and willing to try something different. They are not the most elegant breakfast, but they are deeply crowd-pleasing. I tested these with a group of kids who normally reject anything that looks like a combination of breakfast and lunch. They ate every single one.
Prep: 10 minutes Cook: 10 minutes Total: 20 minutes Serves: 4 (makes 8 bagel halves, 2 per person) Difficulty: Easy
Ingredients
- 4 mini bagels or 2 regular bagels, sliced in half
- 4 large eggs
- 2 tablespoons milk or water
- ¼ teaspoon salt
- ⅛ teaspoon black pepper
- 4 slices cooked bacon or turkey bacon, crumbled
- 1 cup shredded cheddar or mozzarella cheese
- Optional: chopped green onions or fresh chives for garnish
Instructions
Preheat the oven to 375°F and line a baking sheet with parchment paper or foil for easy cleanup. Place the bagel halves cut-side up on the baking sheet. Toast them in the oven for about 3 minutes until they are lightly browned. This prevents the bagels from getting soggy under the toppings. Alternatively, toast them in a toaster before adding the toppings.
While the bagels are toasting, cook the eggs. Whisk them with the milk, salt, and pepper. Cook them in a nonstick skillet over medium-low heat until they are just set and soft. Remove them from the heat while they are still slightly underdone.
Top each toasted bagel half with a scoop of scrambled eggs, a sprinkle of crumbled bacon, and a generous pile of shredded cheese. Return the baking sheet to the oven and bake for 4 to 5 minutes, just until the cheese is melted and bubbly. Watch carefully at the end. The cheese can go from melted to burnt very quickly. Garnish with green onions or chives if using.
Tips & Things That Go Wrong
Do not skip the toasting step. If you add toppings to a raw bagel and bake it, the bagel will be doughy and the cheese will burn before the bagel cooks through. Toasting ensures a crisp base that holds up to the toppings.
The eggs should be slightly underdone when they come out of the skillet. They finish cooking in the oven. If you cook them until they are fully done, they will be dry and rubbery after baking.
You can prepare the bagel halves in advance and assemble them right before baking. This makes them a great option for a crowd or for a weekend morning when you have multiple hungry eaters.
Substitutions
Use English muffins, croissants, or thick slices of bread in place of bagels. Replace the bacon with cooked sausage, ham, or leftover roasted vegetables. Use any cheese you have on hand. Cheddar is classic, but mozzarella, provolone, or pepper jack also work well. For a vegetarian version, add sautéed mushrooms or bell peppers to the scrambled eggs.
Storage & Reheating
These are best eaten fresh. The bagels lose their crispness after refrigeration. If you have leftovers, store them in the refrigerator and reheat in a toaster oven or air fryer for 3 to 4 minutes. The microwave will make them soggy. I would not freeze these. The eggs and bread both suffer in texture when frozen and reheated.
Approximate Nutrition Per Bagel Half (2 per serving): 190 calories, 11g protein, 13g carbs, 10g fat, 1g fiber
Toast the bagels before adding the toppings. A raw bagel stays doughy and the cheese burns before it cooks through. This small extra step makes a significant difference.
Frequently Asked Questions
Can I make these recipes ahead of time?
It depends on the recipe. The Omelet Muffins and the Baked French Toast Casserole are excellent for meal prep. The parfait components can be prepared ahead as long as you store the granola separately. The breakfast tacos, egg scramble, and bagel pizzas are better fresh. Some breakfasts are suited for planning and some are suited for spontaneity. The key is knowing which is which and not forcing a recipe into a format it does not support.
What is the best way to reheat these breakfasts without ruining the texture?
Reheat eggs gently. The microwave works quickly but can make eggs rubbery. A toaster oven or skillet over low heat gives better control. For the Omelet Muffins, microwave for 20 seconds. For the Baked French Toast, use the toaster oven or a skillet for 5 minutes. Avoid overheating any egg-based dish. The texture degrades rapidly beyond the point of warmth.
Can I freeze these recipes?
The Omelet Muffins freeze well for up to 3 months. The Baked French Toast can be frozen unbaked and then thawed and baked. The granola keeps at room temperature. I would not freeze the toast soldiers, the egg scramble, the breakfast tacos, the bagel pizzas, or the parfaits. Freezing changes the texture too much, and the result is not worth the convenience.
What are good low-carb alternatives for these breakfasts?
For the tacos, use lettuce wraps or large cabbage leaves instead of tortillas. The Omelet Muffins are naturally low-carb if you skip the milk. The egg scramble works without toast. The parfaits can use a lower-sugar granola or be made with nuts and seeds instead of oats. The Baked French Toast and the bagel pizzas are not low-carb recipes and should be enjoyed as they are.
How can I involve my kids in making these breakfasts?
Kids can help with the Build-Your-Own Breakfast Tacos by assembling their own. They can stir the batter for the Oatmeal Pancakes. They can sprinkle toppings on the Bagel Pizzas. They can layer the Parfait Jars. The key is giving them age-appropriate tasks that do not involve heat. Let them measure ingredients, mix, and assemble. The mess is part of the experience, and the willingness to eat increases when children help make the food.
How can I add more protein to these breakfasts?
Add extra eggs wherever possible. Use Greek yogurt as a topping or a base. Include cheese, bacon, or sausage. The Parfait Jars are high-protein from the yogurt. The Omelet Muffins are naturally protein-dense. For the pancakes, serve with yogurt and nuts on top. For the Baked French Toast, serve with a side of sausage or bacon. The protein is already built into most of these recipes, but adding a side of meat or extra cheese increases it further.
Making the Most of Weekend Mornings
Weekend breakfasts can go in many directions. Some mornings call for a recipe that involves the whole family, like the Build-Your-Own Tacos or the DIY Omelet Muffins. Some mornings call for a low-effort, high-impact recipe like the Baked French Toast Casserole. Some mornings call for something quick and satisfying like the Toast Soldiers or the Mini Bagel Pizzas. The key is matching the breakfast to the mood of the morning rather than trying to force every recipe into every weekend.
If I had to recommend a starting point, I would say make the Fluffy Oatmeal Pancakes first. They strike the best balance between being impressive, nutritious, and actually achievable in a normal kitchen. The texture is satisfying, the ingredients are familiar, and the result is something everyone will eat. From there, branch out to the recipe that fits your particular weekend mood.
Weekend breakfasts are a chance to slow down. These recipes are designed to make that easier, not harder. The ones that need planning have clear instructions for making them ahead. The ones that need speed come together quickly. The ones that need engagement involve the kids. Choose the recipe that matches your morning, not the one that looks best on a blog. That is how cooking actually works in a real kitchen.