
By 3:45 on a school day, the question comes before the backpack even hits the floor: what is there to eat. Nobody wants to turn on the oven for a snack, and the fridge usually has half a rotisserie chicken, some string cheese, and a bag of baby carrots nobody has touched since Tuesday. The gap between “healthy snack” and “something my kid will actually eat in the next five minutes” is where most afternoons fall apart.
A lot of the advice out there does not help much. Either the recipe needs six specialty ingredients and a food processor, or it is technically “kid-friendly” only in the sense that a five-year-old could theoretically eat it, not that they would choose to. Cute snack boards look great in photos and get picked apart by small, suspicious hands within about ninety seconds.
The seven snacks here skip the oven entirely and lean on ingredients most kitchens already have. Some come together in five minutes flat; a couple ask kids to help with the assembly, which buys you goodwill at snack time. I have noted which ones hold up in a lunchbox, which ones need to be eaten the same day, and where a young kid’s snack needs a slightly different cut or shape to stay safe.
1. No-Bake Peanut Butter Oat Energy Bites
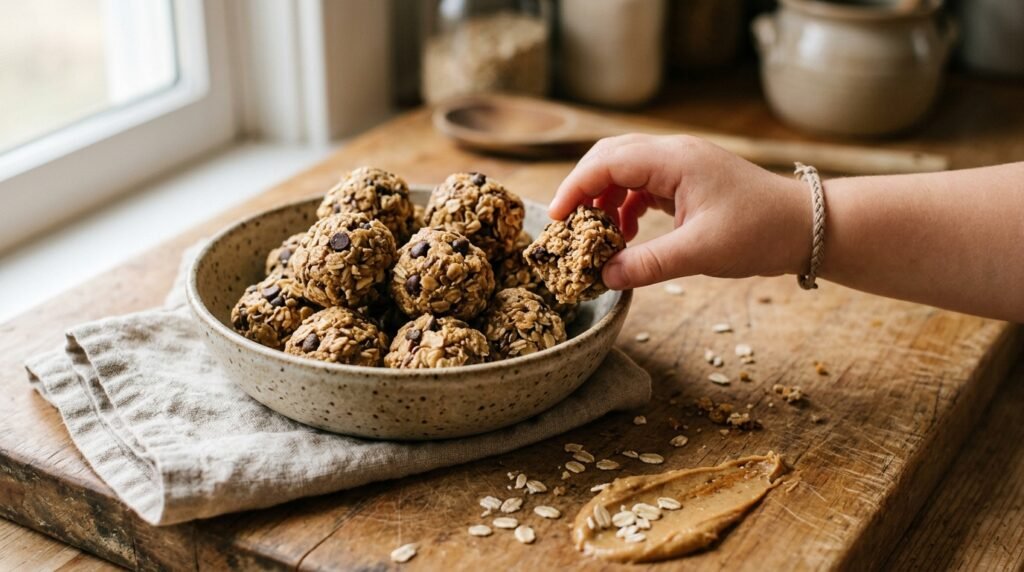
These are the ones I make on repeat, mostly because they come together faster than the argument about why we are not having chips instead. Oats, peanut butter, and a little honey bind into something dense and chewy, closer in texture to raw cookie dough than a dry granola bar.
The good part is that kids can help roll them, which turns snack prep into ten minutes of entertainment instead of ten minutes of you standing alone at the counter. The mixture is sticky enough that small hands come away with peanut butter on at least one knuckle. I have made peace with that.
That said, the texture only works if the oats get a few minutes to absorb some moisture from the peanut butter and honey. Roll the bites right after mixing and they crumble apart on the way to the fridge. Give the mixture ten minutes to sit first and it holds its shape through an entire school week.
Prep: 15 minutes (includes a 10-minute rest) Chill: 20 minutes Total: about 35 minutes Serves: makes 16 bites Difficulty: Easy
- 1 cup rolled oats (90g)
- 1/2 cup creamy peanut butter (130g)
- 1/3 cup honey (80ml) — or maple syrup for kids under 12 months, since honey is not recommended for infants
- 1/2 teaspoon vanilla extract
- Pinch of salt
- 2 tablespoons mini chocolate chips (optional)
- In a medium bowl, stir the peanut butter and honey together until smooth and glossy, about 1 minute. If the peanut butter is cold from the fridge, microwave it for 15 seconds first so it stirs in easily.
- Add the oats, vanilla, and salt. Mix with a spatula or your hands until every oat is coated and no dry patches remain.
- Fold in the chocolate chips if using, then let the mixture sit at room temperature for 10 minutes. This is the step people skip, and it is the one that matters most — the oats need that time to soften slightly and grab onto the peanut butter, or the bites will not hold together.
- Scoop about a tablespoon of the mixture and roll it between your palms into a ball roughly 1 inch across. Repeat with the remaining mixture; you should get about 16 bites.
- Arrange the bites on a plate or small tray and chill for at least 20 minutes before serving, so they firm up rather than staying soft and sticky.
If the mixture feels too wet to roll, add oats a tablespoon at a time until it holds together. If it feels dry and crumbly instead, work in another teaspoon of peanut butter or honey rather than more liquid all at once.
Sunflower seed butter swaps in cleanly for peanut butter if your kid’s school is nut-free, though the bites will taste slightly more savory and less sweet. Rolled oats work better here than quick oats, which turn the texture gummy; if quick oats are what you have, cut the honey by a tablespoon so the mixture is not too wet.
These keep in an airtight container in the fridge for about a week, and they freeze well for up to three months. I usually freeze half the batch in a single layer on a tray first, then transfer them to a bag once solid, so they do not turn into one giant frozen clump. Let them sit at room temperature for about 10 minutes before eating from frozen.
Approximate nutrition per bite (based on 16 bites): 90 calories, 3g protein, 10g carbohydrates, 5g fat, 1g fiber.
If you remember one thing, let the mixture rest before you roll it. Rushed dough falls apart in small hands, and a bite that crumbles on the way to the mouth gets abandoned on the floor instead.
2. Frozen Yogurt Berry Bark
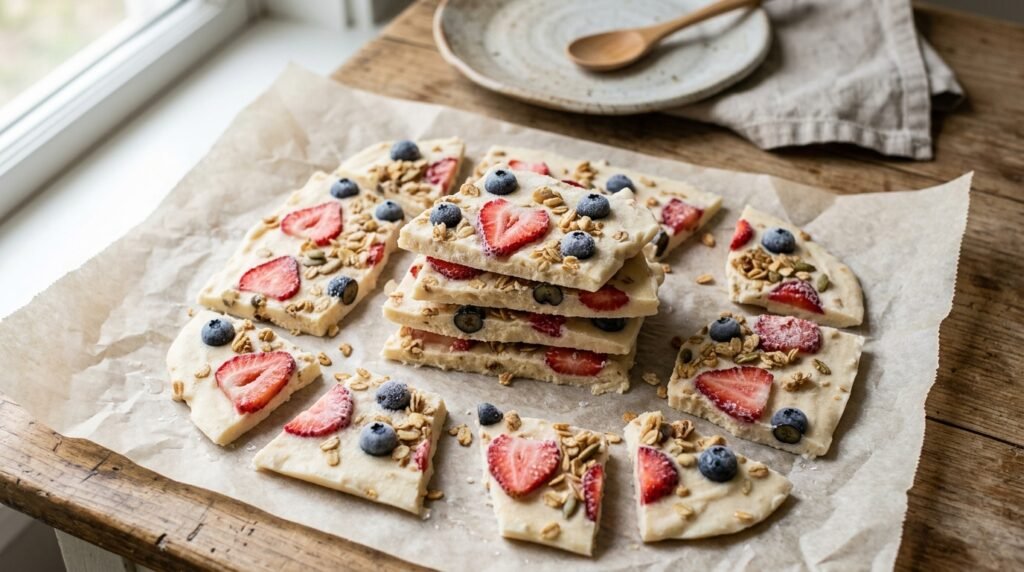
This is the one I make on the hottest days of summer, when nobody wants anything warm and the freezer is doing most of the work. Spread yogurt freezes into something between a popsicle and a chocolate bark — it snaps cleanly when you break it, with a cold, slightly creamy center under a firmer, almost brittle top layer.
It is closer to assembly than cooking. You spread, you scatter, you freeze. The only real skill involved is spreading the yogurt evenly, because thin spots freeze faster and crack unevenly when you break the bark apart.
One thing most recipe cards leave out: this does not hold at room temperature the way regular bark does. Berries release moisture fast once they start to thaw, and within ten minutes a piece left on the counter goes from crisp to soft and a little watery. Serve it straight from the freezer, not staged on a plate ahead of time.
Prep: 10 minutes Freeze: 3 to 4 hours Total: about 4 hours, mostly hands-off Serves: makes about 12 pieces Difficulty: Easy
- 2 cups plain or vanilla Greek yogurt (480g)
- 2 tablespoons honey or maple syrup
- 1 cup mixed berries, sliced if large (strawberries, blueberries, raspberries)
- 1/4 cup granola, roughly crushed
- 2 tablespoons mini chocolate chips (optional)
- Line a small baking sheet or a large plate with parchment paper.
- In a bowl, stir the yogurt and honey together until smooth and evenly sweetened.
- Pour the yogurt onto the parchment and spread it into an even layer about 1/4 inch thick using the back of a spoon. Try to keep the thickness consistent across the whole sheet — thin edges freeze faster and crack into odd shards later.
- Scatter the berries, granola, and chocolate chips over the top, pressing them gently into the yogurt so they stay put once frozen.
- Freeze for at least 3 hours, until completely solid. Break into irregular pieces with your hands once frozen.
Use a level shelf in the freezer. If the tray tilts even slightly, the yogurt pools thicker on one side and you end up with pieces that are hard to bite through on one end and delicate on the other.
Coconut or oat-milk yogurt works for a dairy-free version, though it freezes a little softer and is worth an extra hour in the freezer. Frozen berries are fine in a pinch — thaw and pat them dry first, or the extra water thins the yogurt and it takes longer to set.
Keep the broken pieces in a freezer bag or airtight container, with a layer of parchment between pieces if you are worried about them sticking together. It holds well for about two months. This is not a lunchbox snack unless the lunchbox has an ice pack doing serious work — otherwise, plan on it as an after-school or weekend treat eaten within a few minutes of coming out of the freezer.
Approximate nutrition per piece (based on 12 pieces): 55 calories, 3g protein, 7g carbohydrates, 1.5g fat.
Serve this straight from the freezer. The whole appeal is the snap and the cold center, and both disappear within about ten minutes at room temperature.
3. Banana Nut Butter Sushi Rolls
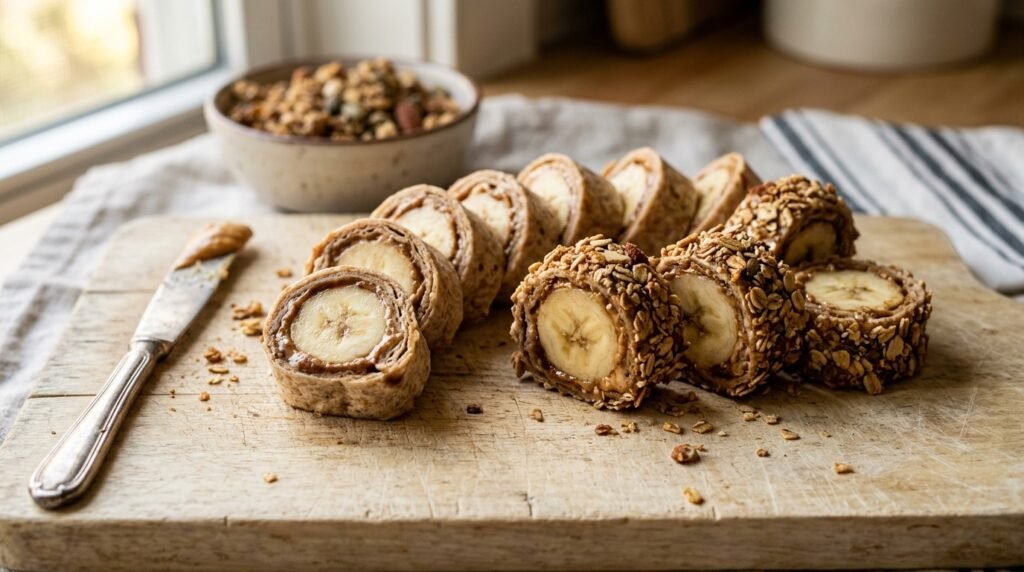
This one is mostly for the visual, and I will admit that up front. It is a banana rolled up in a tortilla smeared with nut butter, sliced into rounds — but calling it “sushi” gets a genuinely reluctant snacker to try it, which is worth more than the recipe itself.
The texture is soft throughout — banana against a thin layer of nut butter against a slightly chewy tortilla — with a little crunch on the outside if you roll the cut edges in crushed cereal or granola. It comes together in about five minutes with no real technique required.
The trick is timing. Banana browns fast once it is cut and exposed to air, and a tortilla left rolled up for more than an hour starts to soften and stick to itself. This is a make-right-before-eating snack, not a make-ahead one — which is fine, since it barely takes longer to make than to plate.
Prep: 5 minutes Cook: 0 minutes Total: 5 minutes Serves: makes 2 rolls, about 12 rounds Difficulty: Easy
- 2 small flour tortillas (6-inch)
- 3 tablespoons peanut butter, almond butter, or sunflower seed butter, at room temperature
- 2 ripe bananas
- 2 tablespoons crushed granola or crushed rice cereal (optional, for coating)
- Lay a tortilla flat and spread a thin, even layer of nut butter across the entire surface, right to the edges.
- Place a banana along one edge of the tortilla and roll it up snugly, so the tortilla wraps the banana with no gaps. Press the seam gently to seal it.
- If coating with granola, roll the outside of the tortilla log in the crushed pieces, pressing lightly so they stick.
- Using a sharp knife, slice the roll into rounds about 3/4 inch thick. For toddlers or younger kids, slice thinner and cut each round in half rather than serving a full coin, since a thick banana-and-tortilla round can be a choking risk for small mouths.
- Serve immediately.
Room-temperature nut butter spreads in one pass; cold nut butter tears the tortilla when you try to smooth it out. If yours is fridge-cold, warm it for 10 seconds in the microwave first.
Whole wheat or spinach tortillas work fine here if that is what is in the kitchen. Sunflower seed butter is the move for nut-free classrooms — the flavor is a little more savory, so a light drizzle of honey inside the roll, for kids over one year, balances it out.
This one really is best fresh. The banana starts to brown within about 20 minutes of slicing, and the tortilla softens if it sits rolled for more than an hour. If you need to prep ahead, roll the tortilla without the banana, keep the banana whole and separate, and assemble at snack time.
Approximate nutrition per 2 rounds: 90 calories, 3g protein, 12g carbohydrates, 4g fat.
Slice this right before serving. A banana roll made an hour ahead is a browned, slightly soggy roll by the time snack time actually happens.
4. Rainbow Veggie Cups With Yogurt Ranch Dip
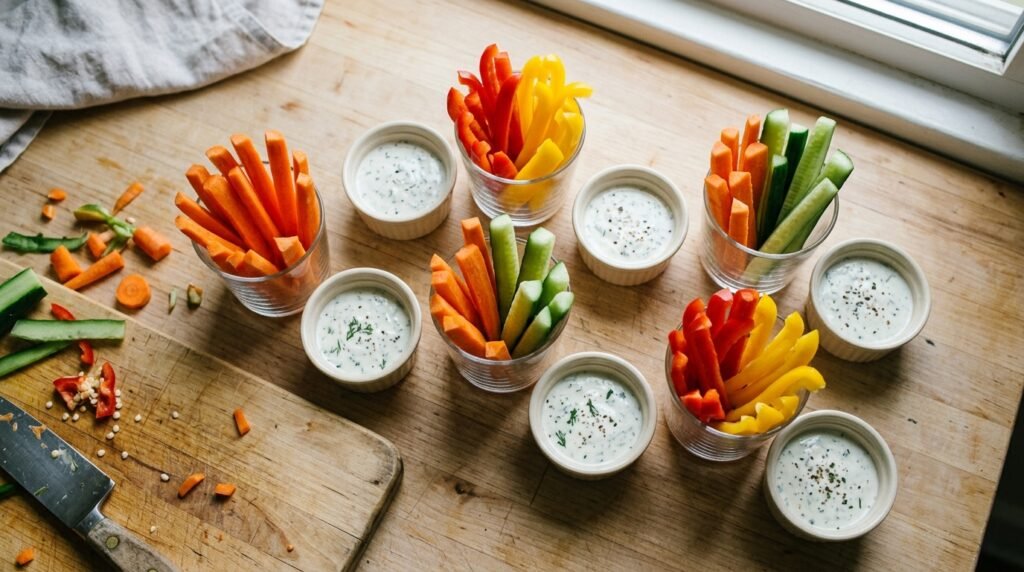
This is the snack I reach for when I need something that does not require a recipe so much as a cutting board and fifteen minutes. Raw vegetables in bright colors, cut into sticks a kid can actually grab, next to a dip that tastes closer to ranch dressing than to plain yogurt.
The dip is what sells it. Plain yogurt on its own gets rejected fairly often in my experience; the same yogurt mixed with garlic powder, dill, and a little onion powder reads as “the good dip” instead. Kids dip. That is most of the appeal.
One thing worth planning around: raw vegetables cut too far ahead lose their crunch and start to sweat, especially cucumber and bell pepper. Cut and portion these no more than a day ahead, and keep them dry until serving — a paper towel at the bottom of the storage container helps absorb extra moisture.
Prep: 15 minutes Cook: 0 minutes Total: 15 minutes Serves: 4 Difficulty: Easy
- 2 carrots, peeled and cut into thin sticks
- 1 red bell pepper, sliced into strips
- 1 yellow bell pepper, sliced into strips
- 1 cucumber, cut into sticks (seeds scraped out if the cucumber is large and seedy)
- 1 cup plain Greek yogurt (240g)
- 1 teaspoon garlic powder
- 1/2 teaspoon dried dill
- 1/4 teaspoon onion powder
- Pinch of salt
- 1 tablespoon milk, to thin, as needed
- In a small bowl, stir together the yogurt, garlic powder, dill, onion powder, and salt. Add the milk a teaspoon at a time until the dip reaches a smooth, spoonable consistency, not too thick to dip into easily.
- Cut the vegetables into sticks roughly 3 inches long and no thicker than a finger, so they are easy for smaller hands to hold and bite through cleanly. For toddlers, cut carrot and cucumber into thin matchsticks rather than rounds or thick sticks.
- Divide the vegetable sticks between small cups or containers.
- Spoon a small portion of dip into a separate small cup or the center of each container.
- Serve right away, or refrigerate for up to a day.
Cut carrots thinner than you think you need to. A thick, hard carrot stick is genuinely difficult for a young kid to bite through, and a stick that will not budge tends to get set aside rather than eaten.
Sour cream works in place of yogurt if that is what is on hand, though the dip will be a little richer and less tangy. Snap peas, celery, or halved cherry tomatoes are easy swaps if bell pepper is not a favorite in your house — not every kid likes the same vegetables, and it is fine to build this around whichever ones actually get eaten.
The vegetables keep for about 2 days refrigerated if kept dry; the dip keeps about 4 days. I store them separately and combine at serving time, since vegetables sitting in dip overnight go soft faster than either component on its own.
Approximate nutrition per serving, vegetables plus 2 tablespoons dip: 70 calories, 4g protein, 8g carbohydrates, 2g fat, 2g fiber.
Cut the vegetables thinner than feels necessary. A stick that is easy to bite through gets eaten; a stick that puts up a fight gets left in the cup.
5. No-Bake Chocolate Oat Clusters
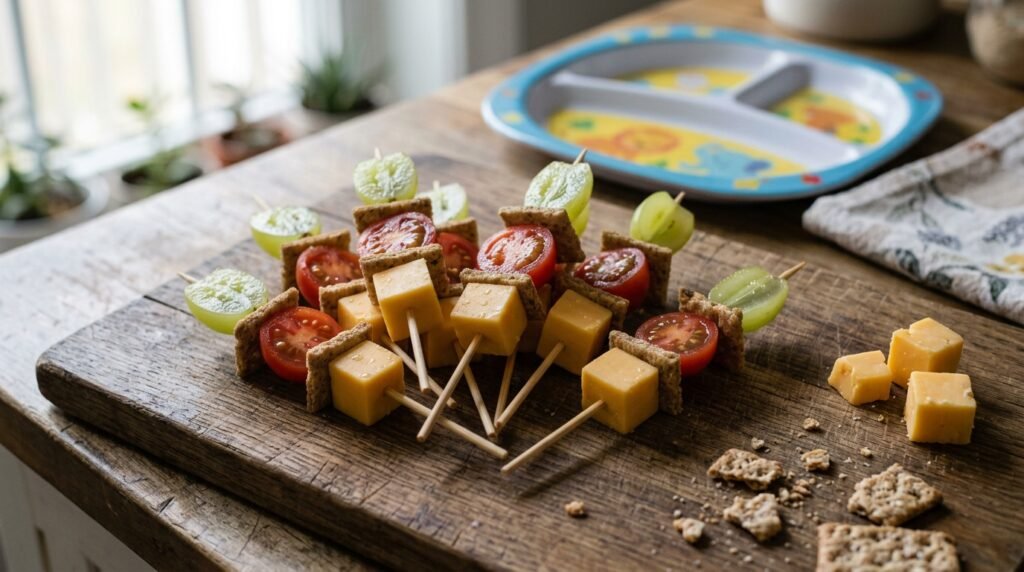
This is the closest thing on this list to an actual treat, and I do not pretend otherwise. Cocoa, oats, and peanut butter melted together and dropped into clusters, closer in spirit to a no-bake cookie than a health food, though it does not have refined sugar beyond the honey.
The texture sets somewhere between chewy and fudgy, with just enough structure from the oats that it holds together as a cluster instead of sliding around like straight chocolate ganache. Kids who reject “healthy” snacks on principle tend not to argue with this one.
This is where the texture changes: the mixture has to be genuinely warm when you mix in the oats and cocoa, and it has to go into the fridge to set before serving. Skip the chill step and you get sticky puddles instead of clusters — edible, but not something a kid can pick up without a fork.
Prep: 10 minutes Chill: 30 minutes Total: about 40 minutes Serves: makes about 14 clusters Difficulty: Easy
- 1/2 cup peanut butter (130g)
- 1/3 cup honey (80ml)
- 3 tablespoons unsweetened cocoa powder
- 1/2 teaspoon vanilla extract
- 1 1/2 cups rolled oats (135g)
- Pinch of salt
- In a microwave-safe bowl, combine the peanut butter and honey. Microwave in 20-second bursts, stirring between each, until the mixture is smooth and just warm enough to stir easily, about 40 to 60 seconds total.
- Whisk in the cocoa powder, vanilla, and salt until fully combined and glossy, with no dry cocoa streaks.
- Add the oats and stir until every piece is coated and the mixture is thick and heavy.
- Drop rounded tablespoons of the mixture onto a parchment-lined tray, shaping each into a loose cluster with the back of the spoon.
- Refrigerate for at least 30 minutes, until firm to the touch. Clusters that still feel tacky need more chill time, not more time on the counter.
Work while the mixture is still warm. Once it cools, it stiffens fast and gets harder to portion evenly — you end up with a few large clusters and a lot of crumbs instead of 14 even ones.
Sunflower seed butter substitutes for peanut butter with only a minor flavor shift; the clusters end up slightly less sweet, which a drizzle of extra honey fixes. Old-fashioned oats hold their shape better than quick oats here, which tend to dissolve into the mixture and leave the clusters denser and a bit gummy.
These keep in an airtight container in the fridge for about a week, and they hold their shape at room temperature for a couple of hours, which makes them fine for a lunchbox as long as lunch happens within a normal school morning. For longer storage, they freeze well for up to two months — thaw for about 15 minutes before eating.
Approximate nutrition per cluster (based on 14 clusters): 95 calories, 3g protein, 11g carbohydrates, 5g fat, 1g fiber.
Shape the clusters while the mixture is still warm. Once it cools on the counter, you get one large slab and a lot of crumbs instead of clusters a kid can actually hold.
6. DIY Cheese and Cracker Kabobs
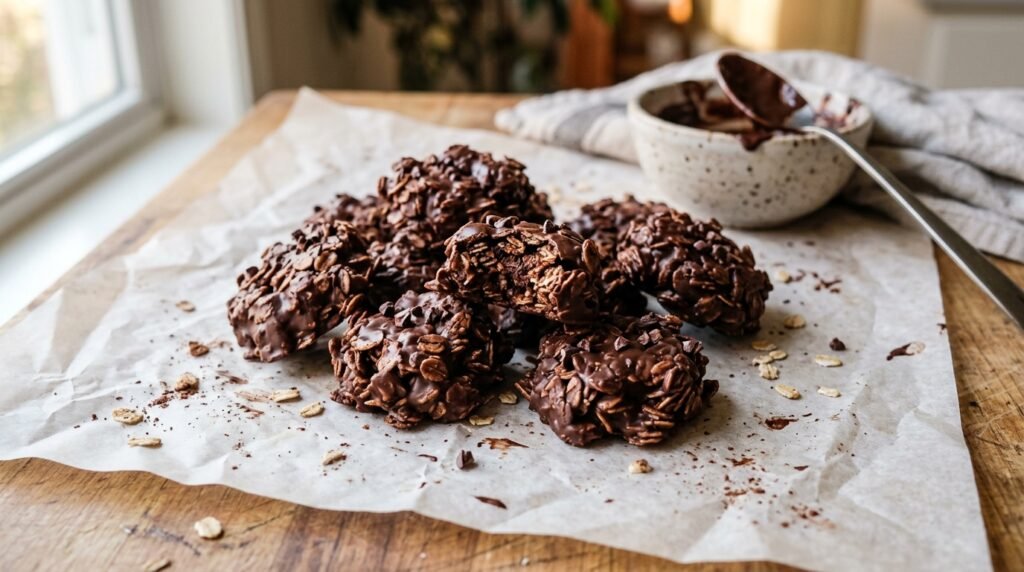
This is the one I hand off almost entirely to the kid in the kitchen. There is no cooking and very little that can go wrong — cheese, crackers, and a few pieces of fruit or vegetable threaded onto a stick, in whatever order looks most interesting to a seven-year-old.
Letting them build their own kabobs does two things: it turns a five-minute snack into fifteen minutes of actual engagement, and it means they are more likely to eat the whole thing, including the parts they usually pick around, because they chose the order themselves.
Do not rush this part: use blunt, kid-safe skewers rather than sharp wooden ones for anyone under about eight, and always quarter grapes lengthwise instead of serving them whole or halved. Whole or halved grapes are a well-known choking hazard for young kids, and it is an easy thing to fix with one extra cut.
Prep: 15 minutes Cook: 0 minutes Total: 15 minutes Serves: makes 8 skewers Difficulty: Easy
- 1 cup cheese, cut into 1/2-inch cubes (cheddar, mozzarella, or a mild cheese your kid likes)
- 16 whole grain crackers
- 1 cup cherry tomatoes, halved
- 1 cup seedless grapes, quartered lengthwise
- 8 blunt-tip kabob sticks or coffee stirrers
- Set out all the ingredients in separate small bowls so kids can see and choose what goes on their skewer.
- Thread the cheese, crackers, tomato halves, and grape quarters onto each stick in any order, alternating so the skewer looks varied rather than clumped by ingredient.
- Repeat until you have used up the ingredients, about 8 skewers total.
- Serve within about 30 minutes of assembling, while the crackers are still crisp.
Assemble close to serving time. Crackers threaded next to cheese and tomato start absorbing moisture within an hour and lose their snap, which is most of what makes this fun to eat.
Swap in cucumber rounds, bell pepper strips, or apple slices for the tomato and grapes, depending on what is in the fridge. Any firm cheese works in place of cheddar; softer cheeses like fresh mozzarella tend to slide around on the skewer more than a block cheese does.
These do not hold well assembled — plan to make and eat them the same day, ideally within an hour. If you want to prep ahead, cut and portion the ingredients into containers the night before and let the kids assemble skewers right before snack time.
Approximate nutrition per skewer: 60 calories, 3g protein, 5g carbohydrates, 3g fat.
Quarter the grapes lengthwise, every time. It takes one extra cut and it is the difference between a fun snack and a real choking risk for younger kids.
7. Crunchy Trail Mix Snack Cups
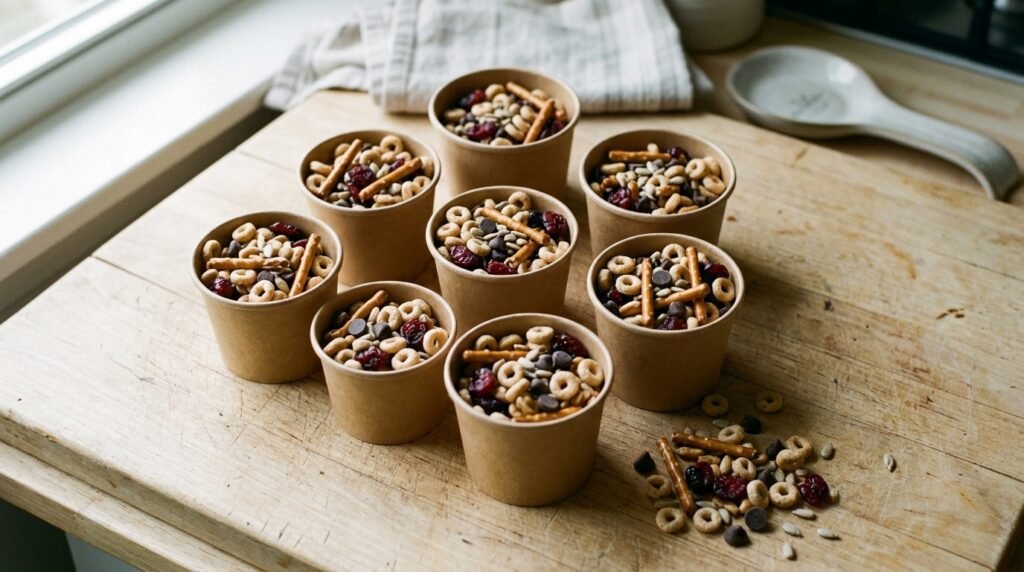
This is the one that lives in the pantry rather than the fridge, portioned out into small cups so a kid can grab one on the way out the door instead of digging through a bulk bag and eating twice as much as intended.
The version that actually holds up in a lunchbox skips anything soft or perishable — no fresh fruit, no yogurt-covered anything that gets sticky in a warm backpack by lunchtime. Cereal, pretzels, dried fruit, and seeds stay crunchy and separate for hours.
Honest note: whole nuts are a choking hazard for kids under about four, so this version leans on sunflower and pumpkin seeds instead, which also makes it a safer bet for nut-free classrooms. If your kids are older and there is no allergy concern at school, whole almonds or cashews are an easy swap.
Prep: 10 minutes Cook: 0 minutes Total: 10 minutes Serves: makes 6 cups, about 1/3 cup each Difficulty: Easy
- 2 cups toasted oat cereal
- 1 cup mini pretzel sticks or twists, broken into smaller pieces
- 1/2 cup dried cranberries or raisins
- 1/2 cup roasted sunflower seeds
- 1/4 cup roasted pumpkin seeds
- 1/4 cup mini chocolate chips
- In a large bowl, combine the cereal, pretzels, dried fruit, sunflower seeds, and pumpkin seeds. Toss gently so the lighter cereal does not get crushed by the heavier ingredients.
- Add the chocolate chips last, stirring once or twice just to distribute them without melting them from the friction of overmixing.
- Divide the mix evenly among 6 small cups or reusable snack containers, about 1/3 cup per portion.
- Seal and store, or serve right away.
Add the chocolate chips at the very end and stir minimally. Overmixing warm hands into a bowl of chocolate chips on a hot day is a fast way to end up with a streaky, half-melted mix instead of distinct pieces.
Swap dried cranberries for raisins, chopped dried apricots, or dried mango depending on what your kid actually eats — dried fruit choice is one of the easiest ways to personalize this without changing the method. Pretzels can be left out entirely for a lower-sodium version; add an extra 1/2 cup of cereal in their place.
This keeps well in an airtight container at room temperature for about two weeks, which makes it one of the few snacks on this list worth making in a double batch. Pack portions in advance for the week, since it does not need refrigeration and travels fine in a lunchbox or backpack.
Approximate nutrition per cup: 140 calories, 3g protein, 20g carbohydrates, 5g fat, 2g fiber.
Skip whole nuts for kids under four and lean on sunflower and pumpkin seeds instead — same crunch, same protein, without the choking risk.
Mixing These Into a Weekly Snack Rotation
None of these need to happen in one big Sunday session, and honestly, most of them are better made closer to when they will be eaten. A practical rhythm that has worked in my house: make the peanut butter oat bites and the chocolate clusters on the weekend, since both keep for a week and freeze well, then handle the fresher ones — the banana rolls, the veggie cups, the cheese kabobs — a day or two at a time.
Let kids pick from two or three options rather than deciding for them. A short list still feels like a choice, and a snack they picked themselves tends to get eaten instead of picked at and abandoned on the counter.
Frequently Asked Questions
Can I make these snacks ahead of time for the whole week?
Some of them, yes. The peanut butter oat bites and the chocolate oat clusters both keep for about a week in the fridge and freeze well beyond that, so those are the ones worth batching. The banana rolls, veggie cups with dip, and cheese kabobs are better made a day or two at a time — they lose texture quickly once assembled, and the freshness is most of what makes them good.
Which of these are safe for toddlers or very young kids?
With a few adjustments, most of them work. Quarter grapes lengthwise instead of serving them whole or halved, cut vegetable sticks thin rather than into thick coins, slice the banana rolls smaller and skip a full thick round, and use seeds instead of whole nuts in the trail mix. The frozen yogurt bark and chocolate clusters are fine as-is for most toddlers, though always use your own judgment about your child’s chewing ability.
What can I use instead of peanut butter if my kid’s school is nut-free?
Sunflower seed butter is the most reliable swap across these recipes — it has a similar thick, spreadable texture, though the flavor leans more savory and less sweet than peanut butter. A little extra honey in the recipe usually balances that out. Soy butter is another option if sunflower seed butter is not available.
Can I freeze any of these snacks?
The peanut butter oat bites and chocolate oat clusters both freeze well for up to two or three months. The yogurt bark is meant to be frozen and stays good for about two months in an airtight container. The banana rolls, veggie cups, cheese kabobs, and trail mix cups are not good freezer candidates — the fresh produce and crackers do not hold their texture after thawing.
How do I keep these snacks fresh in a lunchbox until midday?
The trail mix cups are the most lunchbox-reliable option here since nothing in the mix is perishable. The peanut butter oat bites and chocolate clusters also travel well with a small ice pack. I would avoid packing the veggie cups with dip, the banana rolls, or the cheese kabobs for a midday lunch unless the lunchbox is well insulated — all three lose their texture within a few hours at room temperature.
My kid does not like a certain texture. Can I adjust these recipes?
Yes, and it is usually a small change. If your kid avoids anything mushy, lean toward the trail mix cups or veggie cups over the yogurt bark or banana rolls. If crunchy textures are the issue, the peanut butter oat bites and chocolate clusters are softer and more forgiving. Texture preferences in kids are common and not a sign anything is wrong — building a rotation around what your child actually likes is more useful than pushing a texture they consistently reject.
If you only make one of these this week, start with the peanut butter oat bites. They keep the longest, freeze well, and the ten-minute rest before rolling is the only real technique in the whole list — once you have that down, the rest of these recipes are easier by comparison.
The bigger shift is not any single recipe, though. It is having two or three no-bake options on hand that do not require turning on the oven or standing over a stove, so snack time stops being a small daily negotiation and starts being a short list a kid can choose from.
A snack that gets eaten in full beats an impressive one that gets picked apart and left on the counter.