
The lunchbox that comes home half full. The food that looked appealing in the morning but became a sad, soggy mess by noon. The container that seemed like a good idea until you opened it and found wilted lettuce and rubbery chicken. The desire to pack a keto-friendly lunch for your child is real, but the reality of keeping food fresh and appetizing without access to a microwave or fridge is a different challenge entirely.
Most keto lunch content is written by people who assume you have access to a refrigerator at lunchtime or that your child will eat room-temperature leftovers without complaint. The advice looks good on paper but falls apart in a real lunchbox. Cold chicken that was delicious hot becomes dry and unappealing. Salads that looked crisp in the morning are wilted by noon. And the repeated texture of sad, cold food leads to a lunchbox that comes home half full day after day. The gap between good intentions and actual lunchbox success is where this article lives.
These ten lunch ideas solve specific problems. One is for the child who needs something they can eat with their hands. One is for the family that needs to pack three lunches at once. One is for the child who loves crunchy textures. One is for the parent who wants to use up leftovers. Every recipe has a reason to exist beyond being another keto recipe. They are built with real lunchbox constraints, real ingredients, and real kids in mind. They survive the journey from your kitchen to the lunch table.
1. Deli Roll-Ups With Cream Cheese and Cucumber
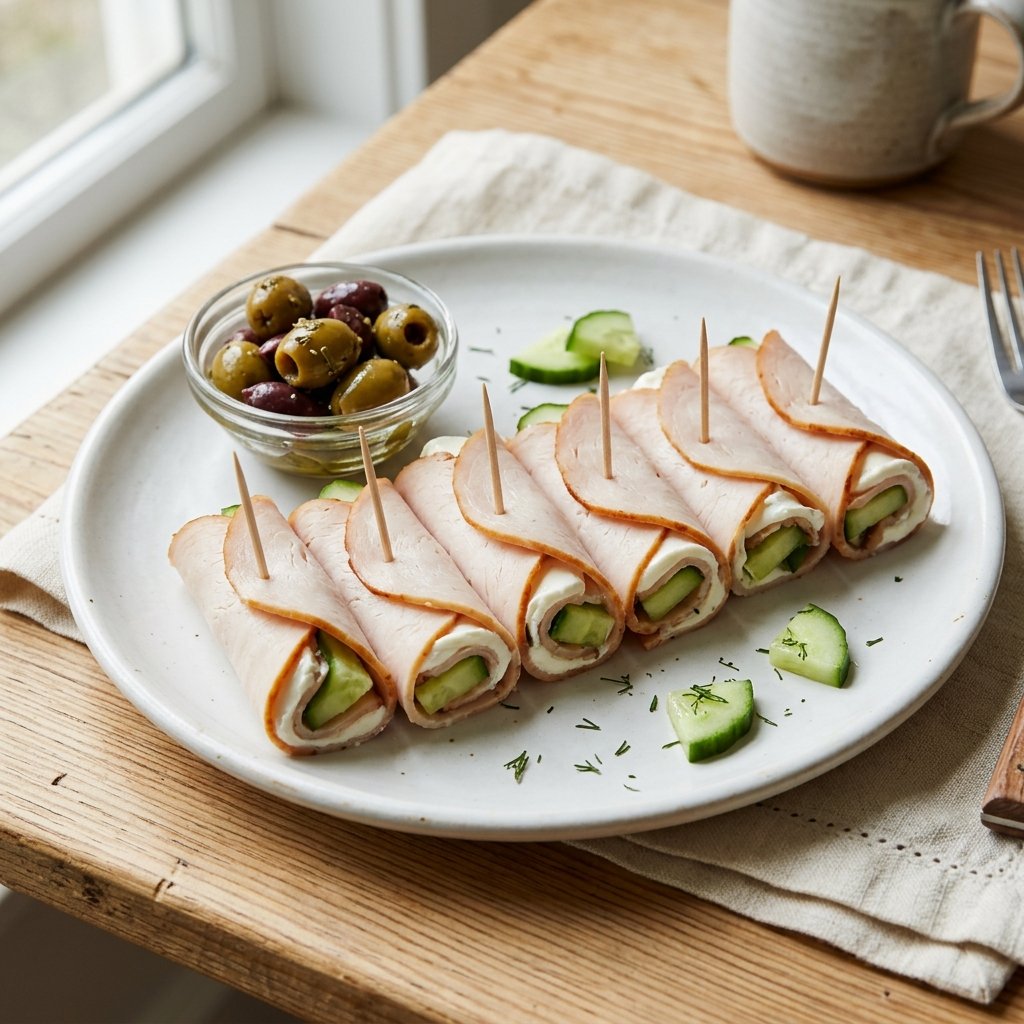
These are the lunchbox item that requires no reheating, no fork, and no complicated assembly at lunchtime. The roll-ups are self-contained, easy to eat, and they hold up well in a lunchbox. The cream cheese stays creamy and the cucumber provides a fresh crunch. The turkey is familiar and satisfying, and the whole thing comes together in about ten minutes.
This is where the texture changes. The cucumber can release water over time, which can make the roll-ups soggy. The solution is simple. Pat the cucumber strips dry with a paper towel before rolling. The moisture is the enemy of a good roll-up, and this small extra step makes all the difference.
Prep: 10 minutes Cook: None Total: 10 minutes Serves: 1 (makes 6 roll-ups) Difficulty: Very easy
Ingredients
- 6 slices of deli turkey or ham
- 3 ounces cream cheese, softened
- ½ cucumber, cut into thin strips
- Salt and pepper to taste
- Optional: fresh dill or chives for flavor
Instructions
Lay the turkey slices flat on a clean surface. Spread a thin layer of cream cheese over each slice, leaving a small border at the edges. Pat the cucumber strips dry with a paper towel and place one or two strips at one end of each slice. Season with a pinch of salt and pepper. Add fresh herbs if using.
Roll each slice tightly, starting from the end with the cucumber. Secure each roll-up with a toothpick to keep it from unrolling. Arrange them in a lunchbox or container. The roll-ups should be eaten within 24 hours for the best texture, but they will keep in the refrigerator for up to 3 days.
Tips & Things That Go Wrong
The cucumber strips must be dry. Any water on the cucumber will be absorbed by the turkey and make the roll-ups soggy. Pat them dry with a paper towel or a clean kitchen towel. If you are packing these for a lunchbox, pack them with an ice pack to keep them cool. The cream cheese will soften as it warms, which is fine, but the turkey should stay cold.
Substitutions
Use any deli meat you like. Roast beef, chicken, or salami all work well. Use any soft cheese. Boursin, goat cheese, or flavored cream cheese all work. For a dairy-free version, use a dairy-free cream cheese substitute. For a nut-free version, this recipe is already nut-free.
Storage & Reheating
These keep in the refrigerator for up to 3 days. They do not need reheating. In fact, they are best cold. Pack them with an ice pack in a lunchbox to keep them fresh. The cucumber will soften over time, so they are best eaten within 24 hours.
Approximate Nutrition Per Roll-Up (2 per serving): 80 calories, 6g protein, 2g carbs, 5g fat, 0g fiber
Pat the cucumber strips completely dry before rolling. Any moisture will make the roll-ups soggy. This is the single most important step.
2. Egg Salad Lettuce Wraps With Crunchy Veg
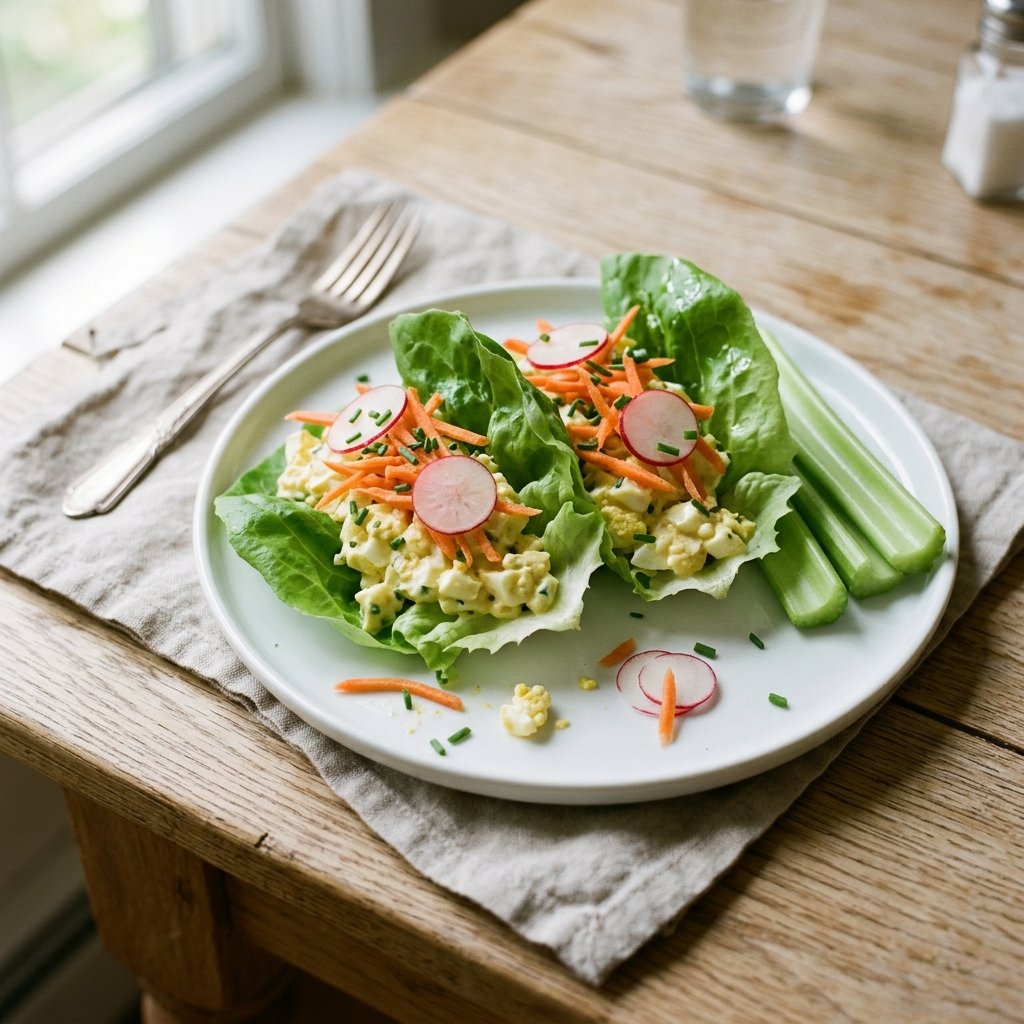
Egg salad is a classic lunch food, but it can be messy and soft. The lettuce wrap solution keeps the filling contained and adds a fresh crunch. The vegetables add color, texture, and nutrition without adding carbs. The whole thing is easy to eat and holds up well in a lunchbox.
Here is the part I would not skip. The egg salad should be made with full-fat mayonnaise. Low-fat mayo contains more water and makes the filling runny. A runny filling will make the lettuce wraps soggy. Full-fat mayo provides a creamy, stable texture that holds up in a lunchbox.
Prep: 15 minutes Cook: None (using hard-boiled eggs) Total: 15 minutes Serves: 1 (makes 2 wraps) Difficulty: Easy
Ingredients
- 4 large hard-boiled eggs, peeled and chopped
- 2 tablespoons full-fat mayonnaise
- 1 teaspoon Dijon mustard
- 2 tablespoons finely chopped celery
- Salt and pepper to taste
- 4 large lettuce leaves (romaine or butter lettuce)
- ¼ cup shredded carrots
- ¼ cup thinly sliced radishes
Instructions
In a bowl, combine the chopped eggs, mayonnaise, mustard, celery, salt, and pepper. Mix until creamy and well combined. The texture should be thick and spreadable. If it is too thin, add a little more chopped egg or a tablespoon of finely chopped celery to absorb excess moisture.
Wash the lettuce leaves and pat them completely dry. Wet lettuce will make the filling slide out. Lay two lettuce leaves on a clean surface and spoon half of the egg salad onto the center of each leaf. Top with shredded carrots and radishes. Fold the sides of the lettuce over the filling and roll tightly. Secure with a toothpick if needed.
Pack the wraps in a lunchbox with an ice pack. They can be eaten cold or at room temperature. The lettuce will soften over time, so they are best eaten within a few hours of assembly.
Tips & Things That Go Wrong
The egg salad can become watery if the eggs are not properly drained. After boiling and peeling, pat the eggs dry with a paper towel before chopping. Excess water will make the filling thin and runny. The lettuce leaves should be dry. Wet lettuce is slippery and makes the wraps difficult to roll.
Do not overfill the lettuce wraps. It is tempting to add as much filling as possible, but overfilled wraps tear and make a mess. A moderate amount of filling is easier to eat and less likely to fall apart.
Substitutions
Use chicken salad or tuna salad instead of egg salad. Use Greek yogurt instead of mayonnaise for a lighter texture. Add chopped pickles or capers for extra flavor. For a dairy-free version, this recipe is already dairy-free.
Storage & Reheating
These are best eaten fresh. The lettuce softens over time and the egg salad can become watery. If you must pack them ahead, pack the egg salad and lettuce separately and assemble at lunchtime. The egg salad keeps for 3 days in the refrigerator. The lettuce should be fresh.
Approximate Nutrition Per Wrap (1/2 of recipe): 220 calories, 12g protein, 6g carbs, 16g fat, 2g fiber
Pack the egg salad and lettuce separately and assemble at lunchtime. The lettuce will stay crisp and the filling will stay creamy.
3. Crunchy Bento Box With Meat, Cheese, and Veg
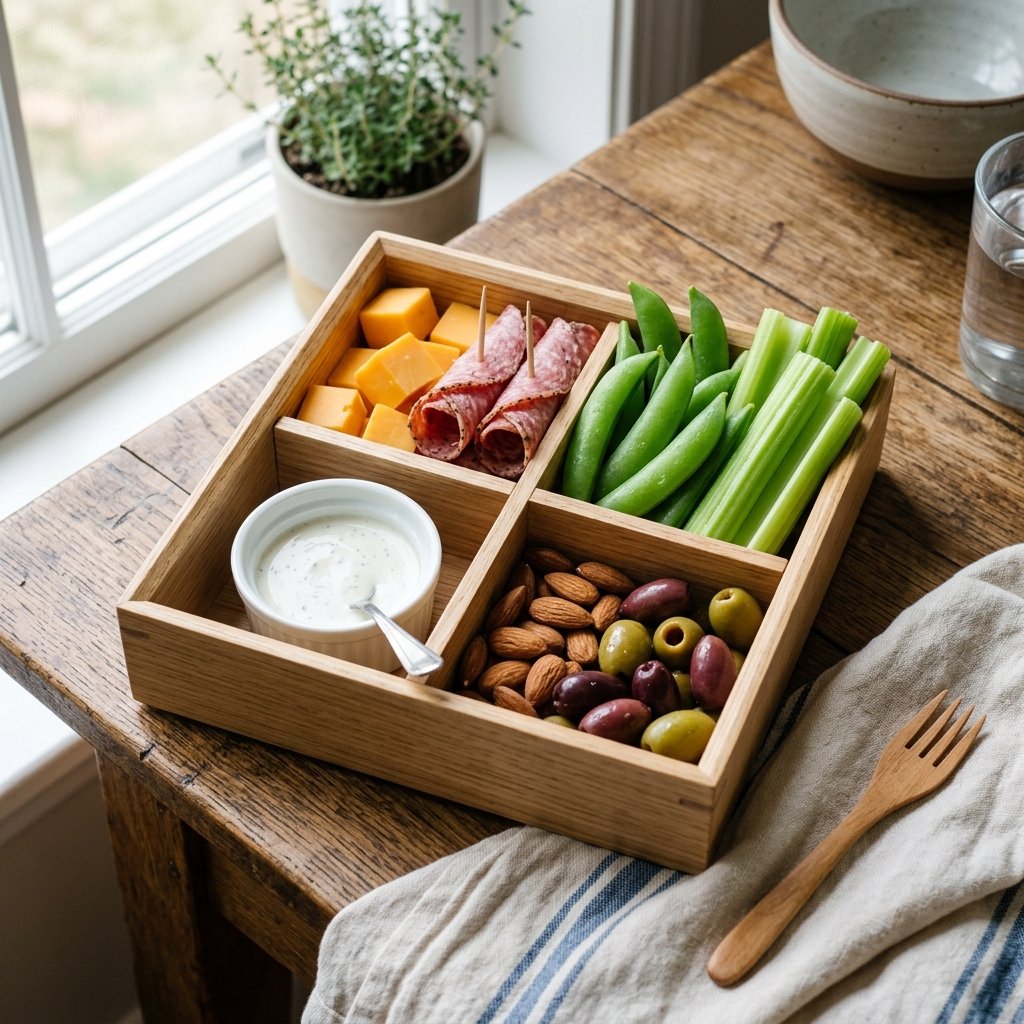
This is the lunchbox for the child who likes to graze. The bento format allows for variety without requiring complicated assembly. The different sections keep the food separate and appealing. The crunchy vegetables provide a satisfying texture. The cheese and meat provide protein. The nuts add healthy fats.
One thing most recipe cards leave out is that the vegetables should be packed with a paper towel to absorb moisture. Crunchy vegetables can become soft in a lunchbox if they are packed with wet ingredients. A paper towel at the bottom of the vegetable compartment keeps things crisp.
Prep: 10 minutes Cook: None Total: 10 minutes Serves: 1 Difficulty: Very easy
Ingredients
- 2 ounces cheddar cheese, cubed
- 2 ounces salami or pepperoni, rolled or sliced
- ½ cup snap peas
- ½ cup celery sticks
- ¼ cup almonds or other nuts
- 2 tablespoons olives
- Small container of ranch dressing or other dip
Instructions
Arrange the ingredients in a bento box or divided container. Keep the dry ingredients separate from the wet ingredients. The cheese and meat should be in one section, the vegetables in another, and the nuts and olives in a third. Place a paper towel in the vegetable section to absorb excess moisture. Add the dip in a small container with a lid.
Close the bento box and refrigerate until ready to pack. The bento box will keep in the refrigerator for up to 3 days. Pack it in a lunchbox with an ice pack to keep the cheese and meat cold.
Tips & Things That Go Wrong
Crunchy vegetables can become soft if they are packed too tightly or with wet ingredients. Use a paper towel to absorb moisture. Do not pack the dip directly next to the vegetables. The dip will make the vegetables soft. Keep the dip in a separate container.
The cheese can sweat in a warm lunchbox. Pack with an ice pack to keep it cool. The nuts can become soft if exposed to moisture. Keep them in a dry section of the bento box.
Substitutions
Use any cheese you like. Mozzarella, pepper jack, or provolone all work well. Use any nuts you like. Walnuts, pecans, or macadamia nuts all work. Use any vegetables you like. Bell pepper strips, cucumber slices, or cherry tomatoes all work. For a nut-free version, use pumpkin seeds or sunflower seeds.
Storage & Reheating
This keeps in the refrigerator for up to 3 days. No reheating is needed. Pack with an ice pack to keep everything fresh and crisp.
Approximate Nutrition Per Box (whole recipe): 420 calories, 20g protein, 14g carbs, 33g fat, 6g fiber
Place a paper towel in the vegetable section to absorb moisture. It keeps everything crisp and fresh for hours.
4. Tuna Salad Pouches With Celery Sticks
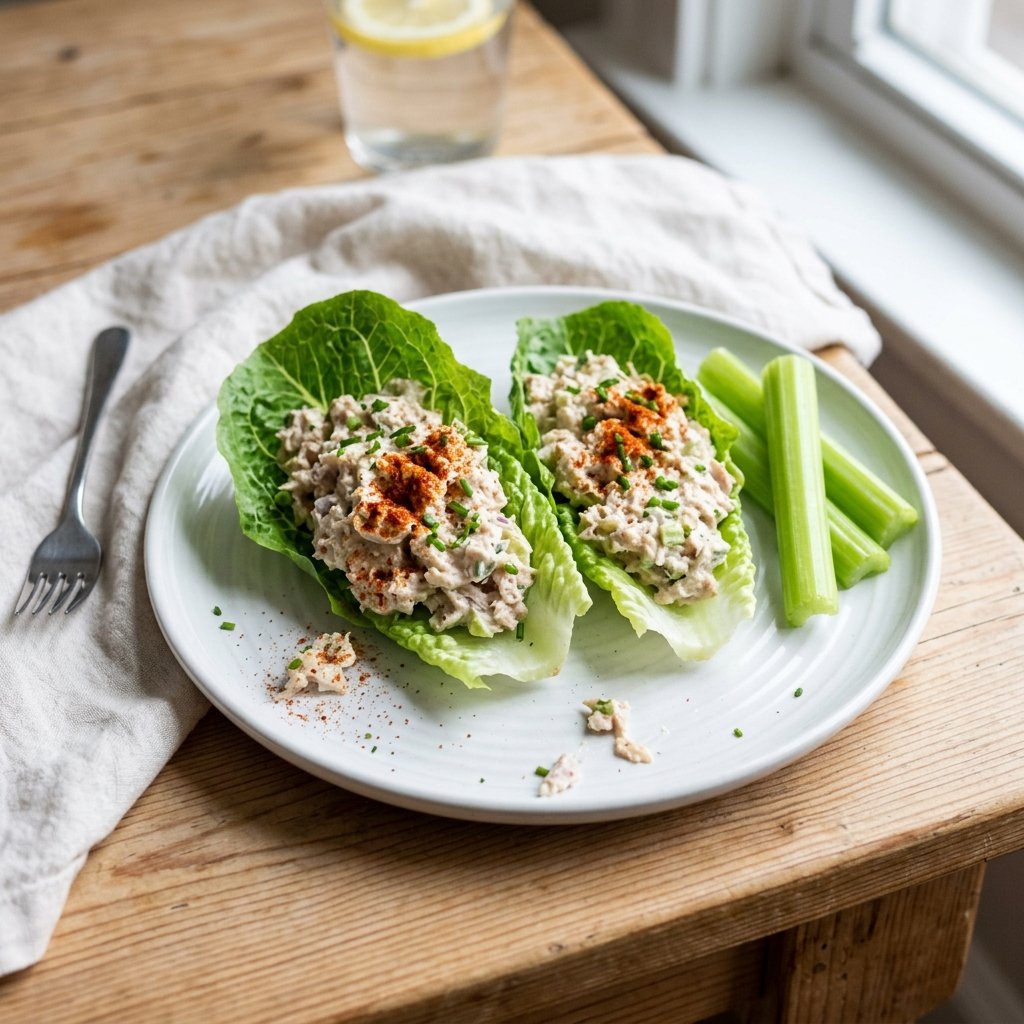
Tuna salad is a lunchbox staple, but it can be messy and boring. The lettuce pouch format keeps the filling contained and adds a fresh crunch. The celery sticks provide a satisfying crunch and a vehicle for the tuna salad. The whole thing is keto-friendly and satisfying.
The version that actually holds up in a lunchbox is about managing moisture. Tuna salad can become watery as it sits. The trick is to drain the tuna thoroughly and use full-fat mayonnaise. Low-fat mayo adds moisture and makes the filling runny. A well-drained tuna salad holds up for hours.
Prep: 15 minutes Cook: None Total: 15 minutes Serves: 1 (makes 2 pouches) Difficulty: Easy
Ingredients
- 1 can of tuna (5 ounces), drained well
- 2 tablespoons full-fat mayonnaise
- 1 teaspoon Dijon mustard
- 1 tablespoon finely chopped celery
- 1 tablespoon finely chopped red onion (optional)
- Salt and pepper to taste
- 4 large romaine lettuce leaves
- 2 celery sticks, cut into spears
Instructions
Drain the tuna thoroughly. Press the tuna with a fork to remove as much liquid as possible. In a bowl, combine the tuna, mayonnaise, mustard, celery, onion, salt, and pepper. Mix until well combined. The texture should be creamy and thick.
Wash the lettuce leaves and pat them dry. Lay two leaves flat and stack two more leaves on top to create a sturdy base. Spoon half of the tuna salad onto the center of each set of leaves. Fold the sides over the filling and roll into a pouch. Secure with a toothpick if needed. Pack the pouches with celery sticks for dipping.
Tips & Things That Go Wrong
The tuna must be drained thoroughly. Any excess liquid will make the tuna salad watery and the lettuce wraps soggy. Press the tuna with a fork to remove as much liquid as possible. Do not overmix the tuna salad. Overmixing makes the tuna mushy and unappealing. Mix just until combined.
The lettuce should be dry. Wet lettuce is slippery and makes the pouches difficult to roll. Pat the leaves dry with a paper towel before using.
Substitutions
Use canned chicken or salmon instead of tuna. Use Greek yogurt instead of mayonnaise for a lighter texture. Add chopped pickles or capers for extra flavor. For a dairy-free version, this recipe is already dairy-free.
Storage & Reheating
These are best eaten fresh. The lettuce softens over time and the tuna salad can become watery. If you must pack them ahead, pack the tuna salad and lettuce separately and assemble at lunchtime. The tuna salad keeps for 3 days in the refrigerator.
Approximate Nutrition Per Pouch (1/2 of recipe): 190 calories, 16g protein, 4g carbs, 12g fat, 2g fiber
Drain the tuna thoroughly and press it with a fork to remove excess liquid. A dry tuna salad is the key to keeping the pouches fresh and crisp.
5. Mediterranean Snack Plate With Olives and Feta
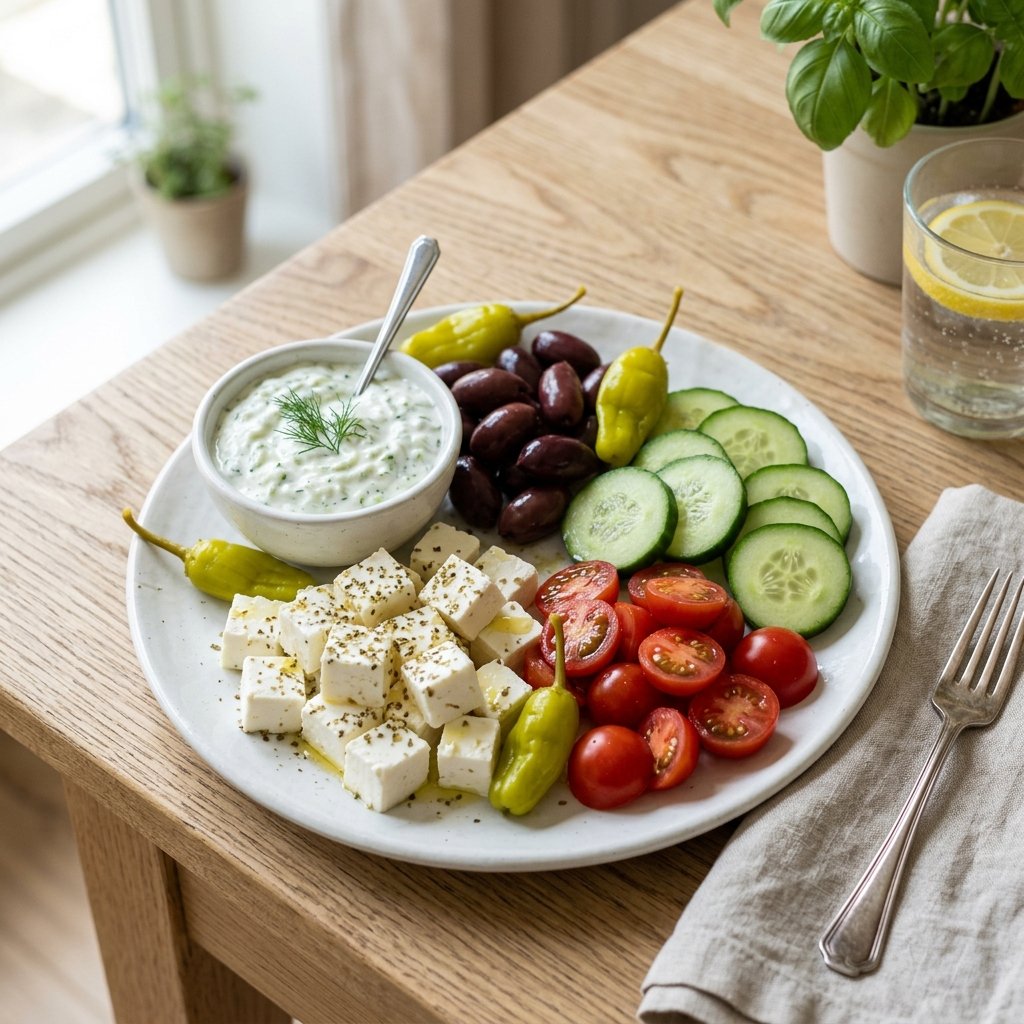
This is the lunchbox for the child who likes variety. The Mediterranean snack plate is colorful, satisfying, and easy to assemble. The feta adds creaminess. The olives add saltiness. The vegetables add crunch. And the tzatziki adds a cooling, tangy element that brings everything together.
One thing most recipe cards leave out is that the feta should be packed separately from the vegetables. Feta is salty and can draw moisture out of the vegetables, making them soft. Pack the feta in a separate section and add it to the plate just before eating. The tzatziki should also be packed separately to prevent it from making the vegetables soft.
Prep: 10 minutes Cook: None Total: 10 minutes Serves: 1 Difficulty: Very easy
Ingredients
- 2 ounces feta cheese, cubed
- ¼ cup kalamata olives
- ½ cucumber, sliced
- ½ cup cherry tomatoes
- 2 tablespoons tzatziki sauce
- Optional: peperoncini peppers
Instructions
Arrange the ingredients in a bento box or divided container. Keep the feta separate from the vegetables to prevent moisture transfer. Keep the tzatziki in a small container with a lid. The cucumbers and tomatoes can be packed together, but place a paper towel in the section to absorb excess moisture.
Close the bento box and refrigerate until ready to pack. Pack with an ice pack to keep everything fresh. Assemble the plate just before eating by combining all the ingredients.
Tips & Things That Go Wrong
The feta can make the vegetables soft if they are packed together. Keep the feta separate and add it at lunchtime. The cucumbers can become watery if they sit for too long. Slice them fresh or pack them with a paper towel to absorb excess moisture.
Do not pack the tzatziki directly on the vegetables. The sauce will make them soft. Keep the sauce in a separate container and add it at lunchtime.
Substitutions
Use any cheese you like. Mozzarella, goat cheese, or provolone all work well. Use any olives you like. Use any vegetables you like. Bell pepper strips, snap peas, or artichoke hearts all work well. For a dairy-free version, skip the cheese and tzatziki and add more olives and vegetables.
Storage & Reheating
This keeps in the refrigerator for up to 3 days. No reheating is needed. Pack with an ice pack to keep everything fresh and crisp. Assemble just before eating for the best texture.
Approximate Nutrition Per Plate (whole recipe): 320 calories, 14g protein, 14g carbs, 24g fat, 4g fiber
Pack the feta and tzatziki separately from the vegetables. The salt and moisture will make the vegetables soft. Add them at lunchtime.
6. Chicken Salad Lettuce Wraps With Almonds
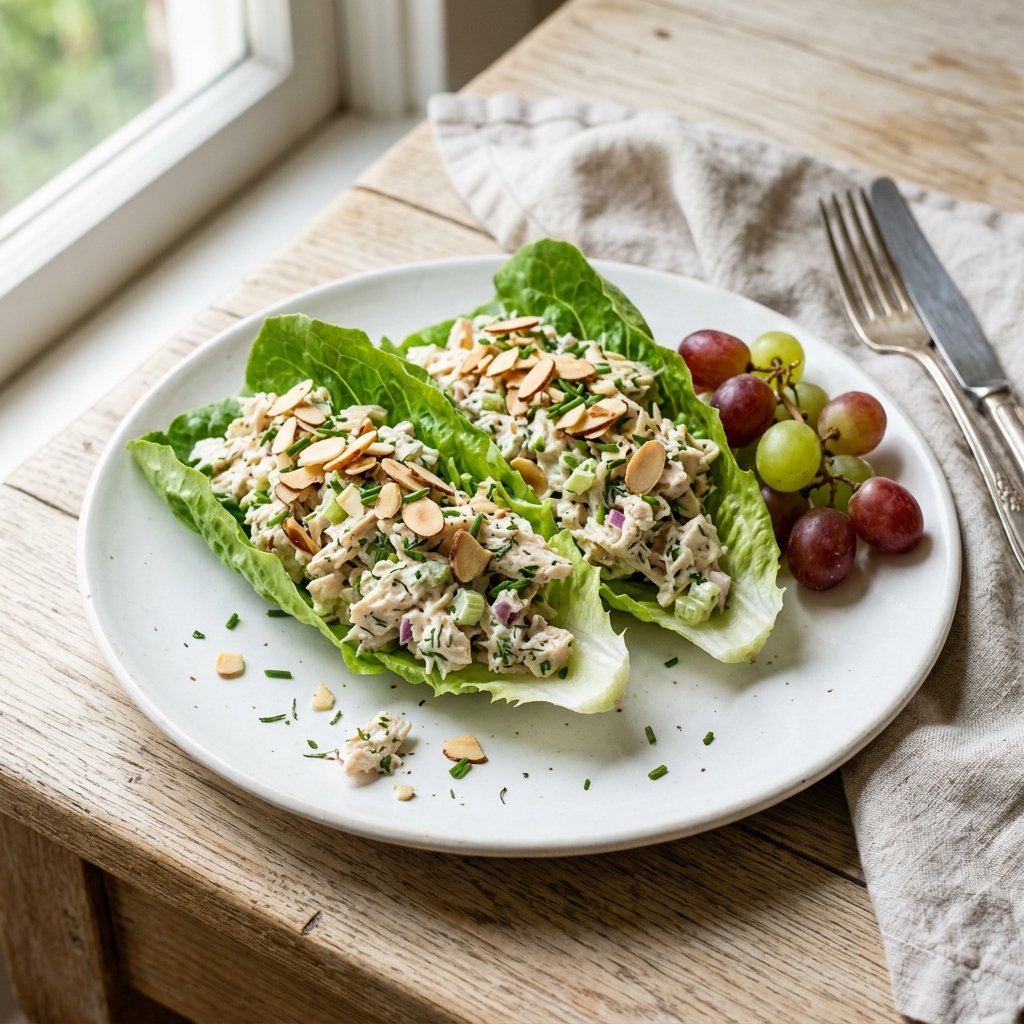
Chicken salad is a lunchbox classic, and it is also an excellent source of protein. This version uses leftover or rotisserie chicken, making it quick and convenient. The almonds add crunch and healthy fats. The lettuce wraps keep the filling contained and add freshness.
The trick is using enough mayonnaise to make the salad creamy but not so much that it becomes runny. Full-fat mayonnaise is the best choice for a stable texture. If the salad seems too dry, add a little more mayo. If it is too wet, add more chopped chicken or celery.
Prep: 15 minutes Cook: None Total: 15 minutes Serves: 1 (makes 2 wraps) Difficulty: Easy
Ingredients
- 1 cup cooked chicken, shredded or chopped
- 2 tablespoons full-fat mayonnaise
- 1 tablespoon Dijon mustard
- 1 tablespoon finely chopped celery
- 2 tablespoons sliced almonds
- Salt and pepper to taste
- 4 large lettuce leaves
- Fresh chives for garnish
Instructions
In a bowl, combine the chicken, mayonnaise, mustard, celery, and almonds. Mix until well combined. Season with salt and pepper. The texture should be creamy and thick. Wash the lettuce leaves and pat them completely dry. Lay two leaves flat and place two more leaves on top to create a sturdy base.
Spoon half of the chicken salad onto the center of each set of leaves. Fold the sides over the filling and roll into a wrap. Secure with a toothpick if needed. Pack with an ice pack for freshness.
Tips & Things That Go Wrong
The chicken salad can be watery if the chicken is not drained properly. Pat the chicken dry before chopping. The almonds can become soft if they are exposed to moisture. Pack them separately if you are concerned about texture. The lettuce should be dry for the best rolling experience.
Substitutions
Use turkey instead of chicken. Use walnuts or pecans instead of almonds. Add chopped grapes or apples for extra sweetness. For a dairy-free version, this recipe is already dairy-free.
Storage & Reheating
These are best eaten fresh. The lettuce softens over time. If you must pack them ahead, pack the chicken salad and lettuce separately and assemble at lunchtime.
Approximate Nutrition Per Wrap (1/2 of recipe): 240 calories, 18g protein, 4g carbs, 17g fat, 1g fiber
Use leftover or rotisserie chicken for a quick and convenient lunch. The salad comes together in minutes with minimal effort.
7. Pepperoni and Cheese Roll-Ups With Pickles
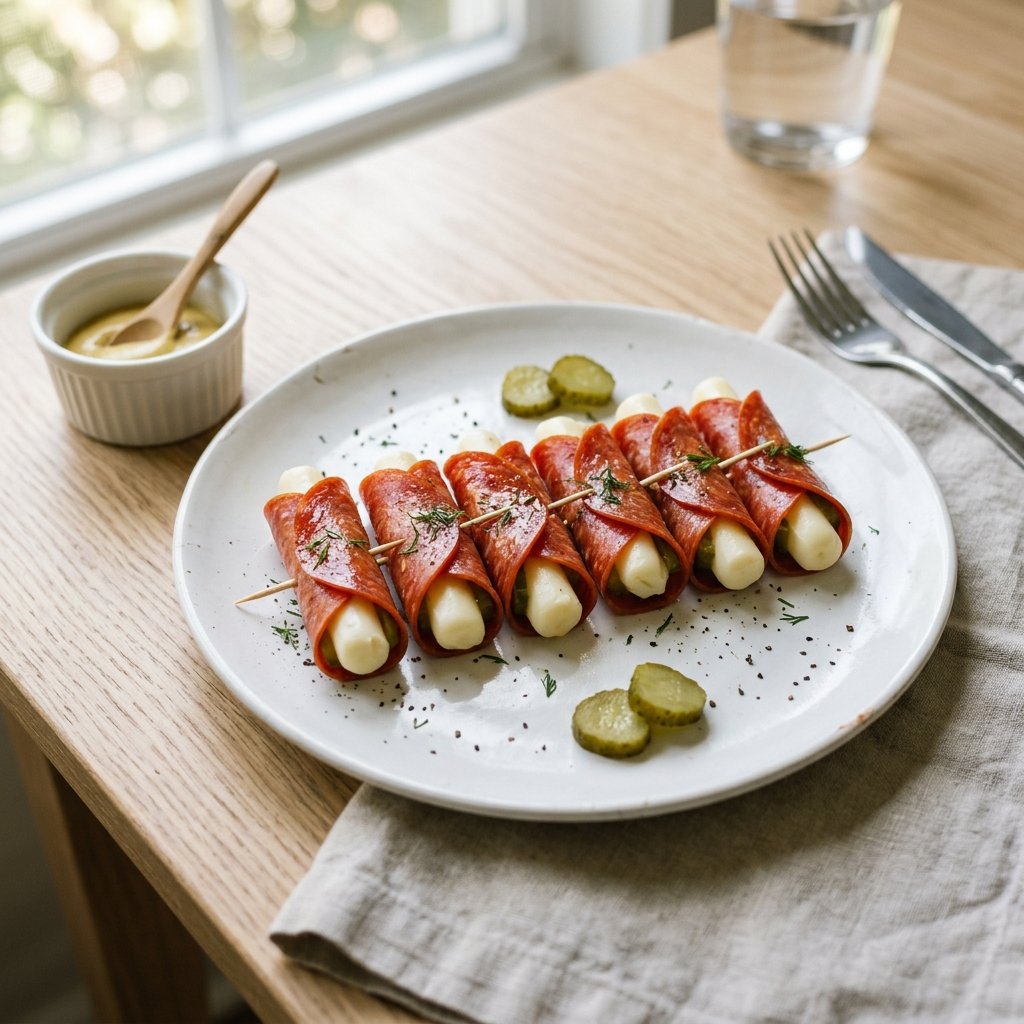
These are the lunchbox item for the child who loves pizza flavors. The pepperoni provides a smoky, savory punch. The cheese adds creaminess and protein. The pickle adds a tangy crunch. The whole thing is fun to eat and requires no preparation at lunchtime.
This is where the texture changes. The pepperoni can become greasy if it is not drained properly. Pat the pepperoni slices with a paper towel before rolling to remove excess grease. The cheese should be firm enough to hold its shape. Use cheese sticks or firm cheese cubes for the best results.
Prep: 10 minutes Cook: None Total: 10 minutes Serves: 1 (makes 6 roll-ups) Difficulty: Very easy
Ingredients
- 6 slices of pepperoni
- 6 cheese sticks (or firm cheese cut into sticks)
- 6 small pickle slices
- Mustard for dipping (optional)
Instructions
Pat the pepperoni slices with a paper towel to remove excess grease. Lay a cheese stick on the edge of each pepperoni slice. Top with a pickle slice. Roll the pepperoni tightly around the cheese and pickle. Secure with a toothpick if needed. Arrange in a lunchbox with mustard for dipping.
Tips & Things That Go Wrong
The pepperoni can be greasy if it is not drained. Pat it dry before rolling. The cheese can soften in a warm lunchbox. Pack with an ice pack to keep it firm. The pickles can make the roll-ups soggy if they are not drained. Pat the pickle slices dry before adding.
Substitutions
Use salami instead of pepperoni. Use any cheese you like. Use pickled vegetables like giardiniera instead of pickles. For a dairy-free version, use dairy-free cheese.
Storage & Reheating
These keep in the refrigerator for 3 days. Pack with an ice pack for freshness. No reheating is needed.
Approximate Nutrition Per Roll-Up (2 per serving): 90 calories, 6g protein, 2g carbs, 7g fat, 0g fiber
Frequently Asked Questions About No-Heat Keto Lunches
How do I keep these lunches cold without a refrigerator?
Use an insulated lunchbox with a reusable ice pack. A good ice pack will keep food cold for 4 to 6 hours, which is long enough for most school days. Freeze the ice pack overnight and place it at the bottom of the lunchbox. Pack the food on top of the ice pack. If your child has a long day, consider using two ice packs, one at the bottom and one on top.
Can I prep these lunches for the whole week?
Some of these lunches can be prepped in advance. The deli roll-ups and egg salad can be made 2 to 3 days ahead. The bento box can be assembled the night before. The tuna salad should be made fresh for the best texture. The Mediterranean snack plate can be prepped a day in advance, but pack the feta and tzatziki separately.
What are good keto-friendly dipping sauces for these lunches?
Ranch dressing, blue cheese dressing, tzatziki, and sugar-free ketchup are all good options. For a keto-friendly option, check the sugar content of the sauce. Many commercial sauces contain added sugar. Make your own or choose a keto-friendly brand. A simple mayonnaise-based sauce with herbs and spices is always a safe choice.
Can I add fruit to these lunches?
Fruit contains carbs, so choose carefully on a keto diet. Berries are the lowest in carbs. Strawberries, blueberries, and raspberries can be added in small amounts. Avoid bananas, apples, and oranges, which are high in sugar. A small handful of berries is a good addition to any of these lunches.
How do I keep crunchy vegetables from getting soft?
Pack them with a paper towel to absorb excess moisture. Keep them separate from wet ingredients like dressing. Use a bento box with divided sections to keep different foods separate. Pack crunchy vegetables on top of the ice pack for maximum freshness.
Making No-Heat Keto Lunches Work in Your Home
The most important decision you will make is not which lunch to pack first. It is how you involve your child in the process. Children are more likely to eat what they have helped prepare. Let them choose between the deli roll-ups and the tuna salad. Let them pack their own bento box. The involvement increases the likelihood of eating.
If I had to recommend a starting point, I would say start with the Crunchy Bento Box. It is the most forgiving and the most adaptable to individual preferences. The format is familiar and the variety keeps things interesting. From there, branch out to the recipe that fits your child’s particular preferences. The roll-ups for the child who loves handheld food. The lettuce wraps for the child who likes fresh crunch. The snack boxes for the child who likes to graze.
Packing a no-heat keto lunch is about planning, not perfection. These recipes are designed to survive the journey from your kitchen to the lunch table. They are not fancy, and they are not complicated. They are practical, reliable, and built to actually work in a real lunchbox. The lunchbox that comes home empty is the best feedback you can get.