
The weekend morning when the house is quiet and nobody has anywhere to be. The coffee is on, the bacon is starting to sizzle, and there is nowhere to rush. A real country breakfast is one of the last great rituals of a slow life, and it is the kind of meal that people remember longer than any dinner. The problem is that most breakfast recipes treat the meal like a chore rather than a gift. They rush the eggs, skip the roux, and serve gravy that tastes like flour and water. There is a version of the country breakfast that is worth waking up early for, and it looks a lot like the one Dolly Parton has described making for her husband Carl on weekends for decades.
The advice that usually shows up in breakfast roundups is either too simple to be useful or too fussy to actually make on a lazy Saturday. Nobody wants a twelve-step recipe for scrambled eggs. Nobody wants a biscuit recipe that requires three specialty flours. What people want is a real menu that works, with techniques that actually make a difference and shortcuts that save time without sacrificing flavor. The gap between what looks good in a video and what works on a real stovetop is where most breakfast recipes fall apart.
These six recipes are built as a complete country breakfast menu. One is the scrambled egg technique that Dolly has talked about for years. One is the country ham and biscuits that anchor the plate. One is the sausage gravy that goes over everything. One is the simpler milk gravy for people who want the comfort without the sausage. One is a cornbread waffle that feels like a modern Southern celebration. One is the chocolate chip pancake that finishes a weekend morning like a treat. They are inspired by the East Tennessee breakfast tradition that shaped Dolly’s kitchen, not verified family recipes, and they are built for a real Saturday morning at home.
1. Dolly’s Fluffy Scrambled Eggs With Ice Water
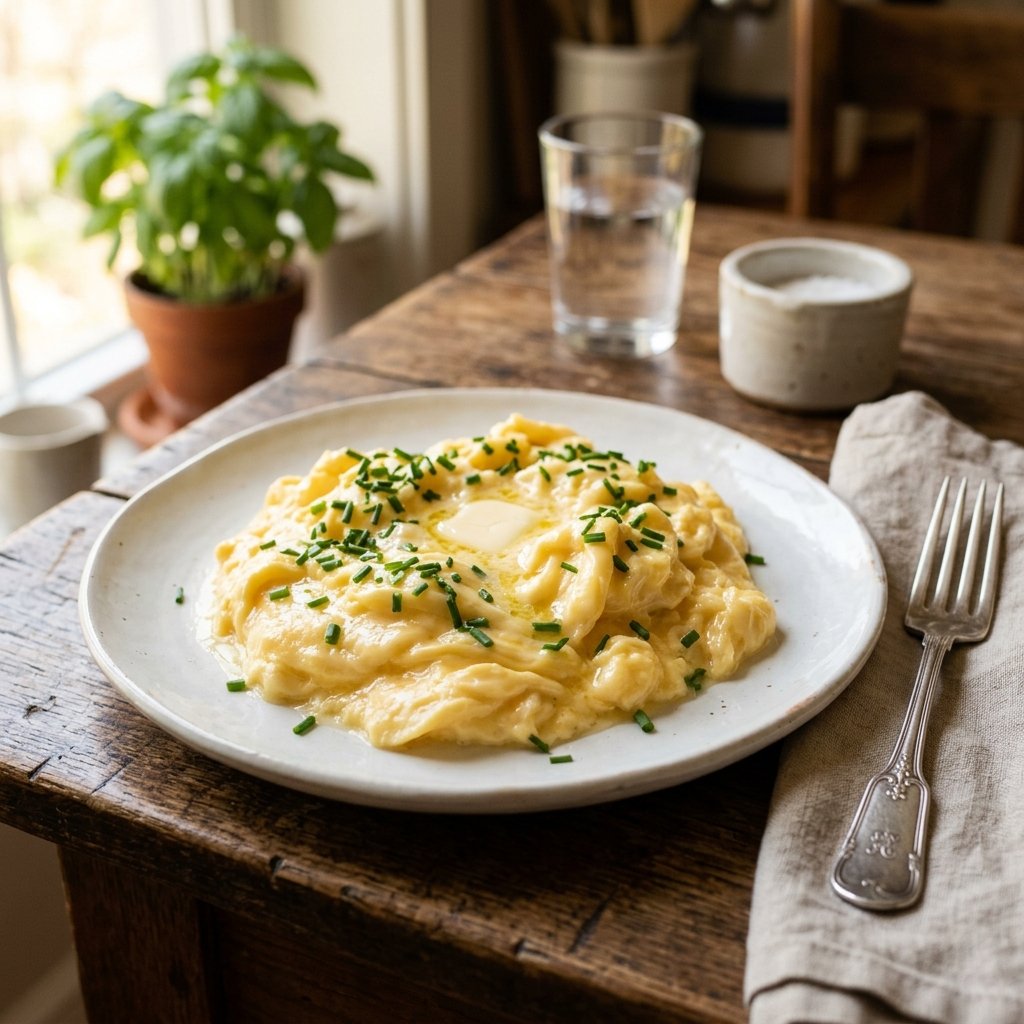
This is the centerpiece of the whole breakfast, and it is also the simplest recipe in the article. The technique is the thing. Dolly has talked about adding a splash of ice water to the eggs before whisking, and I was skeptical until I tried it. The water turns to steam as the eggs cook, and the steam puffs the curds up from the inside. The result is lighter and softer than any scrambled egg I had made before.
Here is the part I would not skip. The heat has to be low. Scrambled eggs cooked over medium or high heat turn rubbery in about thirty seconds. Low heat and slow stirring is the whole technique. If you rush this, the ice water trick does nothing for you. If you take your time, the eggs come out creamy and tender and they hold that texture on the plate.
One thing most recipe cards leave out is that the eggs should come off the heat while they still look slightly underdone. They keep cooking from residual heat, and by the time they reach the plate, they are perfect. If you wait until they look fully set in the pan, they will be dry and overcooked by the time anyone takes a bite.
Prep: 5 minutes Cook: 5 minutes Total: 10 minutes Serves: 4 Difficulty: Very easy
Ingredients
- 8 large eggs
- 2 teaspoons ice water
- 2 tablespoons unsalted butter
- ½ teaspoon salt
- ¼ teaspoon black pepper
- Chopped chives for garnish (optional)
Instructions
Crack the eggs into a medium bowl. Add the ice water, salt, and pepper. Whisk with a fork or a whisk until the yolks and whites are completely combined and the mixture looks uniform. Do not overbeat; you do not want bubbles.
Melt the butter in a nonstick skillet over low heat. When the butter is foaming but not browning, pour in the eggs. Let them sit for 20 to 30 seconds without stirring. Then use a rubber spatula to push the eggs gently from the edges toward the center, tilting the pan to let the liquid egg run into the empty spaces.
Continue this slow folding motion for 3 to 4 minutes, until the eggs are just set and still slightly glossy. They should look a little wetter than you think they should. Remove the pan from the heat and let the eggs sit for 30 seconds. They will finish cooking from the residual heat. Serve immediately with chives on top if using.
Tips & Things That Go Wrong
The eggs can turn rubbery if the heat is too high. Keep the pan on low and do not rush. The ice water trick only works if the eggs cook slowly enough for the water to turn into steam. If the eggs brown at all on the bottom, the pan is too hot. Pull it off the heat for 30 seconds and continue. Do not salt the eggs heavily before cooking if you are serving them with country ham or sausage, which are already salty. Taste the ham first and adjust the eggs accordingly.
Substitutions
Use whole milk or cream instead of ice water if you prefer a richer egg. The texture will be slightly different but still soft. Use a dairy-free butter substitute for a dairy-free version. Add a tablespoon of chopped fresh herbs like dill, parsley, or tarragon for a different flavor profile.
Storage & Reheating
Scrambled eggs are best eaten immediately. Leftovers keep in the refrigerator for 2 days but the texture changes significantly. Reheat gently in a skillet over low heat, stirring constantly, or in the microwave in 15-second bursts. Do not freeze.
Approximate Nutrition Per Serving: 200 calories, 14g protein, 2g carbs, 15g fat, 0g fiber
Keep the heat on low and pull the eggs off the stove while they still look slightly underdone. The residual heat finishes them and keeps them creamy instead of rubbery.
2. Country Ham and Biscuits
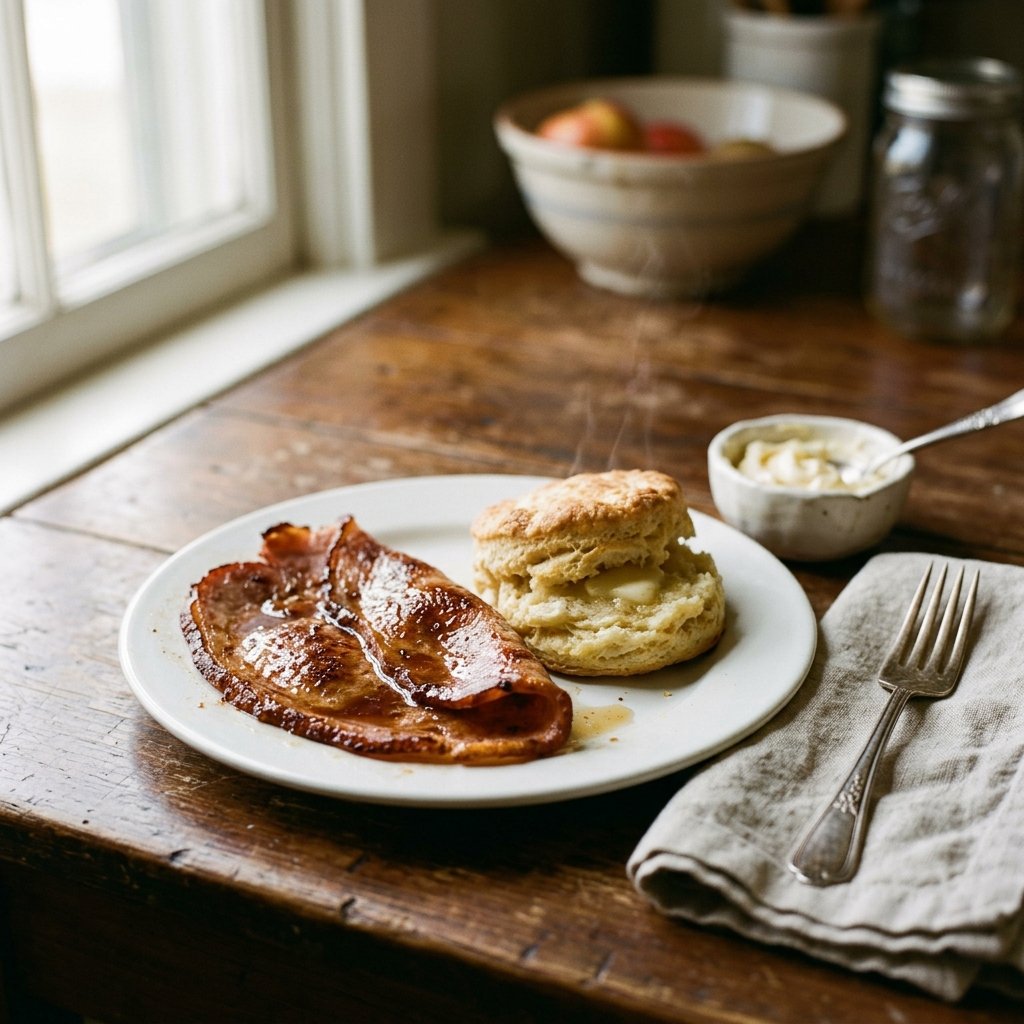
Country ham is a different thing from the ham you buy sliced at the deli. It is salt-cured, dry, and intense, and a little goes a long way. It is the kind of meat that shows up on a Southern breakfast plate next to eggs and biscuits and gravy, and it is the kind of thing that makes the whole plate feel complete. The combination of the salty ham and the soft, buttery biscuit is one of the great Southern pairings.
The trick with country ham is to cook it slowly and to add a little sweetness to balance the salt. A glaze of honey or brown sugar in the pan does that. The ham is thin, so it cooks in about two minutes per side. If you cook it too long, it turns hard and leathery.
The biscuits here are a simple buttermilk drop biscuit. They come together in about ten minutes and bake in fifteen. They are not as tall and layered as a rolled biscuit, but they are tender and buttery and they are the perfect vehicle for ham and gravy.
Prep: 10 minutes Cook: 20 minutes Total: 30 minutes Serves: 4 Difficulty: Easy
Ingredients
For the biscuits:
- 2 cups all-purpose flour
- 1 tablespoon baking powder
- 1 teaspoon salt
- ¼ cup cold butter, cubed
- ¾ cup whole buttermilk
- 2 tablespoons melted butter, for brushing
For the ham:
- 4 thin slices country ham
- 1 tablespoon butter
- 1 tablespoon honey or brown sugar
- ¼ cup water or coffee
Instructions
Preheat the oven to 450°F and line a baking sheet with parchment paper. In a large bowl, whisk together the flour, baking powder, and salt. Cut in the cold butter with a pastry blender or your fingers until the mixture resembles coarse crumbs. Add the buttermilk and stir until just combined. The dough will be soft and slightly sticky.
Drop the dough by large spoonfuls onto the prepared baking sheet, about 8 biscuits. Brush the tops with melted butter. Bake for 12 to 15 minutes until golden brown. Let cool slightly.
While the biscuits bake, cook the ham. Melt the butter in a large skillet over medium heat. Add the ham slices and cook for 1 to 2 minutes per side until browned and slightly crisp at the edges. Remove the ham to a plate. Add the honey and water to the hot skillet and stir for 30 seconds to make a quick pan glaze. Pour the glaze over the ham. Serve with the warm biscuits and honey butter on the side.
Tips & Things That Go Wrong
Country ham is very salty. Do not add salt to the ham or the biscuits. Taste the ham first and adjust the rest of the plate accordingly. If your ham is very salty, soak the slices in cold water for 10 minutes and pat them dry before cooking. The ham can turn tough if it is cooked too long. Two minutes per side is enough. The biscuits can be dry if the dough is overworked. Stir until just combined and no more.
Substitutions
Use prosciutto or Canadian bacon if you cannot find country ham. The flavor will be milder but still good. Use a gluten-free flour blend for a gluten-free version. For a dairy-free version, use dairy-free butter and plant milk with a tablespoon of lemon juice.
Storage & Reheating
The biscuits are best fresh but keep in an airtight container for 2 days. Reheat in a 350°F oven for 5 minutes. The ham keeps in the refrigerator for 3 days. Reheat gently in a skillet for 1 minute per side. Do not microwave the ham, or it will toughen.
Approximate Nutrition Per Serving: 420 calories, 18g protein, 44g carbs, 20g fat, 2g fiber
Country ham is very salty. Taste it before you season anything else on the plate. A little honey or brown sugar in the pan balances the salt beautifully.
3. Dolly’s Country Sausage Gravy
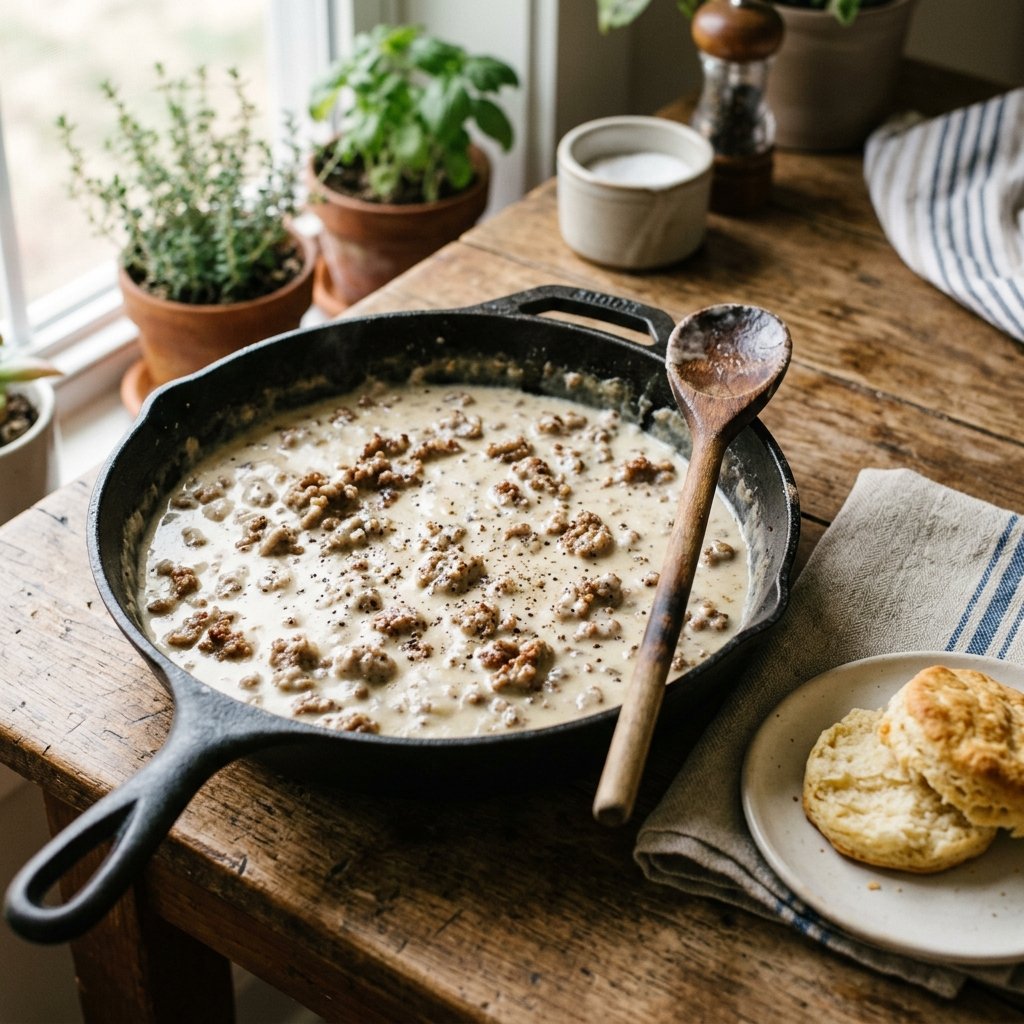
This is the gravy that makes a country breakfast worth waking up for. It is rich, creamy, and full of crumbled sausage, and it is ladled generously over warm biscuits. The whole thing comes together in about twenty minutes, and most of that time is stirring. The technique is not complicated, but the timing matters.
Here is the part I would not skip. The roux is the key. After the sausage is browned, you sprinkle flour over the fat in the pan and cook it for a full two minutes before adding the milk. That cook time is what removes the raw flour taste and gives the gravy its velvety body. If you skip it, the gravy tastes like paste no matter how much sausage you put in.
One thing most recipe cards leave out is that the milk should be warm when it goes in. Cold milk slows down the thickening process and can leave lumps. Warm it in the microwave or in a small saucepan while the sausage cooks. The gravy comes together faster and smoother.
Prep: 5 minutes Cook: 20 minutes Total: 25 minutes Serves: 6 Difficulty: Easy
Ingredients
- 1 pound bulk country sausage
- ¼ cup all-purpose flour
- 3 cups whole milk, warmed
- ½ cup heavy cream
- 1 teaspoon salt
- 1 teaspoon black pepper
- ½ teaspoon garlic powder
- Pinch of cayenne pepper (optional)
- Warm buttermilk biscuits for serving
Instructions
Cook the sausage in a large skillet over medium-high heat, breaking it up with a spoon, until it is browned and cooked through, about 6 to 8 minutes. Do not drain the fat. The fat is what gives the gravy its flavor.
Reduce the heat to medium. Sprinkle the flour over the sausage and fat. Stir constantly for a full 2 minutes, coating the sausage and cooking the flour. The mixture will look thick and pasty. This is correct.
Slowly pour in the warm milk in a steady stream, whisking constantly to prevent lumps. Add the cream, salt, pepper, garlic powder, and cayenne if using. Bring to a gentle simmer and cook for 5 to 7 minutes, stirring often, until the gravy thickens enough to coat the back of a spoon. If it gets too thick, add a splash more milk. Taste and adjust the seasoning. Serve hot over split biscuits.
Tips & Things That Go Wrong
The gravy can turn lumpy if the milk is added too fast. Pour it in a slow stream while whisking constantly. If lumps do form, pour the gravy through a fine-mesh strainer and return it to the pan. The gravy can be too thin if it does not simmer long enough. Give it the full 5 to 7 minutes. The gravy thickens more as it cools, so pull it off the heat when it is slightly thinner than you want it to be. Do not add salt until the end, since the sausage is already salty.
Substitutions
Use turkey sausage for a lighter version. Use a gluten-free all-purpose flour blend for a gluten-free gravy. For a dairy-free version, use plant milk and dairy-free cream, and add an extra tablespoon of flour to help it thicken. For a spicier gravy, use hot sausage instead of mild.
Storage & Reheating
This keeps in the refrigerator for 4 days. Reheat in a saucepan over low heat with a splash of milk, stirring constantly. The microwave works in a pinch, but stir every 30 seconds to keep it smooth. Do not freeze; the cream separates on thawing.
Approximate Nutrition Per Serving: 420 calories, 16g protein, 14g carbs, 32g fat, 1g fiber
Cook the flour with the sausage fat for a full 2 minutes before adding the milk. That is what makes the gravy velvety instead of pasty.
4. Dolly’s Milk Gravy
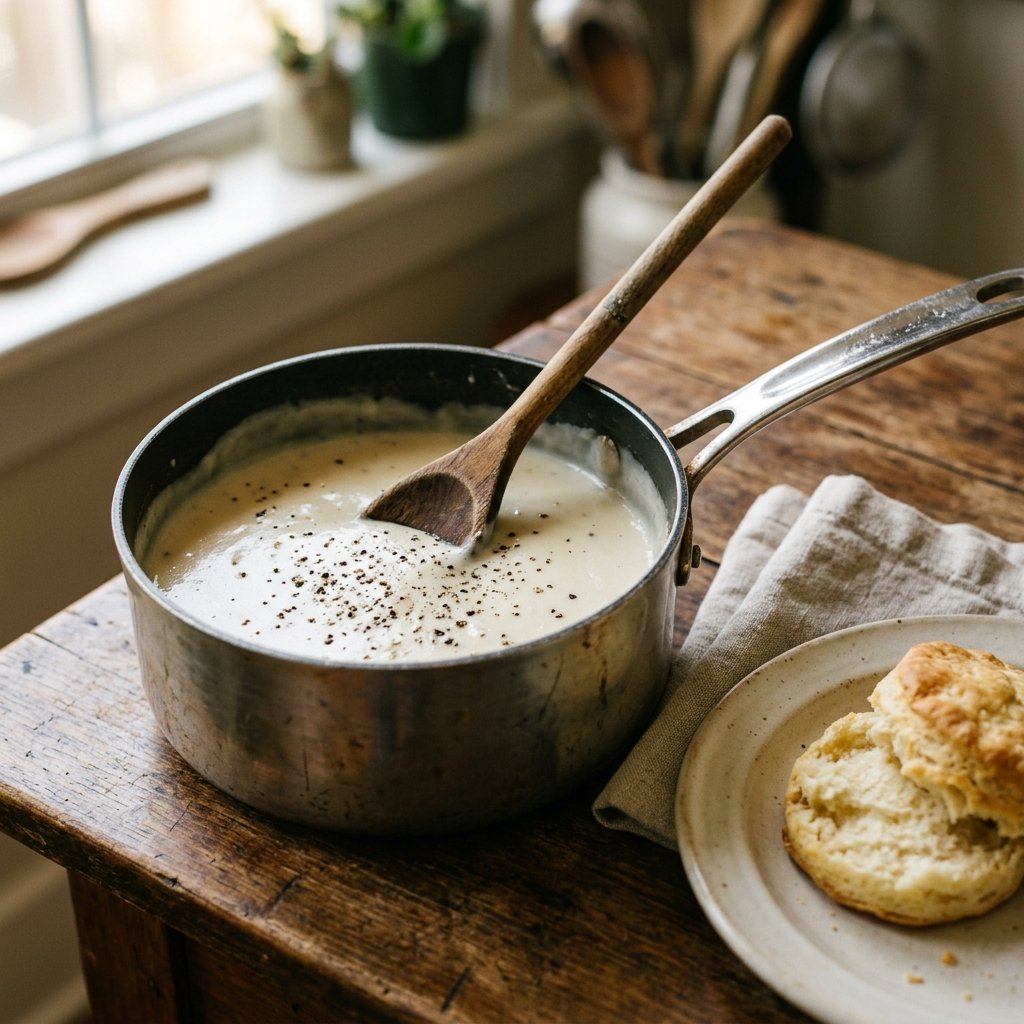
Milk gravy, sometimes called white gravy or sawmill gravy, is the simpler cousin of sausage gravy. It is made with butter, flour, milk, and cream, and it comes together in about fifteen minutes. It is the kind of gravy that goes over biscuits, fried chicken, mashed potatoes, or anything else on the plate that needs a little richness. Dolly has said she can do white or brown gravy and they both taste good, and this is the white one done right.
The technique is the same as the sausage gravy. Make a roux with butter and flour, cook it for two minutes, and then add warm milk slowly. The result is a smooth, creamy gravy that tastes like comfort food in a bowl. The heavy cream at the end is what gives it the silky finish.
One thing most recipe cards leave out is that the gravy should be seasoned well. White gravy is bland if it is not salted properly and if it does not have enough black pepper. Taste as you go and adjust. A pinch of cayenne or a dash of hot sauce at the end can add depth without making it spicy.
Prep: 5 minutes Cook: 15 minutes Total: 20 minutes Serves: 6 Difficulty: Very easy
Ingredients
- 4 tablespoons unsalted butter
- ¼ cup all-purpose flour
- 3 cups whole milk, warmed
- ½ cup heavy cream
- 1 ½ teaspoons salt
- 1 teaspoon black pepper
- ¼ teaspoon garlic powder
- Pinch of cayenne pepper (optional)
- Warm buttermilk biscuits for serving
Instructions
Melt the butter in a medium saucepan over medium heat. Add the flour and whisk constantly for a full 2 minutes. The mixture should smell nutty and turn a pale gold color. Do not rush this step.
Slowly pour in the warm milk in a steady stream, whisking constantly to prevent lumps. Add the cream, salt, pepper, garlic powder, and cayenne if using. Bring to a gentle simmer and cook for 5 to 7 minutes, stirring often, until the gravy thickens enough to coat the back of a spoon. Taste and adjust the seasoning. Serve hot over split biscuits.
Tips & Things That Go Wrong
The gravy can be too thin if the roux is undercooked or if too much milk is added. Cook the flour for the full 2 minutes and add the milk slowly. The gravy can be lumpy if the milk is cold or added too fast. Warm the milk first and pour it in a slow stream. The gravy thickens as it cools, so pull it off the heat when it is slightly thinner than you want it to be. If it gets too thick, whisk in a splash of milk.
Substitutions
Use half-and-half instead of heavy cream for a lighter gravy. Use a gluten-free all-purpose flour blend for a gluten-free version. For a dairy-free version, use plant milk and dairy-free butter, and add an extra tablespoon of flour. Add a tablespoon of chopped fresh herbs like thyme or chives for a different flavor.
Storage & Reheating
This keeps in the refrigerator for 4 days. Reheat in a saucepan over low heat with a splash of milk, stirring constantly. The microwave works in a pinch, but stir every 30 seconds. Do not freeze; the cream separates on thawing.
Approximate Nutrition Per Serving: 240 calories, 5g protein, 10g carbs, 20g fat, 0g fiber
Season the gravy well. White gravy is bland if it does not have enough salt and black pepper. Taste as you go and adjust before serving.
5. Savory Bacon and Cheddar Cornbread Waffles
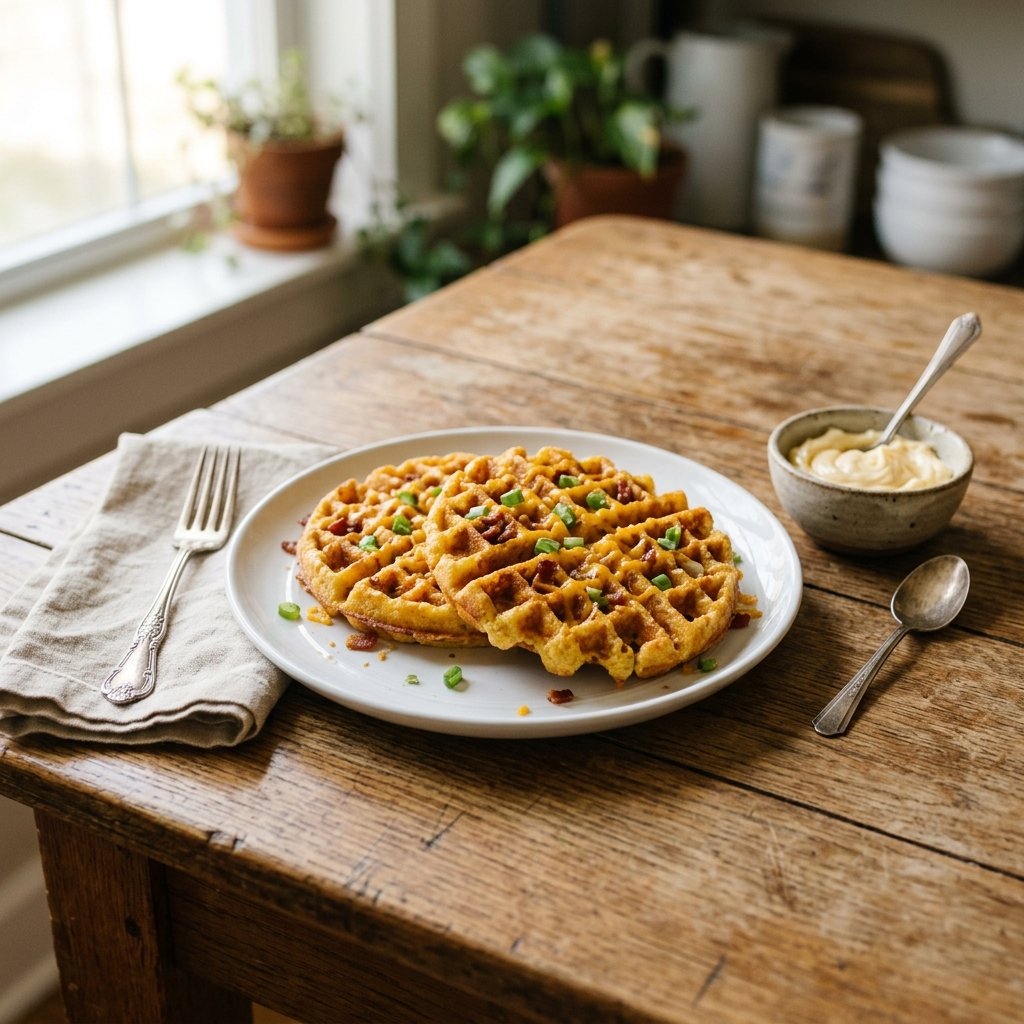
This is the recipe that makes the article feel modern. Cornbread waffles are a Southern twist on a classic, and this version is packed with sharp cheddar, crispy bacon, and green onions. They are crispy on the outside, tender on the inside, and they are just as good with butter and syrup as they are under a scoop of sausage gravy or beside a piece of fried chicken. They come together in about twenty minutes and they are perfect for a weekend brunch.
The trick is to use a cornbread mix and to keep the batter thick. A thin batter will run out of the waffle iron and make a mess. A thick batter holds its shape and gives you a waffle that is crisp on the outside and fluffy inside. The bacon and cheese should be folded in gently at the end so they do not break up.
One thing most recipe cards leave out is that the waffle iron should be greased well between batches. Cornbread batter tends to stick more than regular waffle batter because of the cheese. Brush the iron with melted butter or spray it with nonstick spray before each waffle. The extra ten seconds is worth it.
Prep: 10 minutes Cook: 15 minutes Total: 25 minutes Serves: 4 (makes about 6 waffles) Difficulty: Easy
Ingredients
- 2 cups cornbread mix
- 1 ½ cups whole buttermilk
- 2 large eggs
- ¼ cup melted butter
- 1 cup shredded sharp cheddar cheese
- 6 slices bacon, cooked and crumbled
- 3 green onions, sliced thin
- ½ teaspoon black pepper
- Honey butter for serving
Instructions
Preheat the waffle iron according to the manufacturer’s instructions. In a large bowl, whisk together the cornbread mix, buttermilk, eggs, and melted butter until smooth. The batter should be thick, like a loose cornbread batter. If it seems too thin, add a little more cornbread mix.
Fold in the shredded cheddar, crumbled bacon, green onions, and black pepper. Stir gently until evenly distributed. Do not overmix.
Grease the waffle iron generously with melted butter or nonstick spray. Ladle the batter onto the hot iron and cook according to the manufacturer’s instructions, usually 3 to 5 minutes, until the waffles are golden brown and crisp. Keep finished waffles warm in a low oven while you cook the rest. Serve with honey butter on the side.
Tips & Things That Go Wrong
The waffles can stick to the iron if it is not greased well. Grease between every batch. The waffles can be dense if the batter is overmixed. Stir until just combined. The cheese can burn if the waffle iron is too hot. Turn the heat down slightly if the waffles are browning too fast. These waffles are best eaten fresh, but they reheat well in a toaster or toaster oven.
Substitutions
Use a gluten-free cornbread mix for a gluten-free version. Use turkey bacon or sausage for a different flavor. Use any shredded cheese you like. Mozzarella, Monterey Jack, or pepper jack all work well. Add a diced jalapeño for a spicy version.
Storage & Reheating
These keep in the refrigerator for 3 days and freeze well for up to 2 months. Reheat in a toaster or toaster oven for 3 to 5 minutes until crisp. The microwave makes them soft and is not recommended.
Approximate Nutrition Per Waffle: 380 calories, 14g protein, 34g carbs, 22g fat, 1g fiber
Grease the waffle iron between every batch. The cheese in the batter makes these waffles stick more than regular waffle batter.
6. Chocolate Chip Pancakes With Bananas and Pecans
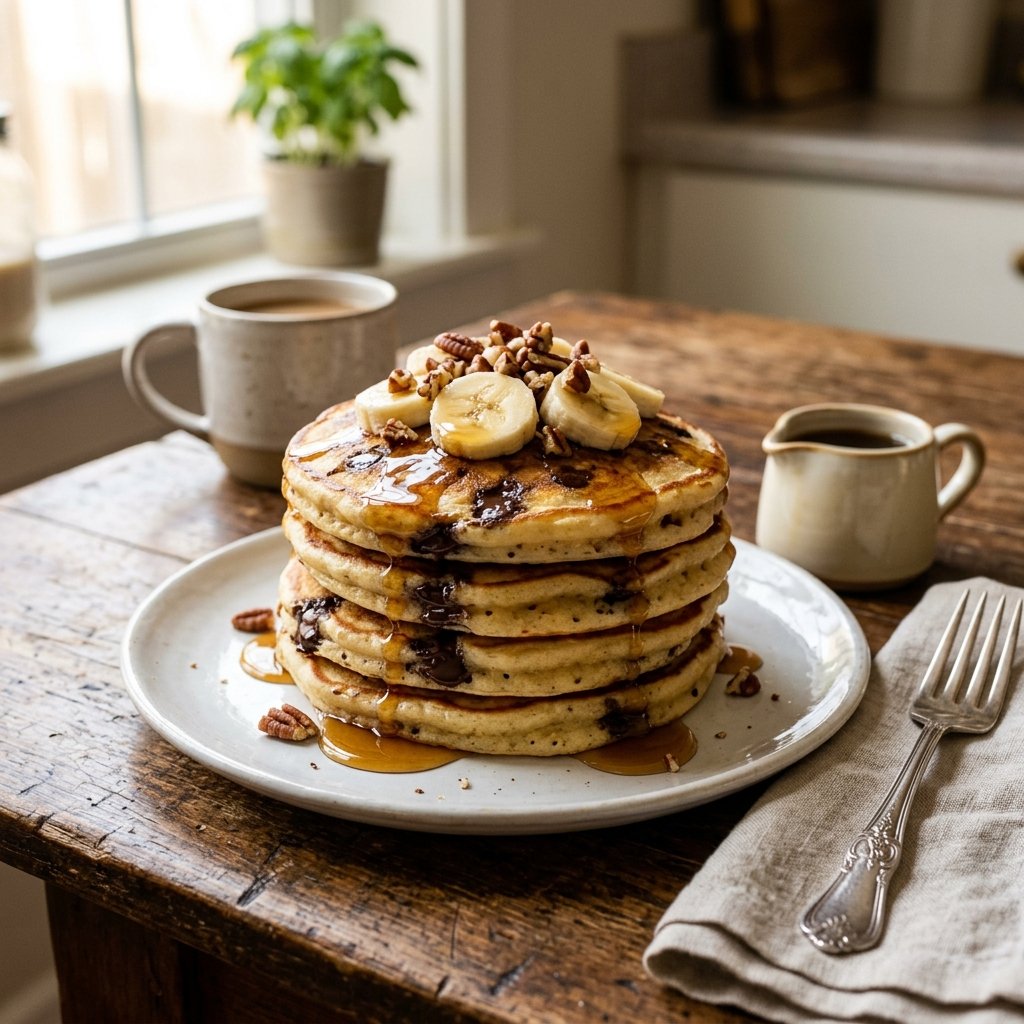
This is the sweet finish to the breakfast. Chocolate chip pancakes with bananas and pecans are the kind of thing that makes a weekend morning feel like a celebration. The pancakes are fluffy and tender, the chocolate chips melt into the batter, and the bananas and pecans add texture and a little bit of sophistication. They come together in about twenty minutes and they disappear in five.
Here is the part I would not skip. The batter should be slightly lumpy. If you whisk it until it is completely smooth, the pancakes turn out tough and flat. Mix the wet ingredients into the dry and stop when there are still a few streaks of flour. The lumps cook out and the pancakes stay tender.
One thing most recipe cards leave out is that the pan should be hot before the first pancake goes in. A drop of water should sizzle and dance on the surface. If the pan is not hot enough, the pancakes spread too much and come out flat. If it is too hot, they burn on the outside and stay raw in the middle. Medium heat is the sweet spot.
Prep: 10 minutes Cook: 15 minutes Total: 25 minutes Serves: 4 Difficulty: Easy
Ingredients
- 2 cups buttermilk pancake mix
- 1 ½ cups whole milk
- 2 large eggs
- 2 tablespoons melted butter
- 1 teaspoon vanilla extract
- 1 cup chocolate chips
- 2 bananas, sliced
- ½ cup chopped pecans or walnuts
- Maple syrup for serving
- Butter for the pan
Instructions
In a large bowl, whisk together the pancake mix, milk, eggs, melted butter, and vanilla until just combined. The batter should be slightly lumpy. Fold in the chocolate chips.
Heat a large skillet or griddle over medium heat. Add a small pat of butter and let it melt. Pour the batter onto the skillet using a ¼-cup measure. Cook until bubbles form on the surface and the edges look set, about 2 to 3 minutes. Flip and cook for 1 to 2 minutes more until golden brown. Keep finished pancakes warm in a low oven while you cook the rest.
Serve the pancakes topped with sliced bananas, chopped pecans, and a drizzle of maple syrup.
Tips & Things That Go Wrong
The pancakes can be tough if the batter is overmixed. Stir until just combined and no more. The chocolate chips can sink to the bottom of the batter. Toss them in a little pancake mix before folding them in. The pancakes can burn if the heat is too high. Keep the pan at medium and adjust as you go. The first pancake is often a test pancake. That is normal.
Substitutions
Use a gluten-free pancake mix for a gluten-free version. Use any milk you have on hand. For a dairy-free version, use plant milk and dairy-free butter. Use dark chocolate chips for a less sweet pancake. Add a teaspoon of cinnamon to the batter for a warmer flavor.
Storage & Reheating
These are best fresh but keep in the refrigerator for 3 days and freeze well for up to 2 months. Reheat in a toaster or toaster oven for 3 to 5 minutes. The microwave makes them soft. Freeze leftover pancakes in a single layer on a baking sheet, then transfer to a freezer bag.
Approximate Nutrition Per Serving: 520 calories, 12g protein, 70g carbs, 22g fat, 4g fiber
Leave the batter slightly lumpy. Overmixed pancake batter makes tough, flat pancakes. Stop stirring while there are still a few streaks of flour.
Frequently Asked Questions About a Southern Country Breakfast
Are these actually Dolly Parton’s recipes?
They are inspired by the East Tennessee and Appalachian breakfast traditions Dolly Parton grew up in and has talked about throughout her career. She has publicly discussed making scrambled eggs with ice water, cooking country ham with biscuits for her husband Carl, and making both white and brown gravy. The recipes themselves are traditional Southern versions, not verified family recipes, and I am not claiming they came straight from her kitchen.
Can I make the whole breakfast menu at once?
Yes, but plan the order. Start with the biscuits because they hold well in a low oven. Make the sausage gravy and keep it warm on the lowest heat, stirring occasionally. Cook the ham last so it is hot when it hits the plate. The scrambled eggs take five minutes and should be the last thing you make. The cornbread waffles and the pancakes are best made in separate batches, so pick one or the other for a single breakfast.
What is the ice water trick for scrambled eggs?
Adding one to two teaspoons of ice water to the eggs before whisking creates steam as the eggs cook. The steam puffs the curds up from the inside, making them lighter and fluffier. The trick only works if the eggs are cooked over low heat, slowly. If the heat is too high, the water evaporates before it can do anything.
Can I make the gravy ahead of time?
Yes. Both the sausage gravy and the milk gravy can be made a day ahead and reheated gently on the stovetop with a splash of milk. They thicken in the refrigerator, so you will need to loosen them up when reheating. Stir constantly and do not let them boil hard, or the cream can separate.
What if I do not have a waffle iron for the cornbread waffles?
You can make the same batter as cornbread muffins or in a cast-iron skillet. Bake in a greased skillet at 400°F for 20 to 25 minutes, or in a muffin tin for 15 to 18 minutes. The texture will be different but the flavor will be the same.
Can I make this breakfast for a crowd?
Yes. The biscuits and gravies can be doubled easily. The ham is cooked in batches. The scrambled eggs can be made in a larger skillet or in two skillets at once. The waffles and pancakes can be kept warm in a low oven while you cook the rest. For a crowd of eight to ten, plan on two hours from start to finish and use the oven as a warming drawer.
Putting a Country Breakfast on Your Table
The practical decision you have to make is not which recipe to try first. It is how much time you want to spend in the kitchen on a weekend morning. If you have twenty minutes, the scrambled eggs and a batch of drop biscuits will still feel like a real breakfast. If you have an hour, add the sausage gravy and the country ham and you have the full Southern plate. If you have an afternoon, the waffles and the pancakes turn the morning into a celebration.
If I had to point you to one recipe to start with, it would be the scrambled eggs with ice water. It takes five minutes, it uses ingredients you already have, and it is the one technique in this article that will change the way you cook breakfast for the rest of your life. From there, add the biscuits and the gravy and you have the kind of breakfast that people remember. And if you want to know what it feels like to cook for someone you love for sixty years, start with the eggs.
A country breakfast is not just a meal. It is a slow morning, a hot skillet, and the sound of coffee being poured. These recipes are built for that kind of morning. They are not fancy, and they are not complicated. They are the kind of food that shows up on the table weekend after weekend because it works.