
The game day spread that has everything except the one thing people actually want at the end. The wings are covered, the sliders are handled, the dips are on the table, and then someone asks what is for dessert. Nobody planned for it. The oven is full. The kitchen is a disaster. And the last thing anyone wants to do is start baking a batch of cookies while the fourth quarter is on. A good no-bake dessert solves that problem in fifteen minutes.
The problem with most game day dessert recipes is that they either require the oven or they are just a bowl of candy dumped into a dish. They show up on a blog looking like something from a bakery and then fall apart when you make them at home. The chocolate seizes. The whipped cream deflates. The layers turn to mush. What makes a no-bake dessert worth making is the technique that keeps the texture right even after a few hours on a party table with people dipping into it all afternoon.
These five desserts are built for the kind of gathering where the food is on the table for hours and people are eating with one hand while watching the game with the other. One is a creamy peanut butter and chocolate dip that comes together in ten minutes. One is an icebox cake you can make the night before. One is a chocolate-covered strawberry that looks like a football. One is a nostalgic rice crispy bite. One is a s’mores cereal treat. None of them require the oven. All of them can be made ahead. Every one of them has a reason to exist beyond filling a spot on the dessert table.
1. Creamy Buckeye Dip
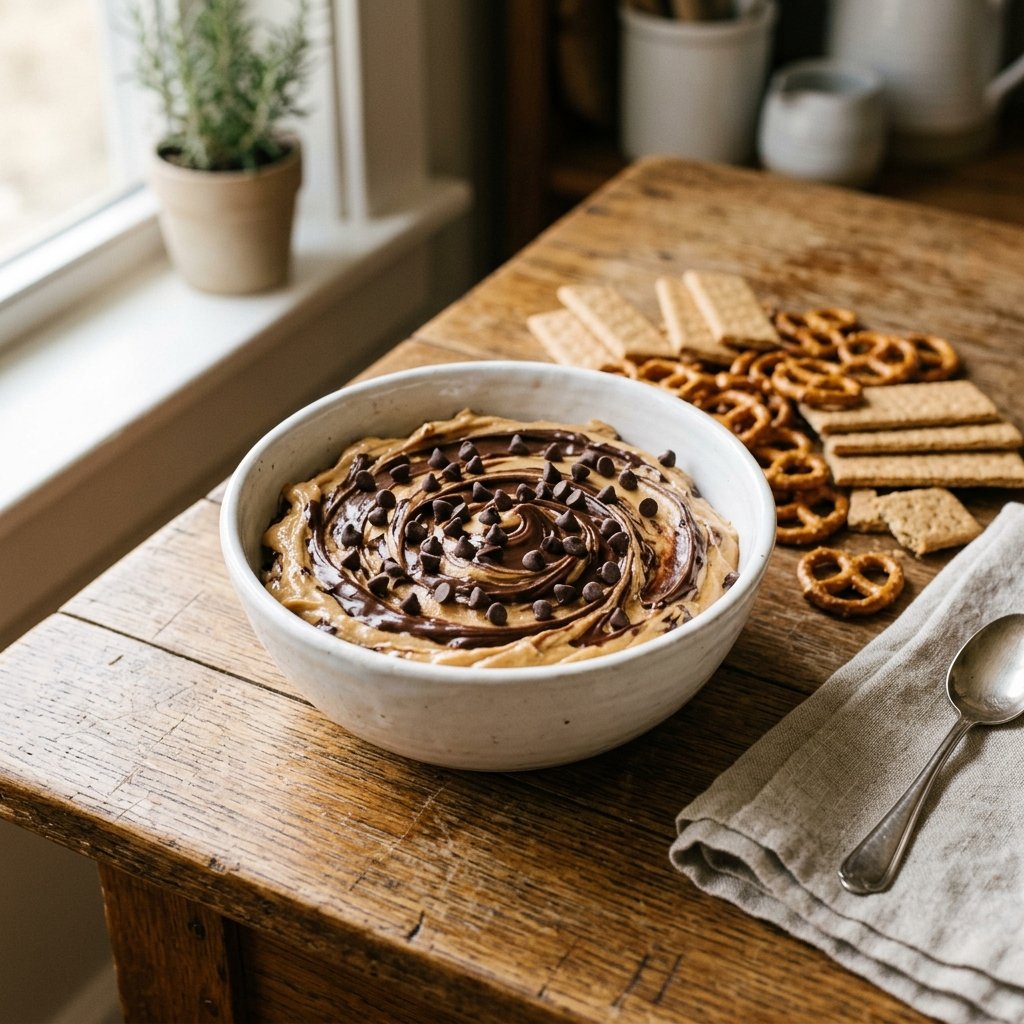
This is the dip that makes people stand around the bowl for the entire party. It has a sweet cream cheese and peanut butter base that is smooth and tangy, swirled with melted chocolate. It looks like something from a bakery and it comes together in about ten minutes with a hand mixer. Serve it with pretzels, graham crackers, apple slices, or all three.
Here is the part I would not skip. The cream cheese has to be fully softened before it goes into the bowl. If it is cold, it stays in lumps and the dip never gets smooth no matter how long you beat it. Let it sit on the counter for 30 minutes, or cube it and microwave it in 15-second bursts until it is soft but not melted.
One thing most recipe cards leave out is that the melted chocolate should be cooled slightly before it is swirled into the dip. If it is too hot, it melts the peanut butter base and turns the whole thing into a brown mess. Let it sit for 5 minutes after melting, then drizzle and swirl with a knife. You want streaks, not a uniform color.
Prep: 10 minutes Cook: None Total: 10 minutes plus chilling Serves: 10 Difficulty: Very easy
Ingredients
- 8 ounces cream cheese, softened
- 1 cup creamy peanut butter
- 1 cup powdered sugar
- 1 teaspoon vanilla extract
- ½ cup mini chocolate chips, plus more for topping
- ½ cup chocolate chips, melted and slightly cooled
- Pretzels, graham crackers, and apple slices for serving
Instructions
In a large bowl, beat the softened cream cheese and peanut butter together with a hand mixer until smooth and creamy, about 2 minutes. Add the powdered sugar and vanilla and beat until fully combined. Fold in the mini chocolate chips.
Spread the mixture into a shallow serving bowl. Drizzle the melted chocolate over the top and swirl it gently with a knife. Do not over-swirl or the whole thing turns brown. Sprinkle extra mini chocolate chips on top.
Refrigerate for at least 30 minutes before serving so the dip firms up. Serve with pretzels, graham crackers, and apple slices for dipping.
Tips & Things That Go Wrong
The dip can be too soft if the cream cheese is not fully softened or if the peanut butter is very runny. Use a thick peanut butter and let the cream cheese come to room temperature. The dip can be too sweet if the powdered sugar is not measured properly. Start with ¾ cup and add more if needed. The chocolate can seize if it is overheated. Melt it in short bursts and stir often. The dip can be too thick to dip if it chills for too long. Let it sit at room temperature for 10 minutes before serving.
Substitutions
Use crunchy peanut butter for texture. Use dark chocolate chips for a less sweet swirl. For a dairy-free version, use dairy-free cream cheese and dairy-free chocolate chips. Add a pinch of flaky salt on top for a sweet-salty finish.
Storage & Reheating
This keeps in the refrigerator for 5 days. Serve cold. Do not freeze; the texture changes on thawing. Stir before serving if the chocolate has settled.
Approximate Nutrition Per Serving: 320 calories, 8g protein, 24g carbs, 22g fat, 2g fiber
Let the melted chocolate cool for 5 minutes before swirling it into the dip. If it is too hot, it melts the peanut butter base and turns the whole thing brown.
2. Touchdown Icebox Cake
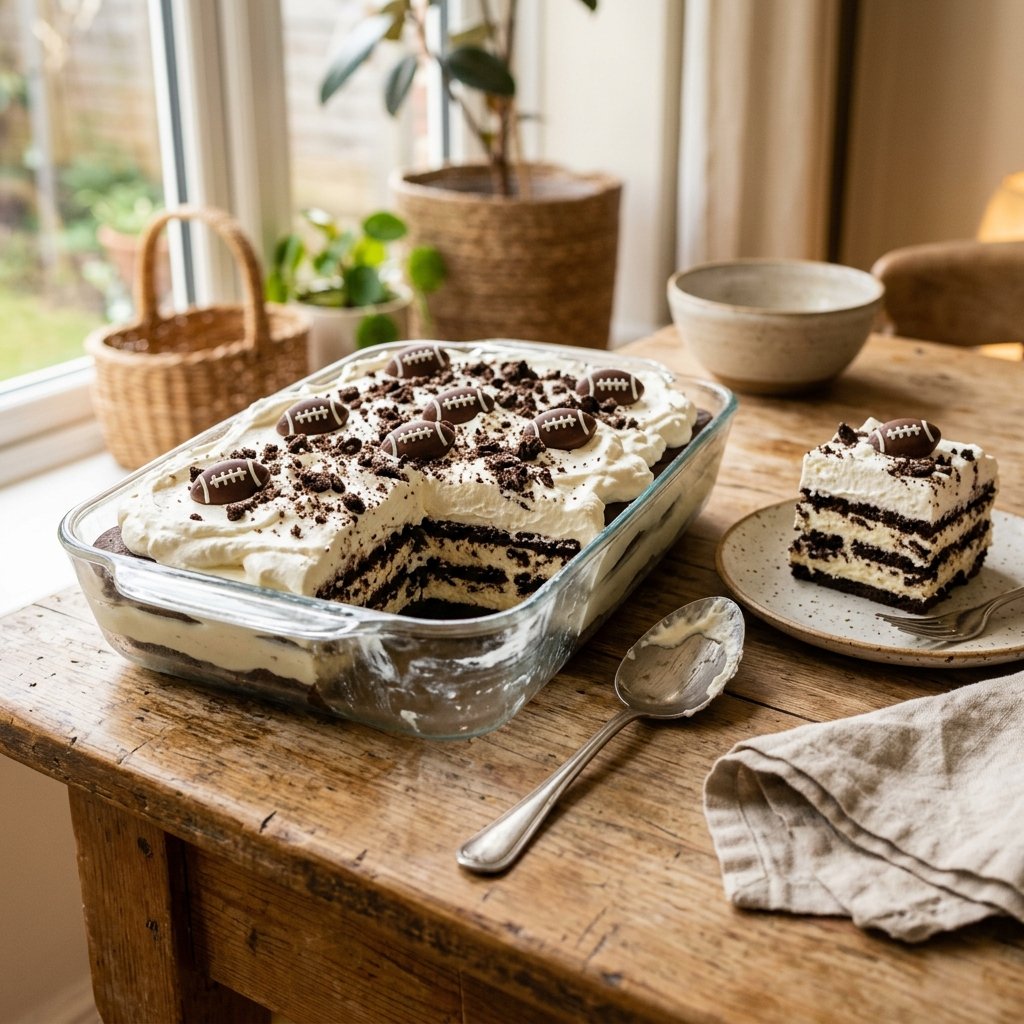
This is the dessert that looks like it took hours and actually took about fifteen minutes. It is a no-bake icebox cake made with layers of store-bought cookies, whipped cream, and chocolate morsels. It sets in the refrigerator overnight and comes out looking like something from a bakery. It is the perfect make-ahead dessert for game day because you can make it the night before and forget about it until the party starts.
The trick is to use the right cookies. Thin, crisp cookies like chocolate wafers or graham crackers soften into a cake-like texture overnight. Thick, soft cookies turn to mush. If you can find chocolate wafer cookies, they are the classic choice. If not, thin graham crackers work well.
One thing most recipe cards leave out is that the whipped cream needs to be stabilized so it does not deflate overnight. Add a tablespoon of instant vanilla pudding mix to the whipped cream before whipping. It sounds strange but it keeps the cream thick and fluffy for days. This is the trick that separates a good icebox cake from a soggy one.
Prep: 15 minutes Chill: 4 hours or overnight Total: 4 hours 15 minutes Serves: 12 Difficulty: Very easy
Ingredients
- 3 cups heavy whipping cream, cold
- 1 tablespoon instant vanilla pudding mix
- ½ cup powdered sugar
- 1 teaspoon vanilla extract
- 1 box thin chocolate wafer cookies or graham crackers
- 1 cup mini chocolate chips
- ½ cup chocolate cookie crumbs, for topping
- Optional: football-shaped chocolate candies for decoration
Instructions
In a large cold bowl, combine the heavy cream, instant pudding mix, powdered sugar, and vanilla. Beat with a hand mixer on high for 3 to 4 minutes until stiff peaks form. The cream should hold its shape when you lift the beaters.
Spread a thin layer of whipped cream in the bottom of a 9×13-inch baking dish. Arrange a single layer of cookies over the cream. Spread a third of the remaining whipped cream over the cookies. Sprinkle with a third of the mini chocolate chips. Repeat the layers two more times, ending with a layer of whipped cream on top.
Sprinkle the chocolate cookie crumbs over the top and arrange the football-shaped candies if using. Cover and refrigerate for at least 4 hours, or overnight for the best texture. The cookies will soften into a cake-like layer. Slice and serve cold.
Tips & Things That Go Wrong
The whipped cream can deflate if it is not stabilized. The instant pudding mix is the trick. Do not skip it. The cookies can turn to mush if they are too thin or if the cake sits too long. Thin wafer cookies are best. The layers can slide if the cream is too soft. Make sure the cream is at stiff peaks before layering. The cake can be too sweet if too many chocolate chips are used. Use a light hand with the chips.
Substitutions
Use vanilla wafers or shortbread cookies instead of chocolate wafers. Use white chocolate chips instead of mini chocolate chips. Add a layer of sliced bananas for a banana cream version. For a dairy-free version, use coconut whipped cream and dairy-free cookies.
Storage & Reheating
This keeps in the refrigerator for 3 days. The texture is best on the second day. Do not freeze; the whipped cream becomes grainy on thawing. Serve cold.
Approximate Nutrition Per Serving: 420 calories, 4g protein, 38g carbs, 30g fat, 2g fiber
Add a tablespoon of instant vanilla pudding mix to the whipped cream before whipping. It stabilizes the cream so it stays thick and fluffy for days instead of deflating overnight.
3. Chocolate Covered Strawberry Footballs

These are the dessert that makes people stop and take a picture before they eat them. They are fresh strawberries dipped in dark chocolate and decorated with white chocolate laces to look like footballs. They are festive, they are bite-sized, and they are actually a little lighter than a brownie or a cookie. They come together in about 20 minutes and they are the kind of thing that disappears fast because people can eat them with one hand.
Here is the part I would not skip. The strawberries have to be completely dry before they are dipped. Any water on the surface of the strawberry will cause the chocolate to seize and the coating will slide off. Wash them, pat them dry with paper towels, and let them sit on a clean towel for 10 minutes before dipping.
One thing most recipe cards leave out is that the chocolate should be tempered or mixed with a little coconut oil so it sets with a glossy finish. Straight melted chocolate chips set with a dull, streaky look. A teaspoon of coconut oil per cup of chocolate gives you a shiny, professional-looking coating that snaps when you bite into it.
Prep: 20 minutes Chill: 30 minutes Total: 50 minutes Serves: 12 Difficulty: Easy
Ingredients
- 1 pound fresh strawberries, washed and completely dry
- 12 ounces dark chocolate chips
- 1 tablespoon coconut oil
- 4 ounces white chocolate chips
- 1 teaspoon coconut oil, for the white chocolate
Instructions
Line a baking sheet with parchment paper. Melt the dark chocolate chips and 1 tablespoon of coconut oil in a microwave-safe bowl in 30-second bursts, stirring between each, until smooth. Do not overheat.
Hold each strawberry by the stem and dip it into the melted dark chocolate, turning to coat about three-quarters of the way up. Let the excess drip off and place the strawberry on the prepared baking sheet. Repeat with the remaining strawberries. Refrigerate for 15 minutes to set the chocolate.
Melt the white chocolate chips and 1 teaspoon of coconut oil in a small bowl. Transfer to a piping bag or a zip-top bag with a tiny corner snipped off. Pipe a short horizontal line across the top of each strawberry for the laces and a short vertical line down the center. Refrigerate for another 15 minutes to set. Serve cold.
Tips & Things That Go Wrong
The chocolate can seize if the strawberries are wet or if the chocolate is overheated. Dry the strawberries thoroughly and melt the chocolate in short bursts. The chocolate can crack if the strawberries are cold when dipped. Let them sit at room temperature for 20 minutes before dipping. The white chocolate can be difficult to pipe if it is too thick. Add a drop more coconut oil to thin it. The laces can look messy if the piping bag is too wide. Snip a very small corner.
Substitutions
Use milk chocolate or semi-sweet chocolate instead of dark. Use white chocolate for the entire coating and dark chocolate for the laces. Use pretzel sticks instead of white chocolate for the laces if you want a shortcut. For a dairy-free version, use dairy-free chocolate chips.
Storage & Reheating
These keep in the refrigerator for 2 days. The strawberries release moisture over time, so they are best eaten within 24 hours. Do not freeze; the strawberries become mushy on thawing. Serve cold.
Approximate Nutrition Per Strawberry: 180 calories, 2g protein, 20g carbs, 11g fat, 2g fiber
Dry the strawberries completely before dipping. Any water on the surface will cause the chocolate to seize and the coating will slide right off.
4. Peanut Butter Rice Crispy Bites
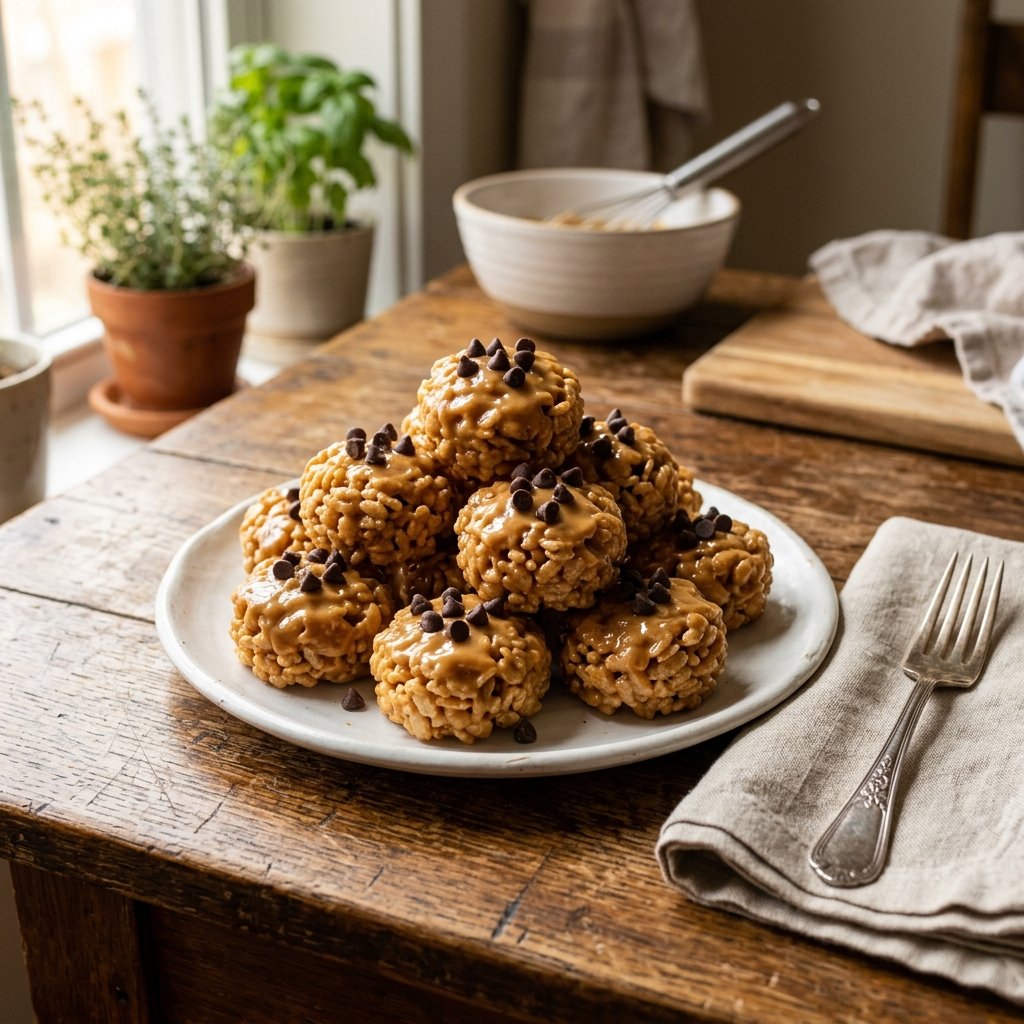
These are the nostalgic no-bake treats that disappear before anything else on the dessert table. They are chewy, peanut buttery, and just sweet enough. They come together in about ten minutes on the stovetop, and they set up in the refrigerator while the game is on. They are the kind of thing that people eat three of without realizing it.
The trick is to work quickly once the peanut butter mixture is melted. It starts to set as soon as it comes off the heat, and if you take your time stirring in the cereal, the mixture will harden before you get it into the pan. Have the cereal measured and the pan lined before you start melting anything.
One thing most recipe cards leave out is that the bites should be pressed firmly into the pan. If you press lightly, they fall apart when you cut them. Use the back of a spatula or a piece of parchment paper to press the mixture down hard and even. The firmer you press, the better the bites hold together.
Prep: 10 minutes Cook: 5 minutes Total: 15 minutes plus chilling Serves: 12 Difficulty: Very easy
Ingredients
- 1 cup creamy peanut butter
- ½ cup honey or maple syrup
- ¼ cup unsalted butter
- 1 teaspoon vanilla extract
- ½ teaspoon salt
- 6 cups rice crispy cereal
- ½ cup mini chocolate chips, for topping
Instructions
Line a 9×13-inch baking dish with parchment paper and set it aside. In a large pot over medium heat, combine the peanut butter, honey, butter, vanilla, and salt. Stir until the mixture is completely melted and smooth, about 3 minutes. Do not let it boil.
Remove the pot from the heat and immediately pour in the rice crispy cereal. Stir quickly and gently until every piece of cereal is coated. Pour the mixture into the prepared baking dish and press it down firmly with the back of a spatula or a piece of parchment paper. Press hard and even.
Press the mini chocolate chips into the top of the bars. Refrigerate for at least 30 minutes to set. Cut into 12 squares or 24 small bites. Serve at room temperature or cold.
Tips & Things That Go Wrong
The mixture can harden too fast if it is cooked too long or if the cereal is not ready to go in. Measure the cereal before you start and work quickly. The bites can fall apart if they are not pressed firmly into the pan. Press hard. The bites can be too sweet if the honey and chocolate chips are both on the sweeter side. Use dark chocolate chips and reduce the honey to ⅓ cup. The mixture can be sticky to press. Wet your hands or the spatula with a little water first.
Substitutions
Use almond butter or sunflower seed butter instead of peanut butter. Use brown rice syrup instead of honey for a less sweet version. Use cocoa rice cereal for a chocolate version. For a dairy-free version, use coconut oil instead of butter and dairy-free chocolate chips.
Storage & Reheating
These keep in an airtight container at room temperature for 3 days or in the refrigerator for up to a week. Do not freeze; the cereal loses its crispness on thawing. Serve at room temperature for the best texture.
Approximate Nutrition Per Bite: 240 calories, 6g protein, 30g carbs, 12g fat, 2g fiber
Press the mixture into the pan hard and even. The firmer you press, the better the bites hold together when you cut them.
5. S’mores Cereal Treats
These are the no-bake treats that taste like a campfire without the fire. They are made with a graham cereal base, mini marshmallows, and chocolate chips, all held together with a buttery marshmallow coating. They are crunchy, gooey, and just sweet enough. They come together in about 15 minutes on the stovetop and they set up in the refrigerator while the game is on.
Here is the part I would not skip. The marshmallows need to be melted slowly over low heat so they do not burn. If the heat is too high, the marshmallows turn brown and the coating tastes scorched. Keep the heat low and stir constantly. The mixture should be smooth and glossy, not stringy or brown.
One thing most recipe cards leave out is that the chocolate chips should be folded in at the very end, after the mixture has cooled for a minute. If the chocolate chips go into a hot marshmallow mixture, they melt completely and turn the whole thing brown. If they go in at the right temperature, they stay whole and give you pockets of chocolate in every bite.
Prep: 10 minutes Cook: 5 minutes Total: 15 minutes plus chilling Serves: 12 Difficulty: Very easy
Ingredients
- 6 tablespoons unsalted butter
- 1 bag mini marshmallows (10 ounces), divided
- 1 teaspoon vanilla extract
- ½ teaspoon salt
- 8 cups graham cereal (like Golden Grahams)
- 1 cup mini chocolate chips
Instructions
Line a 9×13-inch baking dish with parchment paper and set it aside. In a large pot over low heat, melt the butter. Add 8 cups of the mini marshmallows and stir constantly until they are completely melted and smooth, about 5 minutes. Do not let the mixture boil or brown. Stir in the vanilla and salt.
Remove the pot from the heat and let it cool for 1 minute. Add the graham cereal and stir gently until it is evenly coated. Fold in the remaining mini marshmallows and the mini chocolate chips. The residual heat will soften them slightly but they should not melt completely.
Pour the mixture into the prepared baking dish and press it down firmly with the back of a spatula or a piece of parchment paper. Refrigerate for at least 30 minutes to set. Cut into 12 squares and serve at room temperature.
Tips & Things That Go Wrong
The marshmallows can burn if the heat is too high. Keep it on low and stir constantly. The chocolate chips can melt into the mixture if they are added too soon. Let the mixture cool for a full minute before folding them in. The treats can be too sticky to press if the mixture is too hot. Let it cool for a few minutes before pressing. The treats can fall apart if they are not pressed firmly into the pan. Press hard and even.
Substitutions
Use any graham-style cereal you like. Use dark chocolate chips for a less sweet version. Add ½ cup of chopped pecans for crunch. For a dairy-free version, use coconut oil instead of butter and dairy-free chocolate chips.
Storage & Reheating
These keep in an airtight container at room temperature for 3 days or in the refrigerator for up to a week. Do not freeze; the cereal loses its crispness on thawing. Serve at room temperature for the best texture.
Approximate Nutrition Per Square: 280 calories, 4g protein, 42g carbs, 12g fat, 1g fiber
Let the marshmallow mixture cool for a full minute before folding in the chocolate chips. If they go in too hot, they melt completely and turn the whole thing brown.
Frequently Asked Questions About No-Bake Game Day Desserts
Which of these desserts can be made the night before?
The icebox cake is the best make-ahead option and actually improves overnight. The buckeye dip can be made a day ahead and stored in the refrigerator. The rice crispy bites and s’mores cereal treats both keep for several days in an airtight container. The chocolate-covered strawberries are best made the same day, but they can be made a few hours ahead and kept cold.
Can I make these desserts without a microwave?
Yes. The buckeye dip, rice crispy bites, and s’mores cereal treats are all made on the stovetop. The icebox cake does not require any cooking at all. Only the chocolate-covered strawberries call for melting chocolate, which can be done in a double boiler on the stovetop instead of a microwave.
How do I keep the whipped cream from deflating in the icebox cake?